Physical Address
304 North Cardinal St.
Dorchester Center, MA 02124
Physical Address
304 North Cardinal St.
Dorchester Center, MA 02124


If you have ever run your hand across a wood surface and felt tiny scratches that seem to catch the light at odd angles, chances are the sanding was done wrong. Learning to sand with the grain is one of those woodworking basics that separates a rough, amateur-looking project from a piece that looks like it came out of a professional shop. It sounds simple, and in many ways it is, but there is more nuance to it than most beginners expect.
This Complete Guide to Sanding Wood walks you through everything you need to know, from spotting grain direction on tricky lumber to fixing mistakes you may have already made. Whether you are refinishing an old dresser, building a cutting board, or prepping a tabletop for stain, the way you move your sandpaper across the surface matters just as much as the grit you choose.
By the end of this guide, you will know exactly how to read wood grain, why sanding along it produces better results, and how to avoid the small errors that ruin an otherwise good project.
Sanding with the grain simply means moving your sandpaper or sanding tool in the same direction that the wood fibers run, rather than across them or at an angle. Wood is made up of long fibers that grew vertically in the tree trunk, and once that tree is cut into boards, those fibers stay lined up in one general direction along the length of the board. When you sand along that same path, you are working with the natural structure of the material instead of fighting against it.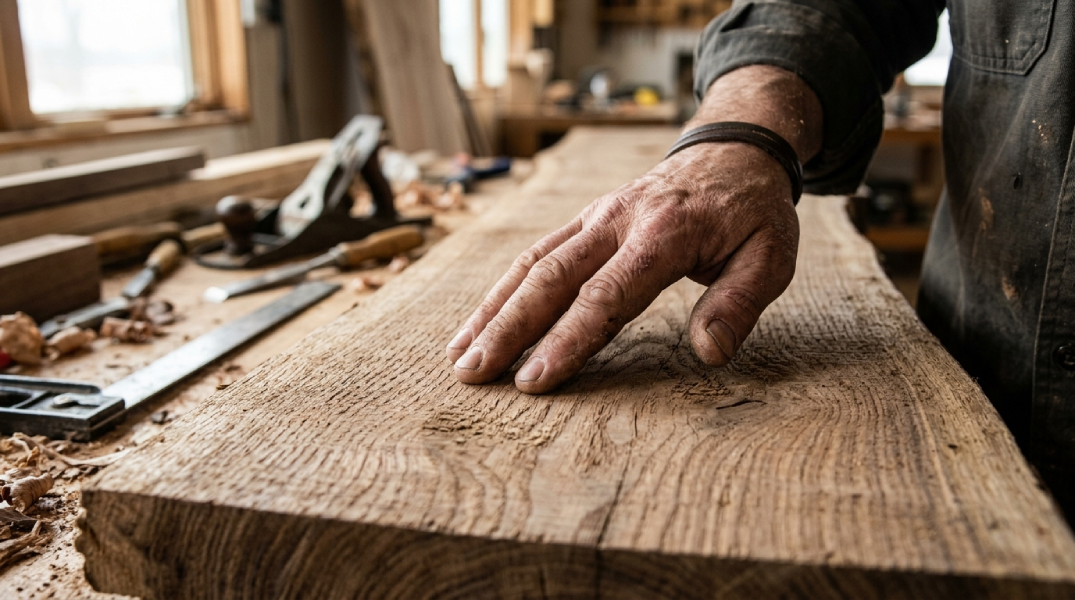
Every piece of solid wood has a grain pattern, and that pattern is basically a map of how the fibers are arranged. On most boards, the grain runs roughly parallel to the long edges, though it is rarely a perfectly straight line. Knots, branch points, and natural curves in the tree can cause the grain to twist, dip, or change direction in certain spots. This is why two ends of the same board can sometimes require slightly different sanding angles.
Softwoods like pine and cedar tend to have very visible grain lines because of the contrast between early growth and late growth rings. Hardwoods such as oak or ash also show clear grain, while woods like maple or cherry can be more subtle and require a closer look to spot the direction confidently.
The reason grain direction matters comes down to how wood fibers behave when disturbed. Sanding along the grain smooths the surface without tearing into the fibers themselves. Sanding across or against the grain lifts and breaks those fibers, which creates tiny gouges that are often invisible until you apply a stain or finish. At that point, the scratches soak up more color than the surrounding wood and stand out clearly, sometimes ruining hours of careful work in seconds.
Beyond just following tradition, there are real, practical reasons carpenters and furniture makers insist on this technique. It is not just about aesthetics either, though that is the most obvious benefit.
Cross grain scratches are notoriously hard to fix once a finish has been applied. They often only become visible after staining, which means you might not notice the problem until it is too late to correct without stripping the whole project and starting over. Sanding along the grain keeps these scratch marks running parallel to the wood fibers, which makes them far less noticeable and, in most cases, invisible to the naked eye once finished.
A surface sanded with the grain simply feels better to the touch. Run your fingers over a properly sanded tabletop and you will notice a silky, consistent texture. Do the same on a piece that was sanded haphazardly and you will likely feel small ridges or rough patches where the sander cut across the fibers unevenly. This smoothness also affects how evenly stain and finish absorb into the wood, giving you a more uniform color and sheen across the entire piece.
Before you even pick up sandpaper, take a minute to study the board. This step gets skipped far too often, especially by beginners eager to get started, but it can save you a lot of rework later.
Look at the surface of the wood under good lighting, ideally natural daylight or a bright work lamp positioned at an angle. You should be able to see thin lines running along the length of the board. These lines represent the growth rings and fiber direction. On rough, unfinished lumber, you can also run your hand lightly across the surface. Moving with the grain will feel smooth, while moving against it will feel slightly rough or bristly, almost like petting a cat backward.
Another trick many woodworkers use is to look at the end grain, which is the exposed cross section at the ends of a board. While this will not tell you the exact direction along the face, it helps confirm how the growth rings are oriented, which can hint at how the fibers behave across the surface.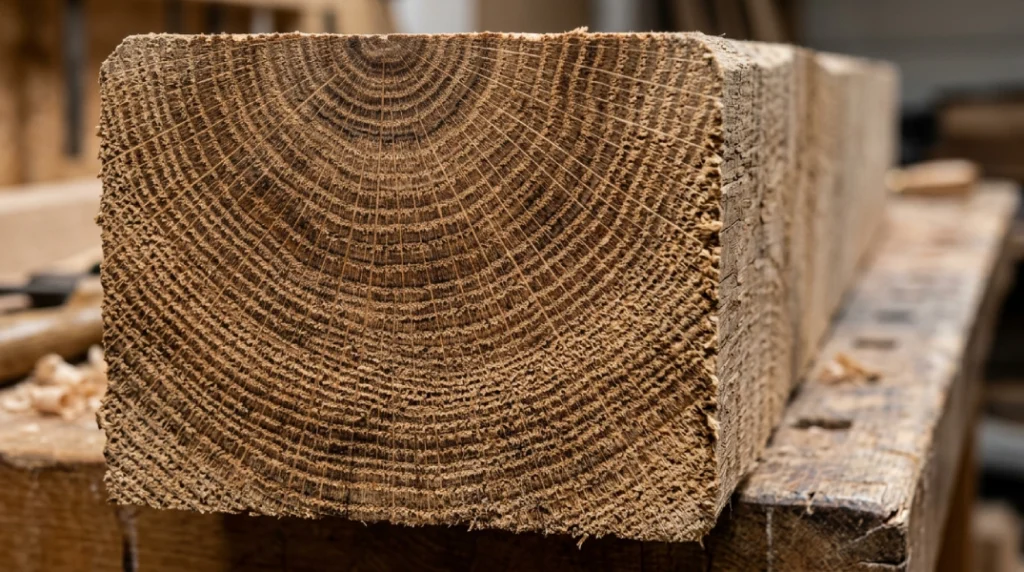
Not every board cooperates. Figured woods like curly maple, birdseye maple, or wood with heavy burl patterns can have grain that swirls in multiple directions within just a few inches. Wood near knots is especially tricky because the fibers curve around the knot rather than running straight. In these situations, there may not be one single correct direction to sand.
When you run into this kind of grain, the best approach is to test a small section first. Try sanding a small area in one direction, check for tear out or fuzzy fibers, then adjust your angle slightly if needed. Sometimes you will need to sand in short, gentle strokes that follow the curve of the grain rather than one long straight pass.
Once you have identified the grain direction, actually sanding the piece requires a bit of technique to get the best results. Rushing through this stage is one of the most common reasons people end up with an unevenly finished project.
Sandpaper grit is measured by a number, and lower numbers mean coarser paper while higher numbers mean finer paper. For most projects, you will start somewhere between 80 and 120 grit if the wood is rough or has visible mill marks, saw marks, or old finish that needs to come off. If the surface is already fairly smooth, you can often start around 120 or 150 grit instead. Starting with paper that is too fine wastes time, while starting too coarse can leave scratches that are hard to remove later.
Once you begin sanding, keep your strokes long, even, and always moving in the same direction as the grain. Avoid circular motions with hand sanding, since these almost guarantee cross grain scratches. Apply light, even pressure and let the sandpaper do the work rather than pressing down hard. If you are using a random orbital sander, the circular motion of the pad is fine because it moves quickly enough to blend scratches, but you should still move the tool itself along the grain direction rather than side to side across the board.
Work in overlapping passes, covering the entire surface evenly rather than focusing on one spot for too long. Uneven sanding can create low spots or thin areas, especially on veneered surfaces where sanding through the thin top layer is a real risk.
After the initial sanding pass, move up through progressively finer grits, typically stepping from something like 120 to 150, then 180, and finally 220 for most projects headed toward a stain or clear finish. Each grit level removes the scratches left by the previous one, gradually smoothing the surface further. Skipping grit levels, such as jumping from 100 straight to 220, often leaves behind scratches that the finer paper cannot fully remove because the jump is too large. Between each grit change, wipe away dust with a tack cloth or a slightly damp rag so you can clearly see your progress and check for any missed spots.
Even experienced woodworkers slip up sometimes, but knowing what to watch for helps you catch problems before they become permanent.
This is the mistake that started this whole conversation, and it remains one of the most common issues people run into. It often happens accidentally when using a belt sander or when rushing through a project without checking grain direction first. If you notice fine scratch lines running at an angle to the main grain pattern, especially after applying a test stain, this is likely the cause. The fix usually involves going back to a coarser grit and re-sanding carefully along the correct direction until those marks disappear.
Pressing down hard on your sander or sanding block might feel like it is speeding things up, but it usually causes more harm than good. Excess pressure can create uneven surfaces, dig grooves into softer wood, and wear out sandpaper much faster than it should. It also increases the risk of overheating the wood surface with power sanders, which can leave burn marks that are difficult to remove. Letting the sandpaper’s natural abrasiveness do the work, with just light guiding pressure from your hand, produces a far more even and professional result every time.
Sanding with the grain is not a complicated skill, but it does require patience and attention to detail. Taking the extra few minutes to study your board, identify the fiber direction, and work through the grits properly will save you from frustrating do overs and disappointing finishes. Every experienced woodworker learned this the hard way at some point, usually by staining a piece and watching unwanted scratches appear out of nowhere. Once you understand how wood grain behaves and how to work with it rather than against it, your projects will consistently look smoother, more polished, and more professional.
If you are just starting out, practice on scrap pieces before moving to your main project. Get comfortable spotting grain direction and adjusting your technique for tricky areas like knots or figured wood. With a bit of practice, sanding along the grain will become second nature, and your finished pieces will show it.
What happens if you sand against the grain?
Sanding against the grain tears and lifts the wood fibers instead of smoothing them. This creates tiny scratches that often remain invisible until a stain or finish is applied, at which point they soak up extra color and become clearly visible.
Can you sand with the grain using a power sander?
Yes, and in fact power sanders like random orbital sanders are commonly used this way. While the sanding pad itself moves in small circles, you should still guide the tool along the length of the grain rather than moving it side to side across the board.
How do you find the grain direction on painted or finished wood?
If the original finish is still visible, look closely for faint lines or texture patterns beneath the paint or coating. You can also check the end grain or, if possible, test a hidden area first to confirm the direction before sanding the visible surface.
What grit sandpaper should I start with for rough wood?
For rough or heavily worn wood, starting around 80 grit is common. This removes old finish, mill marks, or surface damage efficiently before you move up to finer grits for smoothing.
Why does my wood still look scratched after sanding with the grain?
This usually means you skipped a grit level or did not spend enough time on a coarser grit before moving to a finer one. Go back one or two grit levels and sand a bit longer to fully remove the deeper scratches before progressing again.
Does sanding direction matter for plywood or veneer?
Yes, and it matters even more with veneer because the top layer is very thin. Sanding against the grain or applying too much pressure can wear through the veneer quickly, exposing the layer underneath. Always use light pressure and check your progress frequently.
How long should I sand each grit before moving to the next?
There is no exact time, since it depends on the wood and how rough the surface is to start. A good rule of thumb is to sand until you can no longer see scratches from the previous grit, then wipe the dust away and inspect closely under good light before switching to the next grit.