Physical Address
304 North Cardinal St.
Dorchester Center, MA 02124
Physical Address
304 North Cardinal St.
Dorchester Center, MA 02124

Ask any seasoned woodworker what separates a rough, blotchy finish from a glass-smooth one, and the answer is rarely the stain or the topcoat. It’s the sanding. More specifically, it’s choosing the right sandpaper grit at the right stage of the job.
Grit selection directly impacts how efficiently you remove material, how cleanly you transition between stages, and how well your final finish adheres. Use too coarse a grit before finishing, and you’ll leave deep scratches that seep through your stain. Skip too many steps in your sanding sequence, and you’ll spend more time correcting mistakes than making progress. Get it right, and every coat of finish lays down like silk.
This guide is designed to cut through the confusion. Whether you’re stripping back an old cabinet, preparing raw timber for staining, or buffing a lacquer coat to a mirror shine, you’ll find clear, practical answers here. For a broader look at how sanding fits into every stage of a project, start with our ultimate guide to woodworking sanding techniques , which covers everything from tool selection to finishing sequences.
In this sandpaper grit guide, we’ll break down how grit numbers work, explain the difference between CAMI and FEPA rating systems, walk through every grit range from coarse to ultra-fine, and cover both wet and dry sanding techniques. By the end, you’ll know exactly which sandpaper grits to use and when.
Sandpaper grit refers to the size of the abrasive particles bonded to the surface of a sanding sheet. The grit number indicates how many particles would fit within a one-inch span of a standardized mesh screen. This single number tells you almost everything you need to know about how a sheet of sandpaper will behave.
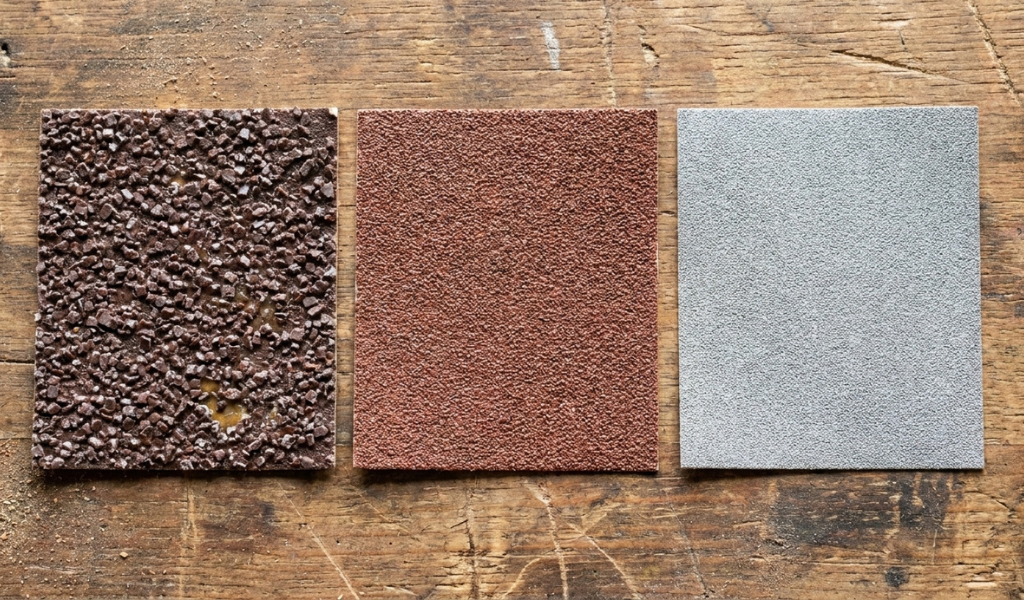
The relationship between grit numbers and abrasive coarseness is inverse: the lower the number, the coarser the grit. A 40-grit sheet carries large, widely spaced abrasive particles that cut aggressively into surfaces. A 220-grit sheet, by contrast, carries fine, densely packed particles that refine rather than remove.
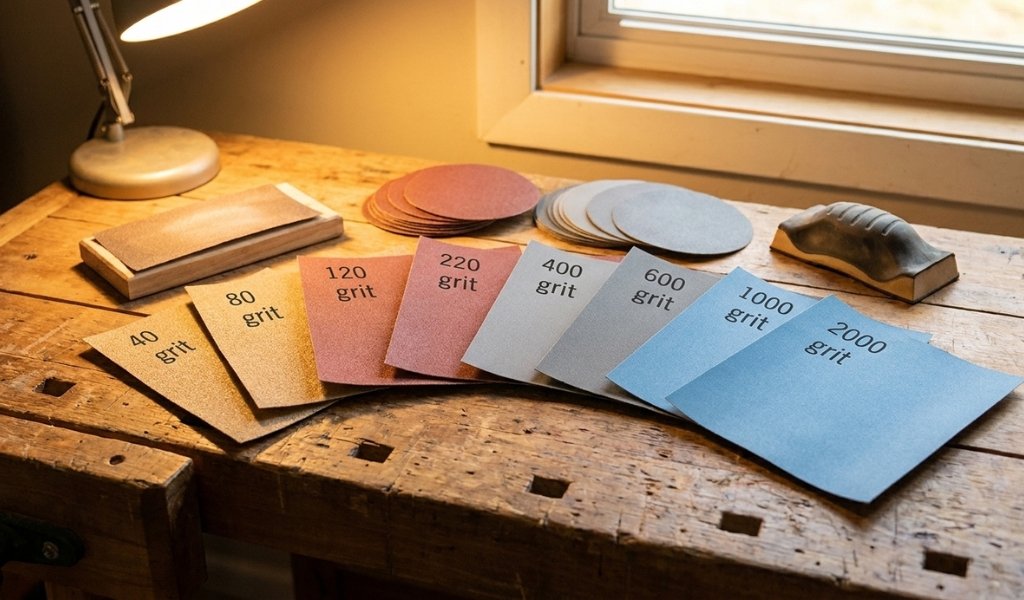
This scale runs from around 24 grit at the extreme coarse end used for heavy material removal on rough surfaces all the way to 2000 grit and beyond for ultra-fine polishing work. For most woodworking projects, the practical range sits between 40 grit and 220 grit, with specific grits like 80 grit, 120 grit, and 220 grit serving as common benchmark stops in any sanding sequence.
A useful shorthand: coarser grits cut faster, leave deeper scratches, and are used for shaping and stock removal. Finer grits cut slower, leave shallower marks, and are used for smoothing and finish preparation.
Two primary grading systems govern how sandpaper grit is classified: CAMI (Coated Abrasive Manufacturers Institute), used predominantly in North America, and FEPA (Federation of European Producers of Abrasives), used across Europe and increasingly in international markets.
FEPA-graded sandpaper is identified by a “P” prefix P80, P120, P220 and is generally considered more tightly controlled in particle sizing than the CAMI equivalent. At finer grits, the two systems diverge noticeably. For example, CAMI 220 and P220 are roughly equivalent, but at higher grits, FEPA ratings climb faster. A P400 is finer than a CAMI 400.
For most woodworking applications, either system works well through the mid-range grits. Where precision matters most is finishing coats, lacquer sanding, and polishing understanding which standard you’re working with helps ensure consistent results across different sandpaper brands.
Every sandpaper grit range serves a distinct purpose. Matching the right grit to the right task is the foundation of efficient, damage-free sanding.
Coarse grits specifically 40 grit and 60 grit are the workhorses of rough sanding. These are the grits you reach for when you need to quickly remove material: stripping old paint, leveling a glued panel, flattening rough timber, or shaping curved edges.
The abrasive particles at this range are large, and they cut deep. That speed comes at a cost, though. Coarse sandpaper leaves significant scratch patterns in the wood surface, which means follow-up stages are essential. Begin with a coarse grit only when the surface genuinely demands it starting coarser than necessary just creates more work in later stages.
60 grit sandpaper is commonly the starting point for rough wood that’s been planed but not yet refined. 40 grit is generally reserved for the most aggressive stock removal tasks, or for working with very hard timbers where 60 grit struggles to cut efficiently.
Medium grits bridge the gap between rough shaping and fine finishing. Starting at 80 grit, you begin the process of eliminating the scratch patterns left by coarse sanding. By the time you reach 120 grit, the wood surface should be free of visible defects, mill marks, and coarse abrasion lines.
80 grit is an excellent choice for initial sanding on surfaces for further refinement particularly when working with softwoods or medium-density hardwoods. 120 grit completes the leveling phase and prepares the surface to receive finer grits without wasting abrasive time.
Many woodworkers use this range to address specific imperfections: raised grain, shallow dents, dried glue squeeze-out, and minor surface irregularities. A well-sanded surface at 120 grit is clean and consistent, ready for the finish-prep stage.
Fine grits 150, 180, and 220 are where surface quality is truly established. These grits remove the scratches left by medium sanding and bring the wood to a state ready for staining, sealing, or finishing.
220 grit sandpaper is often the last grit used on bare wood before applying a finish. It creates a smooth surface without closing the wood grain so tightly that stains and finishes fail to penetrate evenly. Extra-fine grits above 220 such as 320 or 400 grit are typically reserved for sanding between coats of paint or finish rather than bare wood preparation.
Finest grit sandpapers (400 grit and above) excel at polishing finishes on wood and metal, leveling dust nibs between topcoats, and preparing for the final buffing stage.
Knowing your grit number is only part of the equation. The mineral type, coating style, and backing material all influence how a sandpaper sheet performs, how long it lasts, and what applications it’s suited to.
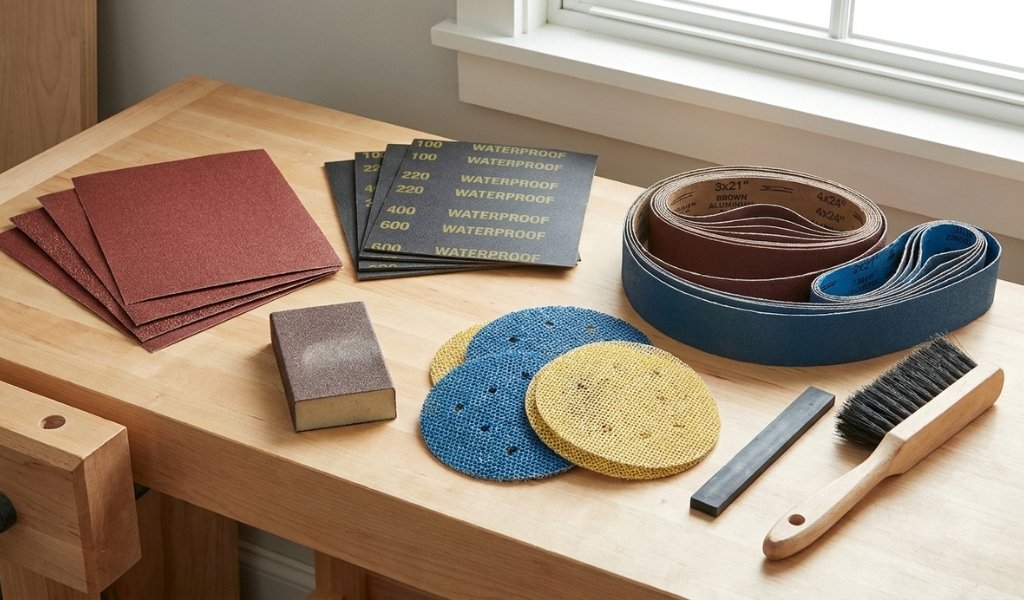
The four most common abrasive minerals used in woodworking sandpaper each have distinct characteristics:
Choosing the right abrasive mineral for your sanding needs can meaningfully extend the life of your sandpaper and improve the quality of your results.
The coating density of a sanding sheet how much of the backing surface is covered with abrasive particles affects both cutting performance and clogging resistance.
Open-coat sandpaper covers approximately 50–70% of the backing surface with abrasive particles. The gaps between particles allow wood dust and resin to clear away rather than build up, reducing clogging. Open-coat sheets are the preferred choice for softwoods, resinous woods, and any application where the material tends to gum up sandpaper quickly.
Closed-coat sandpaper covers the backing surface fully with abrasive particles, delivering a more aggressive cutting action. This makes it better suited to hardwoods and metals, where clogging is less of a concern and surface coverage matters more.
The backing material determines how a sanding sheet flexes, holds up under pressure, and handles moisture:
Understanding individual grits is useful. Knowing how to sequence them is what produces a flawless finish.
The cardinal rule of going through the grits is progression without leapfrogging. Each grit level removes the scratch pattern left by the previous one. Skip a step, and those deeper scratches survive to telegraph through your finish.
A typical sequence for raw hardwood might look like this:
For softwoods, you may start at 80 grit and finish at 180 grit softwood grain is more open and less forgiving of over-sanding with very fine grits, which can burnish the surface and inhibit stain penetration.
Always sand with the grain on the final pass at each grit stage. Cross-grain scratches at 120 or 150 grit will show under a stain even if they’re invisible to the naked eye on bare wood.
A useful sandpaper grit chart posted at your workbench keeps this sequence visible and prevents the common mistake of reverting to a coarser grit mid-sequence to fix a problem that finer work could resolve more efficiently. For a printable reference and detailed breakdown of each grit stage, our sandpaper grit numbers chart resource offers a complete visual tool for your workshop.
The right sandpaper grit for your project changes significantly depending on whether you’re working with bare wood or a previously finished surface.
Raw wood requires a full grit progression from coarse to fine, with each stage addressing surface quality before the next begins.
Painted or finished surfaces call for a different approach. Light scuff-sanding between coats typically with 220 to 320 grit improves adhesion without removing the previous coat. Heavier paint removal may require starting at 80 or 100 grit. Stripping multiple old coats of paint or varnish is where 60 grit and a coarser approach come into their own, especially when combined with appropriate wood sanding tools (/wood-sanding-tools/) designed for efficient stock removal without damaging the substrate beneath.
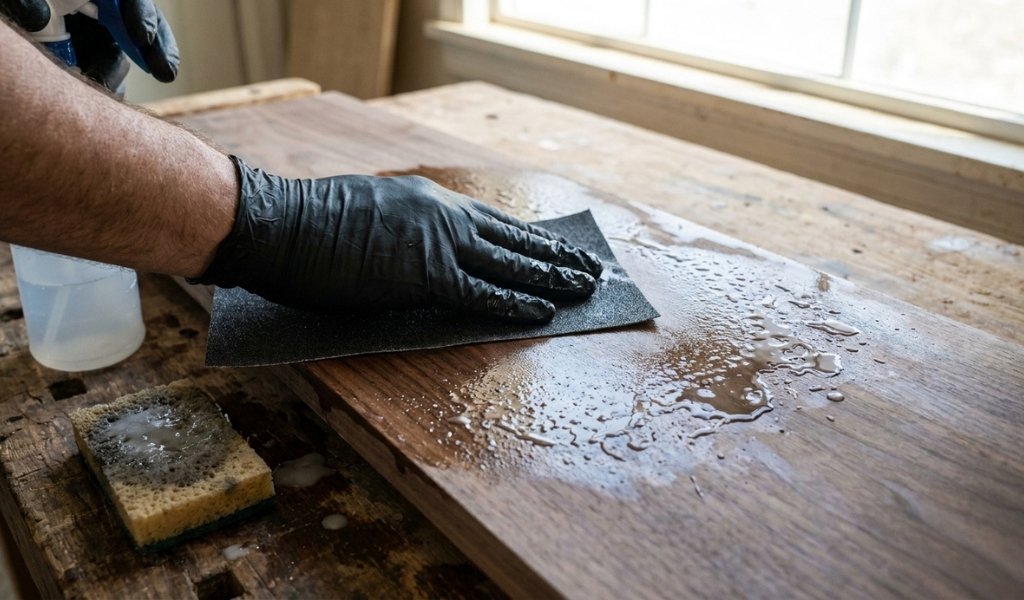
Most woodworkers sand dry as a matter of habit but wet sanding has a specific and valuable role in a professional finishing sequence.
Dry sanding is the standard technique for all bare wood preparation. Water introduces moisture into the wood fibers, causing grain raise and uneven absorption exactly the opposite of what you want before applying a stain or sealer. All sanding on raw, unfinished timber should be done dry, with appropriate dust extraction to protect your lungs and keep your workspace clean.
The full dry sanding sequence should be completed before any liquid product including pre-conditioners, wood conditioners, or raising agents touches the surface.
Wet sanding comes into its own after the finish has been applied and cured. Adding water (or a dedicated lubricant like mineral spirits) to the sanding process when working on finish coats reduces friction, prevents the abrasive from clogging, and produces an ultra-smooth surface that buffing compounds can then bring to a high gloss.
Fine and super-fine grits 400 grit through to 2000 grit are commonly used for wet sanding lacquers, polyurethanes, and waterborne finishes. Many of these sheets come on waterproof backing designed specifically for this purpose.
The distinction between wet sanding and dry sanding is covered in greater depth in our dedicated wet vs. dry wood sanding guide, which walks through lubricant choices, technique, and grit recommendations for specific finish types.
Even experienced woodworkers make these errors. Recognizing them early saves time, materials, and frustration.
Starting too coarse, unnecessarily. Reaching for 40 or 60 grit when 80 or 100 would do the job creates extra work in the refinement stages. Assess the surface first not every project needs aggressive stock removal.
Skipping grits to save time. This almost always backfires. The scratch pattern from 80 grit will still be visible under a finish if you jump straight to 180 grit without a 120-grit pass. The right grit can make the difference between a professional result and hours of rework.
Sanding across the grain on final passes. Cross-grain scratches absorb stain unevenly and become painfully visible once a finish goes on. Always finish each grit stage with the grain.
Using worn-out sandpaper. Dull abrasive particles don’t cut, they burnish. Burnished wood closes the grain and prevents stains from penetrating evenly. Replace sheets when they stop cutting efficiently, not when they fall apart.
Neglecting dust removal between grits. Abrasive particles from a coarser sheet, left on the surface, can embed themselves into the wood and cause scratches during fine sanding. Always clean the surface thoroughly between stages.
Finishing bare softwood too fine. Sanding softwood beyond 180 or 220 grit can burnish the surface, creating a barrier that prevents stain or sealer from penetrating evenly. Know when to stop.
Choosing the right sandpaper grit is a skill that compounds over time. The more projects you complete, the more intuitive the decisions become but even experienced craftspeople benefit from revisiting the fundamentals.
The core principles are consistent: start with a coarser grit appropriate to the surface condition, progress methodically through each stage without skipping, match your abrasive mineral and backing to the task, and always finish with the grain. Wet sanding has its place, but only once the finish is down and cured.
Get these fundamentals right, and the results speak for themselves: a surface so smooth that finish coats flow on evenly, stains absorb uniformly, and the final piece looks like it was made by someone who truly understands their craft.
Ready to go deeper? Explore the full range of wood sanding tools (/wood-sanding-tools/) and find the right equipment to match the grits and techniques covered here.
The golden rule is to never skip grits in your sanding sequence. Each grit level is designed to remove the scratch pattern left by the previous one. Jumping from 80 grit to 220 grit, for example, leaves deep scratch marks that show clearly under a stain or clear finish no matter how much finer sanding you do afterward.
60 grit is rougher. Lower grit numbers indicate larger abrasive particles and a more aggressive cutting action. 60 grit sandpaper is used for heavy material removal and rough shaping, while 120 grit is a medium-grit sandpaper used for leveling and preparing a surface for fine finishing.
CAMI (Coated Abrasive Manufacturers Institute) is the North American grit grading standard. FEPA (Federation of European Producers of Abrasives) uses a “P” prefix P80, P120 and applies stricter particle size tolerances, particularly at finer grits. At lower grits, the two systems are broadly similar. At higher grits (above P220), FEPA ratings diverge from CAMI, with FEPA grading producing finer results at equivalent numbers. When precision matters such as in finishing sanding or polishing, check which standard your sandpaper uses.
No. Skipping grits does not save time in practice; it creates problems that take longer to fix than if you had followed the full sequence. The scratch patterns left by coarser grits must be systematically removed by each successive grit. Attempting to jump from coarse to fine sanding leaves visible marks that telegraph through stains and finishes, requiring additional sanding or complete stripping to correct.
It depends on the wood species and the stain type, but 120 grit is generally not the final grit before staining. Most woodworkers finish bare wood at 180 or 220 grit before applying a stain. Stopping at 120 grit leaves a scratch pattern that can cause uneven stain absorption, particularly in close-grained hardwoods. On open-grained woods like oak or ash, 150 grit may be acceptable, but 180 to 220 grit is the safer, more consistent choice for most staining applications.