Physical Address
304 North Cardinal St.
Dorchester Center, MA 02124
Physical Address
304 North Cardinal St.
Dorchester Center, MA 02124

Changing coil springs is one of those car repairs that sounds scarier than it actually is—but only if you know what you’re doing. Get it wrong, and a compressed spring can release with enough force to cause serious injury. Get it right, and you’ll have a smoother ride, better handling, and the satisfaction of doing the job yourself.
This guide walks you through everything you need to know about coil spring removal and replacement. You’ll learn when it’s time to replace your springs, what tools you need, how to use spring compressors safely, and how to complete the job from start to finish. Whether you’re a seasoned DIYer or tackling this for the first time, this guide has you covered.
To change coil springs, lift and secure the vehicle, remove the wheel, disconnect the strut or suspension assembly, compress the spring using a spring compressor, remove the old spring, install the new spring, and reassemble all components. Always follow proper safety procedures and replace springs in pairs for balanced handling.
Coil springs are tightly wound metal springs that sit between your vehicle’s frame and its wheels. Their job is to absorb road impacts, support the weight of the vehicle, and keep the tires in contact with the road at all times.
They work alongside shock absorbers or struts to control how your car moves. Without properly functioning coil springs, your ride becomes rough, your handling suffers, and your tires wear unevenly. In short, they’re critical to how your car drives and how safe it feels on the road.
Coil springs don’t last forever. Over time, they weaken, crack, or break entirely—especially on vehicles driven on rough roads or with high mileage.
Here are the most common signs it’s time to replace yours:
Replacing worn coil springs restores ride comfort, improves handling, and prevents further damage to suspension components like shock absorbers and control arms. If you’re also upgrading your suspension for a lift kit or performance improvement, swapping the springs is a key part of the process.
Before starting any coil spring removal job, gather the right tools. Trying to improvise with the wrong equipment is how accidents happen.
Essential tools:
Optional but helpful:
Always work on a flat, stable surface, and never rely solely on a floor jack to support the vehicle. Jack stands are non-negotiable.
The right coil spring compressor depends on how to maintain a spring compressor and your vehicle’s suspension setup. Using the wrong type can make the job harder and more dangerous so first you have to know what is a compressor and how it works. Here’s a breakdown of the main types available.
External compressors are designed for MacPherson strut setups, which are found on the front suspension of most modern cars. Because the spring wraps around the strut, you can’t compress it from the inside—so the tool clamps from the outside instead.
These compressors typically feature two large-diameter threaded rods with hooks that grab onto opposite sides of the coil. You tighten both rods gradually and evenly, compressing the spring a little at a time. Some mechanics use a cargo strap or safety chain as a backup in case one side slips.
Key tip: always space the hooks evenly around the spring and along its length. Uneven compression causes the spring to bend sideways, which can damage the tool or send the spring flying.
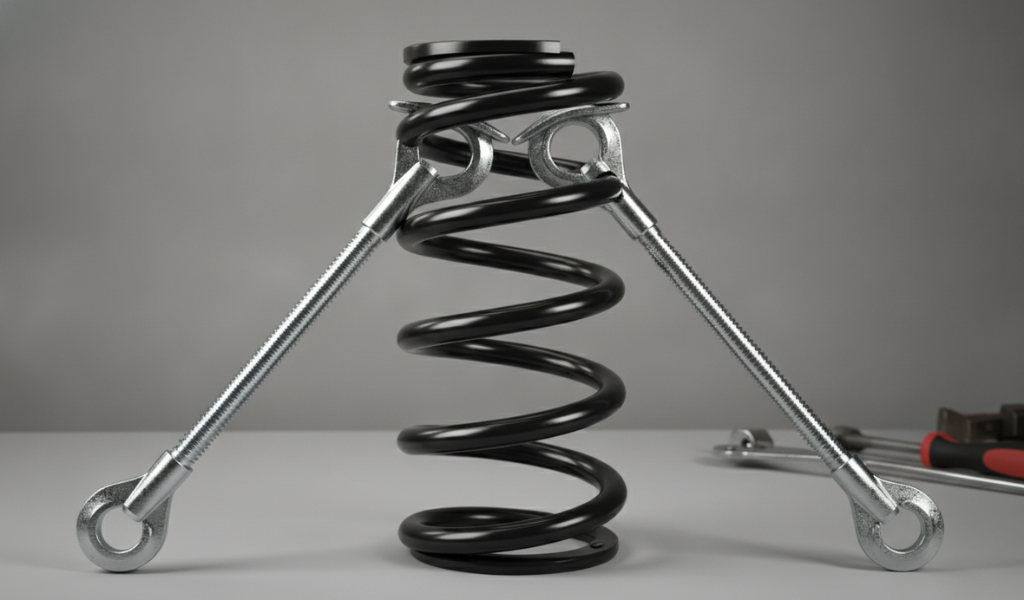
Internal compressors are used when the center of the spring is clear and accessible—common in rear suspension setups or when working with separate spring and shock configurations. These tools use a single large-diameter threaded rod (often an ACME thread) with two arms that grip the inside of the coil and pull toward each other as you tighten the shaft.
If the compressor rod is too large to pass through the shock absorber hole at the top, you may need to access the spring from the bottom through the lower control arm. It takes a bit more time and requires lifting the car higher, but the process still works well.
As with external compressors, keep the arms evenly spaced and keep the shaft well lubricated. A heavy oil like AN hose assembly oil works well here due to its thick, sticky properties that reduce wear on the threads.
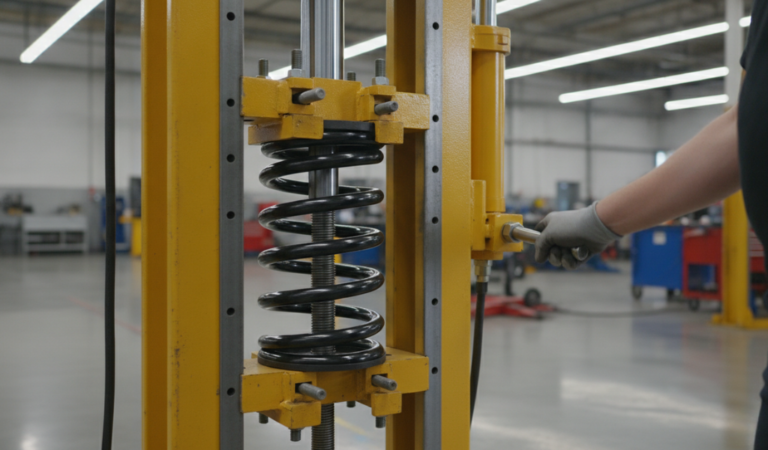
Professional workshops often use bench-mounted or wall-mounted spring compressors for heavier-duty work. These are faster, safer, and can handle a wider range of spring sizes without needing adapters. They’re particularly useful for larger vehicles like trucks, SUVs, and lifted 4WDs where the springs carry significantly more load.
This is the part most people skip over—and it’s the most important section in this entire guide is how to use spring compressors safely
A coil spring under compression stores an enormous amount of energy. If it releases suddenly, the results can be catastrophic. Here’s how to stay safe:
Before you start:
During compression:
After removal:
Coil spring removal is the process of safely compressing and removing a vehicle’s suspension spring using a spring compressor. The spring must be compressed before removal because it stores a large amount of potential energy that can cause serious injury or damage if released suddenly. Proper coil spring removal is essential when replacing worn springs, struts, shocks, or other suspension components.
Now for the main event. The exact process varies slightly depending on whether your vehicle uses MacPherson struts or a separate spring-and-shock setup, but the core steps are the same.
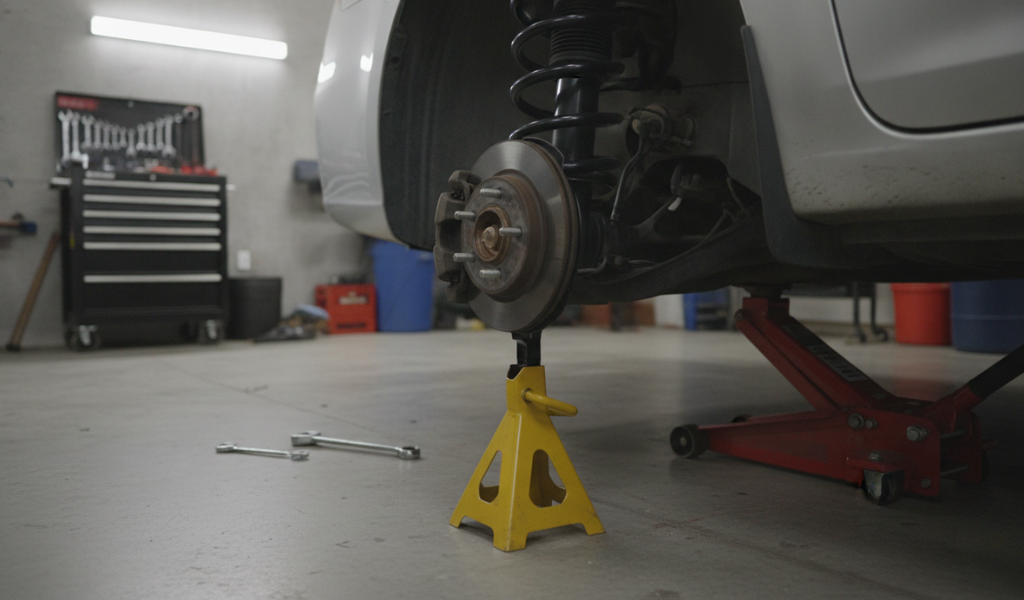
Start by loosening the wheel nuts slightly while the car is still on the ground. Then lift the vehicle with your floor jack and secure it on jack stands. Remove the wheel.
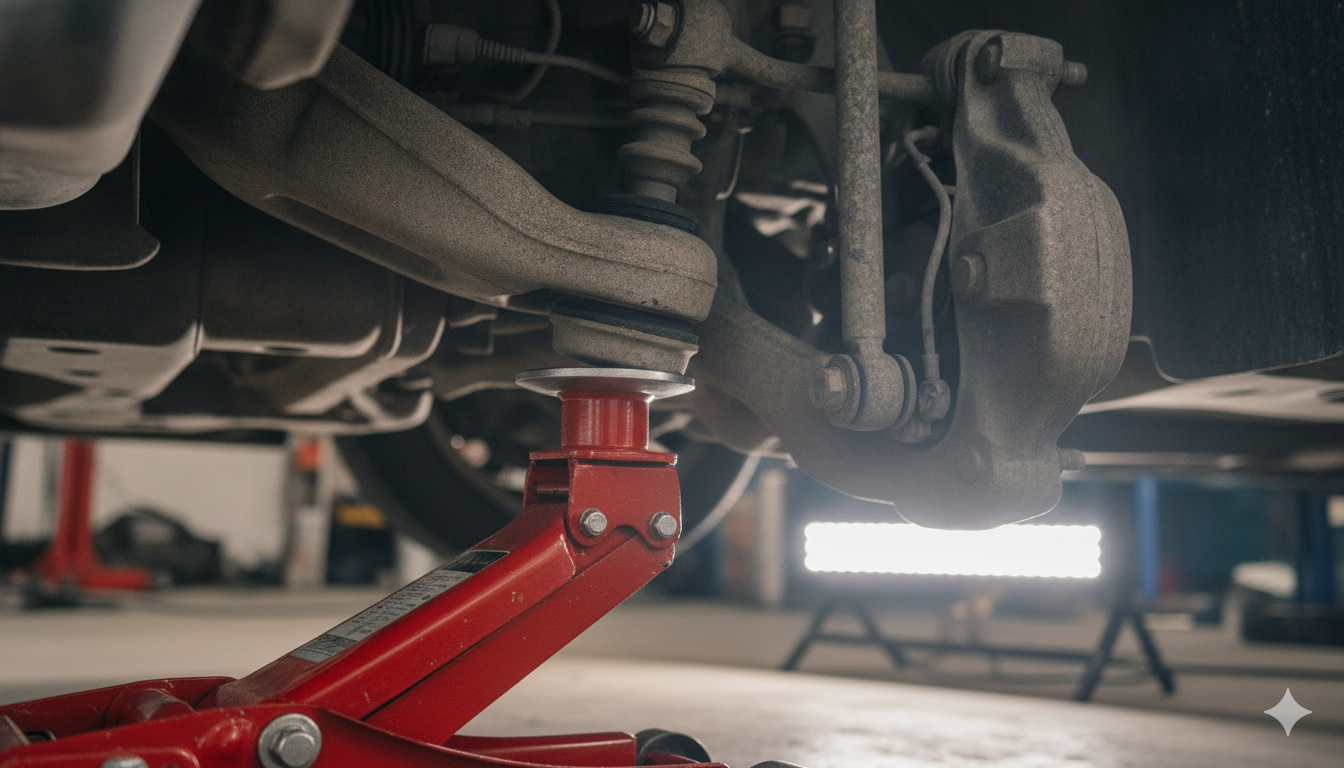
Place your floor jack under the lower control arm to support it. This prevents the arm from dropping suddenly when you disconnect the suspension.
For MacPherson strut setups, you’ll need to remove the entire strut assembly from the car before compressing the spring. Unbolt the strut from the steering knuckle at the bottom, then remove the top mount bolts from inside the engine bay or trunk.
For vehicles with separate springs and shocks, you can usually remove the shock first, then tackle the spring.
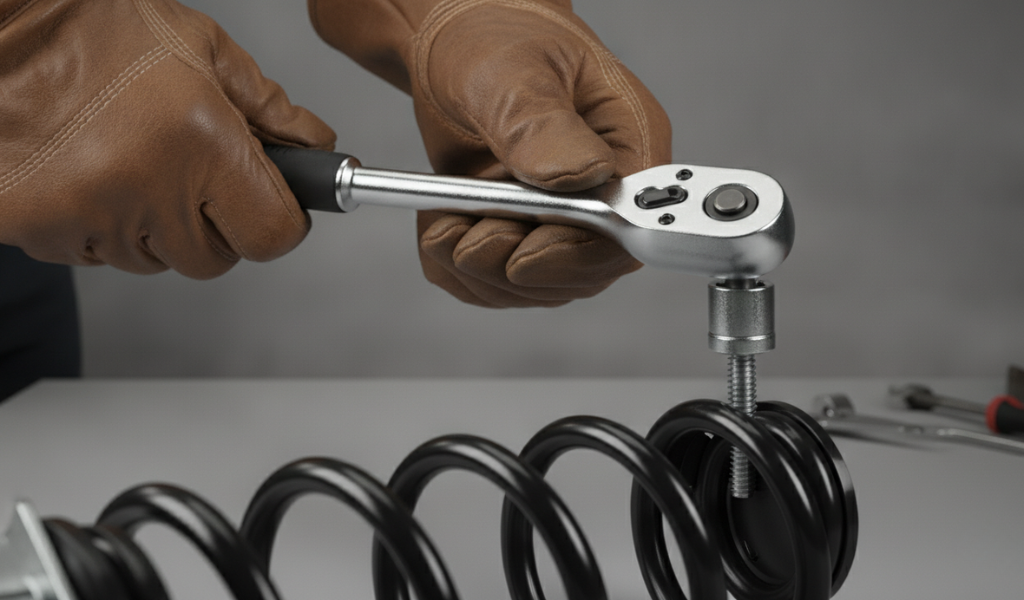
Install the spring compressor according to its type (external or internal) as described above. Space the hooks or arms evenly around the spring, then begin tightening slowly. Alternate sides if using an external compressor. Keep going until the spring moves freely within the perch—meaning it’s no longer under load.
Once the spring is compressed, remove the top nut from the strut shaft. Hold the shaft steady with an Allen key or strut tool while turning the nut. Once removed, you can lift off the top mount, spring seat, and the compressed spring.
Place the new spring into position and transfer the compressor onto it. Compress the new spring enough to fit it back into the assembly, then reverse the removal steps. Tighten the top nut to the manufacturer’s specified torque.
Bolt everything back into place. Make sure all bolts are torqued to spec—loose suspension hardware is dangerous. Refit the wheel and lower the car.
Coil spring replacement almost always affects your wheel alignment. Book an alignment check straight after the job to make sure your car tracks straight and your tires wear evenly.
A few extra things worth knowing before you get started:
Coil spring removal and replacement is a job that rewards preparation. Get the right tools, understand your suspension type, and follow the safety steps closely—particularly when it comes to using spring compressors. Rushing this job or cutting corners is how people get hurt.
If you’ve never worked on suspension before, consider starting with a simpler repair to build your confidence. And if you’re ever unsure, there’s no shame in handing it over to a professional. A properly functioning suspension is too important to get wrong.
Ready to get started? Make sure you have the correct coil spring compressor for your vehicle type before anything else. That one decision shapes how safe and straightforward the entire job will be.
The most common signs include a noticeably lower ride height on one corner of the car, a rough or bouncy ride, clunking sounds from the suspension, and uneven tire wear. A visual inspection can also reveal cracked or broken coils.
Yes, but only if you use the correct tools—especially a quality spring compressor—and follow proper safety procedures. A compressed coil spring stores significant energy and can cause serious injury if released suddenly. Never attempt this job without the right equipment.
It depends on your suspension type. MacPherson strut setups require external compressors that clamp onto the outside of the spring. Conventional setups with separate springs and shocks typically use internal compressors. Check your vehicle’s suspension configuration before buying a tool.
For someone with basic mechanical experience, it typically takes 2–4 hours per axle. First-timers may need longer. Having all your tools ready beforehand speeds things up considerably.
Yes. Coil spring replacement affects suspension geometry, which throws off your wheel alignment. Always have an alignment done after the job to protect your tires and ensure safe handling.
Technically yes, but it’s not recommended. Coil springs wear at a similar rate on both sides. Replacing only one creates an imbalance in ride height and handling. It’s better to replace both springs on the same axle at the same time.
If your shock absorbers are also worn, replacing them at the same time makes sense. You’re already doing most of the same work, and mismatched components can reduce the performance of both.
Can a Broken Coil Spring Damage Other Suspension Parts?
Yes. A broken coil spring can place extra stress on shock absorbers, struts, tires, control arms, and other suspension components. Replacing damaged springs promptly helps prevent additional repair costs, maintain proper vehicle handling, and improve overall driving safety.