Physical Address
304 North Cardinal St.
Dorchester Center, MA 02124
Physical Address
304 North Cardinal St.
Dorchester Center, MA 02124

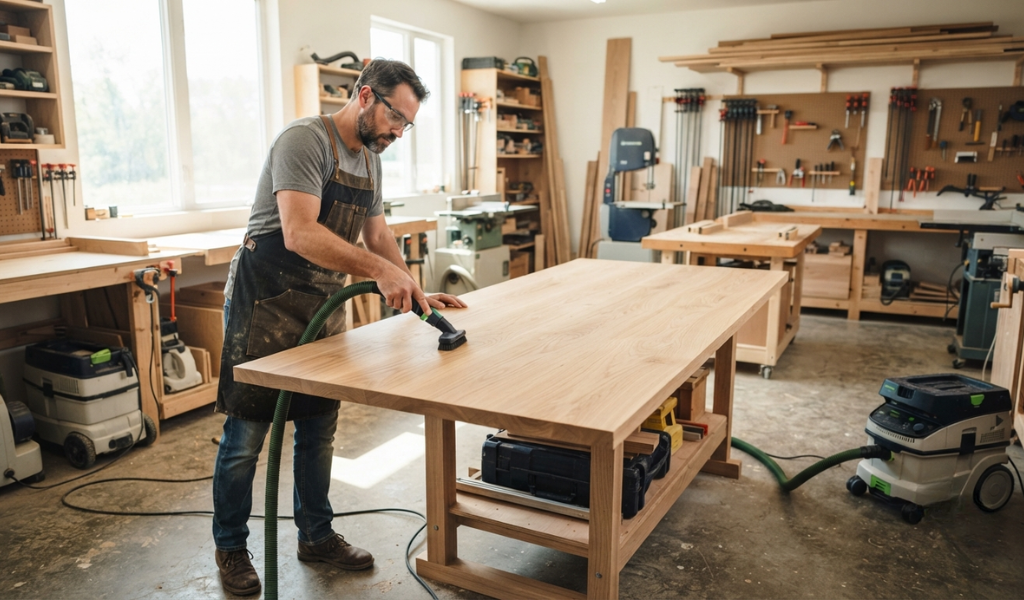
Sanding your wood to a silky-smooth surface feels like the hard part. But here’s where many woodworkers beginners and seasoned pros alike make a critical mistake: they skip proper cleanup and go straight to finishing. The result? A final finish full of bumps, bubbles, and trapped dust particles that ruin hours of careful work.
So, what can you use to wipe down wood after sanding? The short answer is: it depends on your project, the type of finish you’re applying, and how fine your sanding grit was. The right method to clean wood after sanding can mean the difference between a flawless, professional-looking result and a surface that needs to be redone from scratch.
This guide covers everything you need to know about cleaning dust after sanding. We recommend starting with our ultimate guide to woodworking sanding techniques to know more about sanding . From tack cloth and microfiber cloth to mineral spirits and damp lint-free rags, you’ll learn exactly which tools work best, when to use them, and how to avoid the most common mistakes. By the end, your wood surface will be truly ready to finish.
Sanding does two things: it smooths the wood surface and it generates a tremendous amount of fine dust. Some of that dust is visible and easy to brush away. The rest, the fine particles that settle deep into the grain and pores of the wood, is nearly invisible to the naked eye. That’s the stuff that causes real problems.
When you run your sander across bare wood, it creates airborne dust as well as sanding dust that clings stubbornly to the surface. Even after you’ve vacuumed and brushed the surface, fine dust particles remain. These particles, if left behind, will mix with your stain, paint, or varnish and create a gritty, uneven texture.
Think of it this way: you wouldn’t paint a car without washing it first. Wood is no different. The cleaner the wood surface, the smoother the final finish. Skipping this step almost always leads to visible imperfections, no matter how good your finishing product is.
Beyond just smoothness, sanding dust actually interferes with adhesion. Paint, stain, and sealant are designed to bond directly with the wood grain. When a layer of fine dust sits between the finish and the raw wood, it acts as a barrier. The finish bonds to the dust instead of the wood, which leads to peeling, flaking, and uneven color absorption, especially with dye stain on open-grain woods like mahogany or oak.
Proper sanding and cleaning together prepare the wood to accept any finish correctly and evenly.
There are several good tools and methods for removing dust after sanding. Each has its strengths, and the best choice often depends on your project and the finish you plan to apply.
A tack cloth is a loosely woven cheesecloth treated with a slightly sticky substance, usually a diluted varnish or beeswax blend, that makes it tacky to the touch. It’s one of the most popular tools among woodworkers for a simple reason: it picks up and holds fine dust particles without pushing them around.
To use tack cloth, unfold it loosely rather than bunching it up tightly. Wipe the wood surface in long, light strokes following the wood grain. 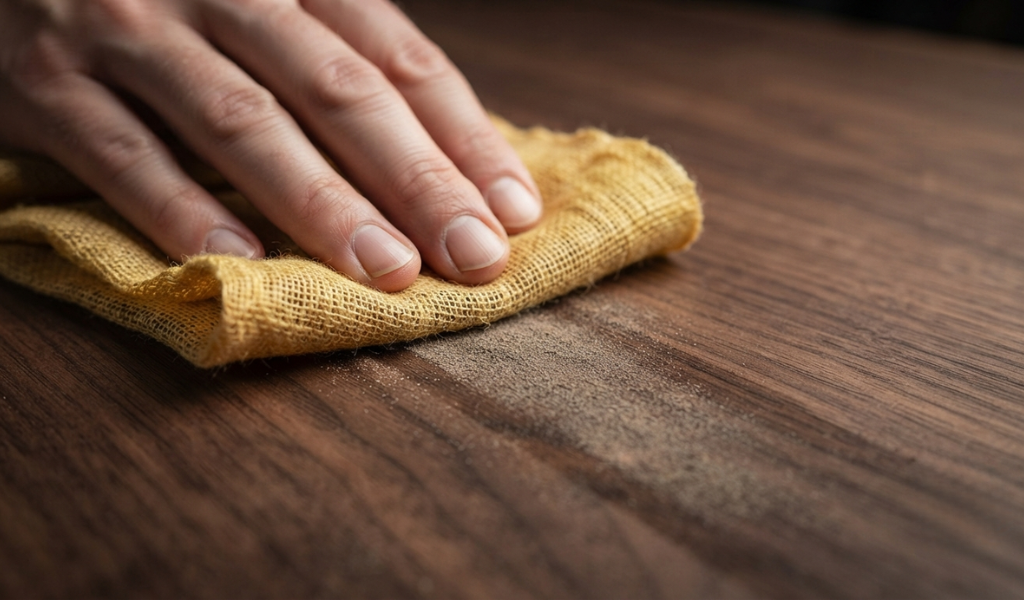 Don’t press too hard. The goal is to lift the dust, not press it back in or transfer the sticky residue onto the wood surface.
Tack cloth works best before applying oil-based finishes, varnish, or shellac. Be cautious using it before water-based finishes, since the waxy residue can occasionally interfere with adhesion on bare wood if overused.
A dry microfiber cloth is an excellent, reusable alternative to a tack cloth. The tiny fibers create static electricity as they move across the wood surface, which attracts and traps fine dust rather than simply pushing it elsewhere.
Many woodworkers prefer a microfiber cloth because it leaves no residue, works well before water-based and oil-based finishes alike, and can be washed and reused. It’s especially useful for large wood surfaces like tabletops, doors, and cabinet panels where a tack cloth might wear out quickly.
Fold the microfiber cloth into quarters and wipe with light pressure along the grain. Shake or vacuum it out between passes to avoid redistributing the dust you’ve already collected.
Before using any cloth, vacuuming is the smartest first step. A shop or standard vacuum with a soft brush attachment removes most of the loose sanding dust quickly and efficiently, including the dust sitting in crevices, corners, and along edges.
An air compressor with an air hose can also blow dust off the surface, though this simply moves the dust into the air and onto nearby surfaces rather than removing it. If you use compressed air, make sure to vacuum the area thoroughly afterward and wait for the airborne dust to settle before wiping.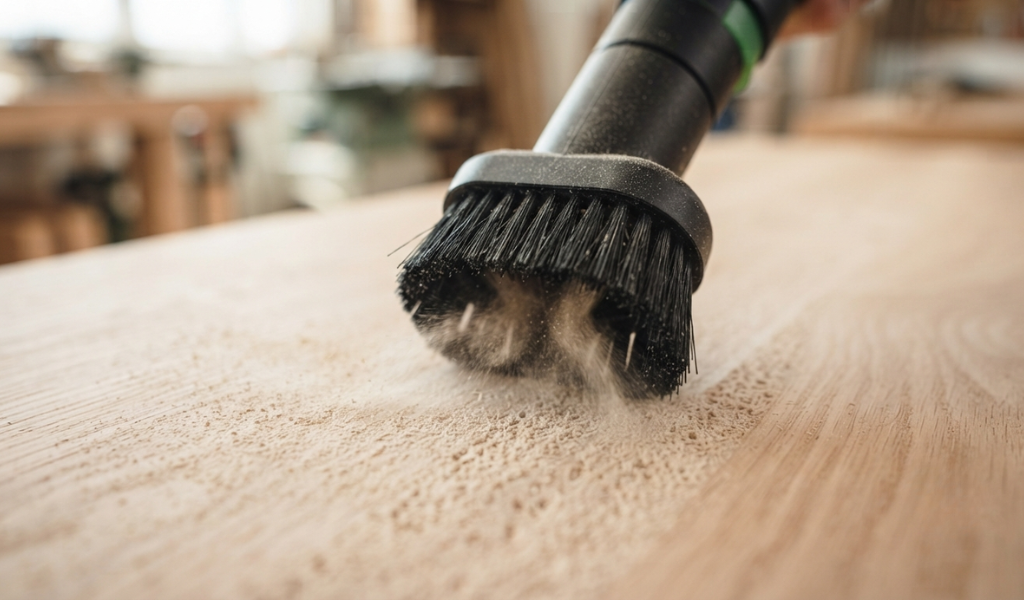
A shop vacuum reduces airborne dust significantly compared to brushing by hand, making it a healthier and more efficient starting point for any cleanup.
A lightly damp lint-free cloth works well for cleaning wood after sanding, particularly before painting with water-based products. The moisture helps collect fine particles that dry methods might miss.
The key word here is “lightly.” You want to dampen the cloth, not soak it. Wring it out thoroughly so it’s barely wet, then wipe the wood surface and let it dry completely before applying any finish. Using too much water will raise the grain, which means you’ll need to sand lightly again with a fine grit before proceeding.
This method is not recommended before oil-based finishes, polyurethane, or shellac, since even small amounts of moisture can cause adhesion problems or cloudiness in the final finish.
For a more thorough clean, especially on bare hardwood furniture or before applying oil-based stain, many professionals turn to mineral spirits or denatured alcohol. These solvents clean the wood surface effectively without raising the grain the way water does.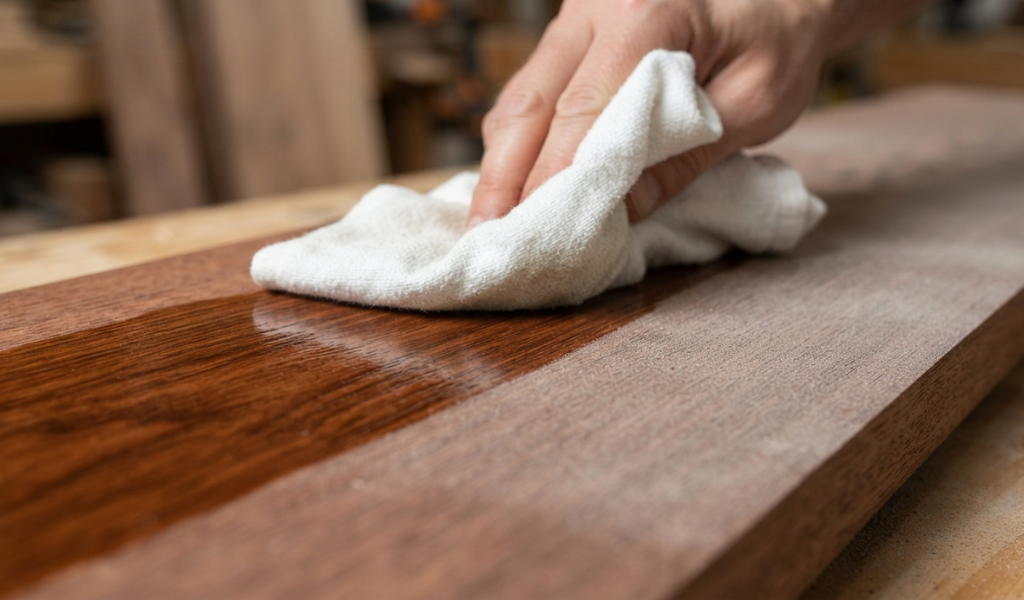
Mineral spirits dissolve oil-based contaminants, grease, and stubborn dust that clings to the wood. Dampen a lint-free cloth with a small amount and wipe in the direction of the wood grain. Let the wood dry completely, usually 15 to 30 minutes, before applying any finish.
Denatured alcohol evaporates faster than mineral spirits and leaves no residue, making it a solid choice before shellac or water-based finishes. Avoid using paint thinner as a substitute, as it can leave a residue that interferes with finishing.
Always work in a well-ventilated area when using any solvent, and keep it away from open flames.
Not every woodworking project needs the same cleanup approach. Here’s how to match your cleaning method to the job.
For raw wood furniture, the best approach is to vacuum first, follow up with a tack cloth or dry microfiber cloth, and then wipe down with mineral spirits if you’re applying an oil-based stain or finish. This three-step process removes most of the dust and any oils or glue spots that might have been left behind during construction. Let the wood dry fully before the final sanding pass or finishing.
Cabinets and trim have lots of edges, corners, and detailed profiles where sanding dust likes to collect. A vacuum with a brush attachment is especially helpful here. Follow up with a tack cloth, working carefully into the corners and along the edges. For painted trim, a damp lint-free cloth after vacuuming works well before applying a water-based primer.
Outdoor wood, like decks, fences, and patio furniture, often has more surface area and may have been exposed to moisture or dirt before sanding. A shop vac and stiff brush remove the bulk of the debris. For final prep, a damp cloth or a diluted dish soap solution on a lint-free rag can remove any remaining grime. Make sure the wood dries completely, ideally for 24 hours, before applying any exterior stain or sealant.
For fine woodworking projects, like small boxes, carved pieces, or detailed joinery, gentleness matters. Compressed air from a can or a soft-bristle brush removes dust from tight spaces without risk of scratching. Finish up with a light pass of tack cloth and inspect carefully under good lighting before applying any finish.
Follow this order every time to get a truly dust-free surface.
Start with your shop vacuum and brush attachment. Vacuum the entire wood surface, including the edges and underside if accessible. Run the brush attachment along the grain so it lifts dust out of the pores rather than pushing it in. This step removes most of the sanding dust quickly and is essential before any hand-wiping method.
Once vacuumed, use your preferred wiping method based on your finish type. For oil-based finishes, use tack cloth or mineral spirits on a lint-free cloth. For water-based finishes, use a dry microfiber cloth or a very lightly dampened lint-free cloth. Always wipe along the grain, using fresh sections of the cloth as it picks up dust. Allow the surface to dry completely if any moisture or solvent was used.
Before you open a can of stain or paint, take a moment to inspect the wood surface closely. Use a raking light, a flashlight held at a low angle, to reveal any remaining dust, scratch marks, or imperfections. Run your clean hand lightly across the surface. It should feel completely smooth and cool to the touch, with no gritty texture.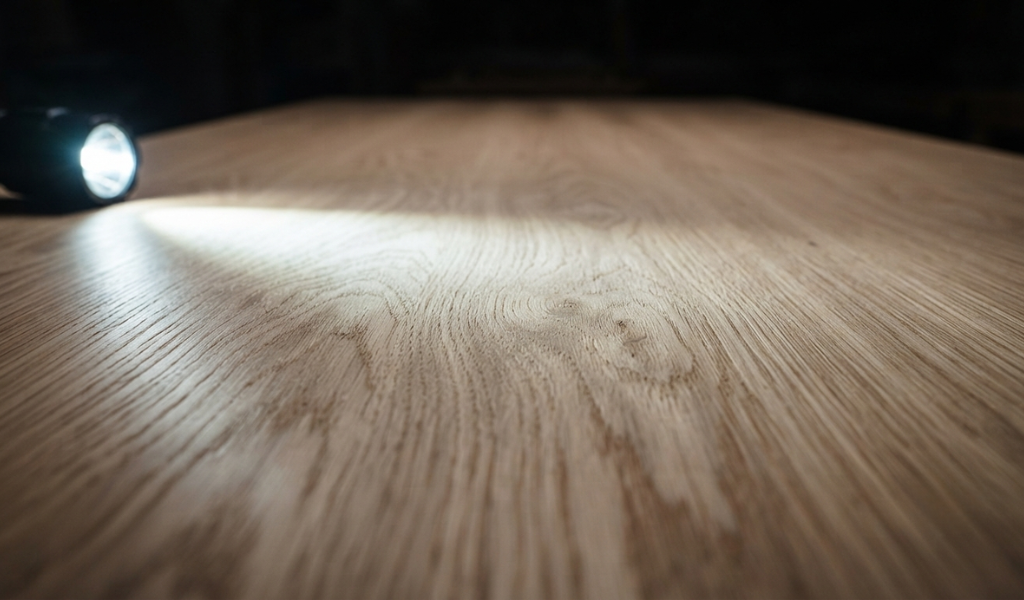
If you still feel fine particles, wipe again with a fresh tack cloth or microfiber cloth. Only move on when the surface is genuinely dust-free and ready to finish.
Water is a quick and tempting cleaning option, but using too much is one of the most damaging mistakes in preparing the wood. Water will raise the grain, causing wood fibers to swell and stand up again after all your sanding work. If you want to use a wet cloth, dampen it minimally and always let the wood dry completely before inspecting whether you need to sand lightly again.
Lint is almost as bad as sanding dust. Always use lint-free cloths, microfiber cloths, or proper tack cloths when cleaning wood after sanding. Avoid paper towels and old cotton rags that shed fibers easily. These loose threads get trapped in the finish and become visible after drying, particularly under gloss or satin coatings.
Some people feel the wood surface looks clean enough and skip the wipe-down step. Fine dust particles are easy to miss, especially in normal lighting. They only become obvious once the finish is applied and dries. By then, sanding back and refinishing is the only fix. Taking five extra minutes to properly clean wood after sanding saves hours of rework.
Stain penetrates the wood grain directly, so the surface must be completely free of dust and oils. Vacuum first, then wipe with a tack cloth or mineral spirits on a lint-free rag. Let the surface dry before applying stain. On open-grain woods like mahogany or oak, mineral spirits work particularly well because they clean without raising the grain.
For a painted finish, a damp lint-free cloth after vacuuming is a reliable choice. The slight moisture picks up fine particles effectively, and since paint sits on top of the surface rather than penetrating it, a tiny bit of raised grain is less problematic. Let the wood dry fully, then apply your primer before painting.
Polyurethane and other oil finishes show every trapped particle once they dry, so cleanliness here is critical. Tack cloth followed by a light wipe with mineral spirits gives you the cleanest possible surface. Make sure all solvent has evaporated before applying your first coat. Rushing this step often leads to a cloudy or rough final finish.
Cleaning wood after sanding is one of the simplest steps in any woodworking project, but skipping or rushing it leads to finishes that look rough, dull, or uneven. The good news is that with the right tools, the process takes just a few minutes.
Start with a vacuum and brush attachment to remove most of the sanding dust. Follow up with a tack cloth, microfiber cloth, or a lint-free cloth dampened with mineral spirits depending on your finish type. Inspect the surface with a raking light before you apply anything. That’s the whole process.
Whether you’re staining a piece of raw wood, painting cabinets, or finishing a fine woodworking project with polyurethane, clean wood
Yes, but with caution. A barely damp lint-free cloth can be used to clean wood after sanding, particularly before water-based finishes. However, too much water will raise the grain and require additional fine sanding. Always wring the cloth out thoroughly and let the wood dry completely before finishing. Avoid using water before oil-based stains or varnish.
Both work well, but for different situations. A tack cloth is slightly more effective at picking up the finest dust particles because of its sticky surface. However, it can leave a waxy residue that interferes with some water-based finishes. A dry microfiber cloth is a safer, more versatile option that works with all finish types and can be reused many times. Many woodworkers use a vacuum and microfiber cloth first, then finish with a tack cloth for the final pass before oil-based finishes.
The best test is to use a raking light. Hold a flashlight or lamp at a very low angle across the wood surface and look for any visible dust, particles, or streaks. Then run a clean, dry hand across the surface. It should feel completely smooth with no gritty texture. If it feels even slightly rough or you see particles under the raking light, wipe again before finishing.
Professional woodworkers typically combine several methods. They start with a shop vac and brush attachment to remove most of the sanding dust, then follow up with a tack cloth or a lint-free cloth dampened with mineral spirits for a fine clean. For final sanding stages, compressed air is sometimes used before a final tack cloth wipe to ensure a completely dust-free surface prior to finishing.
Not necessarily after every grit change, but you should vacuum between grits to prevent coarser particles from scratching the wood as you move to finer grits. A full wipe-down with cloth or mineral spirits is most important after your final sanding pass, just before applying the first coat of finish.
Yes. Denatured alcohol is a good alternative to mineral spirits, especially before shellac or water-based finishes. It evaporates quickly and leaves no residue. However, it is not ideal before oil-based finishes, where mineral spirits are the better choice. As with all solvents, use it in a well-ventilated space and keep it away from heat sources.
Compressed air from an air compressor or air hose blows dust off the wood surface but disperses it into the air and onto surrounding surfaces. It’s useful for clearing dust from tight corners and carved areas, but it should always be followed by vacuuming and a cloth wipe-down. Relying on compressed air alone does not give you a dust-free surface prior to finishing.