Physical Address
304 North Cardinal St.
Dorchester Center, MA 02124
Physical Address
304 North Cardinal St.
Dorchester Center, MA 02124

You spent hours on a woodworking project. The joints are tight and the shape looks great. Then you add stain, and suddenly every little scratch and uneven patch jumps out at you. It is one of the most annoying moments in woodworking, and it happens to almost everyone at least once.
There is a very simple fix, and it costs about as much as a pencil. The pencil trick sanding method lets you see exactly where you have sanded and where you have not.This is exactly what The Complete Guide to Sanding Wood is meant to help with. You do not need special tools, and a beginner can learn it in five minutes. In this guide you will learn how the trick works, what you need, how to do it step by step and why so many pros swear by it. If you want better results from your wood sanding, read on.
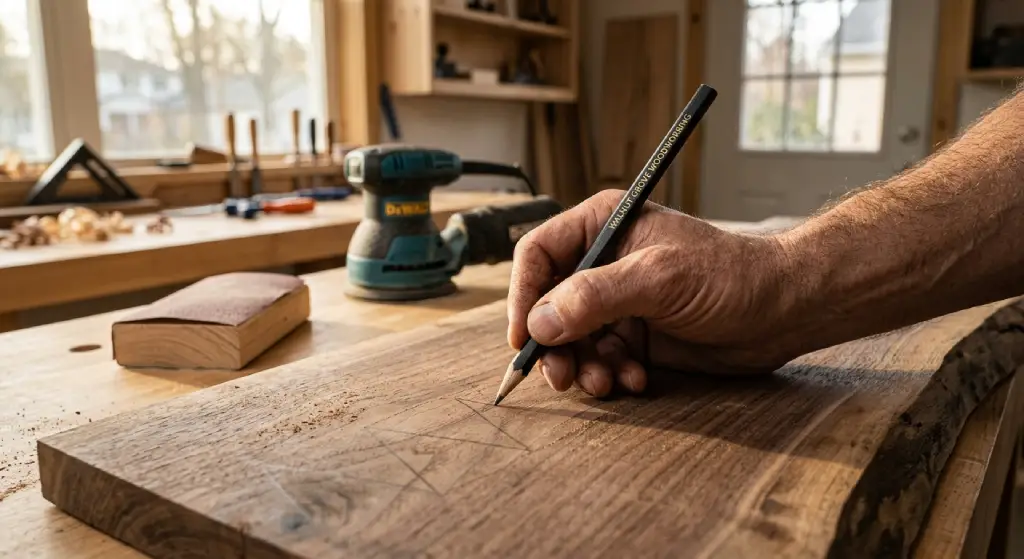
The pencil trick is exactly what it sounds like. Before you start sanding, you use a pencil to scribble light marks all over the wood. As you sand, the marks wear away. When the pencil marks are gone, you know that spot has been sanded. If some marks are still there, you know you missed it or the surface is low in that area.
It sounds almost too easy to work, but it solves a real problem. Wood is hard to judge by eye. Once you start to sand, the surface all looks the same, and bare wood hides scratches until the finish goes on. The pencil gives you a map of your work.
This tip is popular in DIY videos on YouTube, in woodworking classes and in busy professional shops. It works on a tabletop, a cabinet door, a small box or even a big deck board.
The idea behind the trick is simple. Sandpaper works by removing a very thin layer of wood. A layer that thin is almost invisible, so you cannot tell how much you have taken off or whether you took it off evenly.
Graphite, the soft gray material in a pencil, leaves a thin layer of dark color on the surface. That layer is as thin as the top of the wood itself, so it wears away at the same rate. When your sandpaper cuts through the top layer of wood, it takes the graphite with it.
This turns an invisible process into a visible one. A spot that still has pencil marks is a spot that the sandpaper has not touched. If the whole surface has lost its marks at the same time, you have removed wood evenly across the board.
This is also why the trick helps find low spots. A dip or a groove sits below the level of the rest of the surface. The sandpaper skips over it while it cuts the high spots, so the pencil marks stay in the dip. You can see right away where the surface is not flat, and you can decide whether to keep sanding or leave it alone.
Experienced woodworkers use the pencil trick because it saves time and stops mistakes. A pro does not want to sand more than needed. Every extra minute of hard sanding is a minute lost, and each pass takes away a little more wood.
The trick also gives them confidence. When they finish a grit and the pencil marks are gone, they can move on to the next grit and know the job is done. They do not have to guess, and they do not have to come back later to fix scratches that showed up under stain.
A cabinet maker I know says the trick changed how he works. Years ago he would sand a door panel until it felt smooth, then add a coat of finish and find faint swirl scratches and a rough band near the edge. Now he scribbles on every panel before he starts, and he says he has not had a callback for sanding problems since.
The method is also good for teaching. Beginners often do not know when to stop, and the pencil gives them a clear answer. Many woodworking teachers show this trick on the first day.
The best part of this trick is how little you need. Most people already have everything in the shop or in a kitchen drawer. Still, a few choices make the job easier, so it helps to know what to pick.
A regular number 2 pencil works very well. It is cheap, it is easy to find and its marks are light and easy to sand off. The fine line is great for small pieces and tight areas. The only downside is that you need more strokes to cover a big surface.
A carpenter pencil has a wide, flat lead and is much softer. It leaves a thick, dark line that covers more area with each stroke. This is a good choice for large boards, tabletops and doors, because it saves time. The soft lead also shows up well on dark or rough wood.
Both types work. Use a number 2 pencil for small, detailed or light-colored projects and a carpenter pencil for big flat jobs. Keep the lead sharp for a clean line, and do not press hard. You want a light scribble, not a deep groove in the wood.
One more thing. Stick to graphite. Do not use a pen or a marker, because the ink soaks into the wood and can be very hard to remove. It may even show up through your stain. Colored pencils and chalk can work in a pinch, but standard graphite is the safest and easiest to sand away.
The pencil trick works with almost any sanding tool. Your choice depends on the size of your project and how much material you need to remove.
For hand sanding, a flat sanding block is the best option. It keeps the paper flat and spreads your pressure evenly, which helps you sand a flat surface without making dips. You can attach the sandpaper with a bit of spray adhesive or just wrap it around the block. For curves and rounded edges, a flexible foam sponge or a pad that bends is a better pick.
For bigger jobs, an electric random orbital sander with a round disc is a great choice. It covers large areas quickly and gives an even finish. A belt sander is faster still and cuts hard, so it is good for rough work, but it needs a careful hand. If you use a belt sander, check your pencil marks often because it removes wood in a hurry.
Whichever tool you pick, use fresh sandpaper. A worn disc or a clogged sheet does not cut well, and the pencil marks will take forever to go away. Have a range of sandpaper grits on hand, usually 80, 120, 180 and 220. You will also need a clean rag or brush to wipe away dust, and a roll of painter’s tape if you want to protect nearby surfaces. 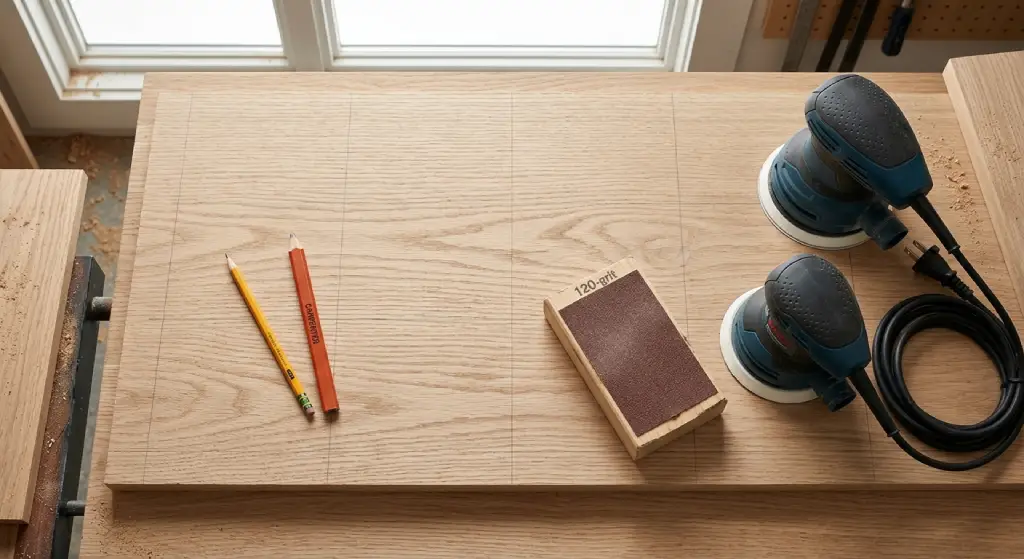
Now for the fun part. The process is simple, but each step has small details that make a big difference. Follow them in order for the best results.
Start with a clean, dry board. Brush off loose dust and any debris, since dirt makes it hard to see your marks. If the board came off a planer or a saw, take a moment to look at it first. You may see ridges from the planer or rough marks from cutting, and these are the things you want to remove.
Now scribble. Use a light touch and draw lines across the entire surface. A zigzag pattern or a series of close, parallel lines works well. You do not need to color in every inch. Aim for lines about half an inch apart, so you cover the whole board without wasting time.
Do not forget the edges and corners. These areas are easy to miss and often get uneven. Mark them too, and add a few extra lines near joints and glued seams where the surface is likely to be uneven.
If you are using a carpenter pencil, you can use wider spacing because each line covers more area. Keep your pressure light so the graphite does not dig into the grain.
Choose your starting grit. For rough wood or a surface with visible marks, begin with 80 grit. For a board that is already fairly smooth, you can start with 120. Then start sanding, working in the direction of the grain with steady, even pressure.
Keep your tool flat and keep moving. If you use an orbital sander, let the weight of the machine do the work and move it slowly across the board in overlapping rows. If you sand by hand, use long, smooth strokes with the block. Sanding in one spot too long will dig a dip into the wood, so spread your effort across the whole surface.
Check your progress after every few passes. Stop, wipe off the dust with a dry rag and look at the surface in good light. You will see the pencil lines fading in some areas and staying strong in others. The faded areas are done. The dark ones need more work.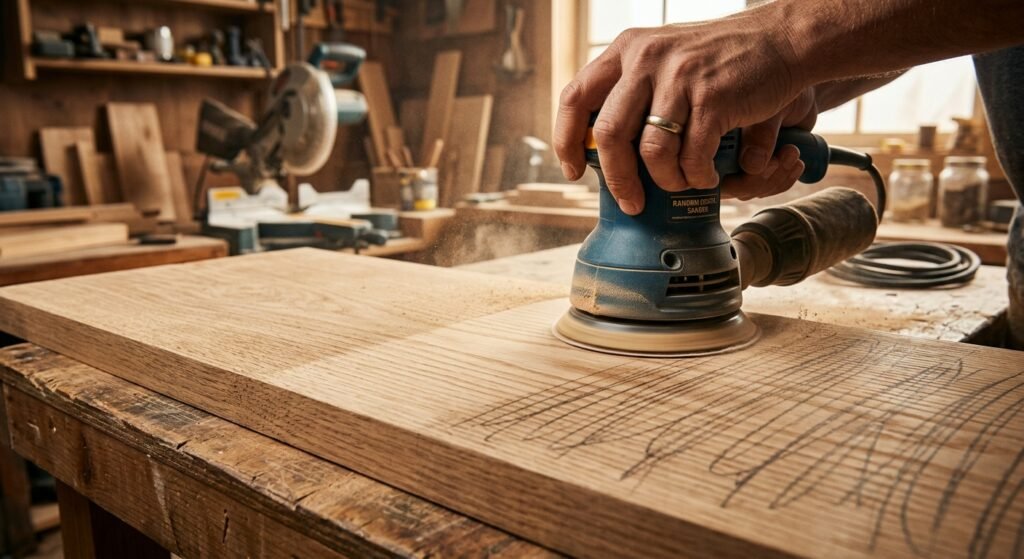
Keep sanding until the pencil marks are gone. This is the whole point of the trick. When the marks are gone from the entire surface, you have removed the top layer evenly and the wood is ready for the next grit.
Then repeat the process. Scribble a new set of pencil lines on the surface, switch to the next grit, such as 120, and sand again until the new marks vanish. Then do it again with 180 and finally 220. Each new set of marks shows you that the new, finer grit has fully replaced the scratches left by the one before it. This is where the trick really pays off, since a skipped patch from a coarse grit can leave deep scratches that no fine paper will fix.
A small tip for edges. Use painter’s tape to cover any nearby surfaces you want to protect, and be careful near corners, where a sander can round things over quickly. Hand sanding is often better right at the edges.
After you think you are done with a grit, take a close look. This is when you read the map your pencil made for you.
If the entire surface is clean, with no pencil marks left, you are good to go. Wipe off the dust and move on to the next grit.
If some marks are still there, look at where they are. Isolated patches or thin lines usually mean a low spot or a groove. 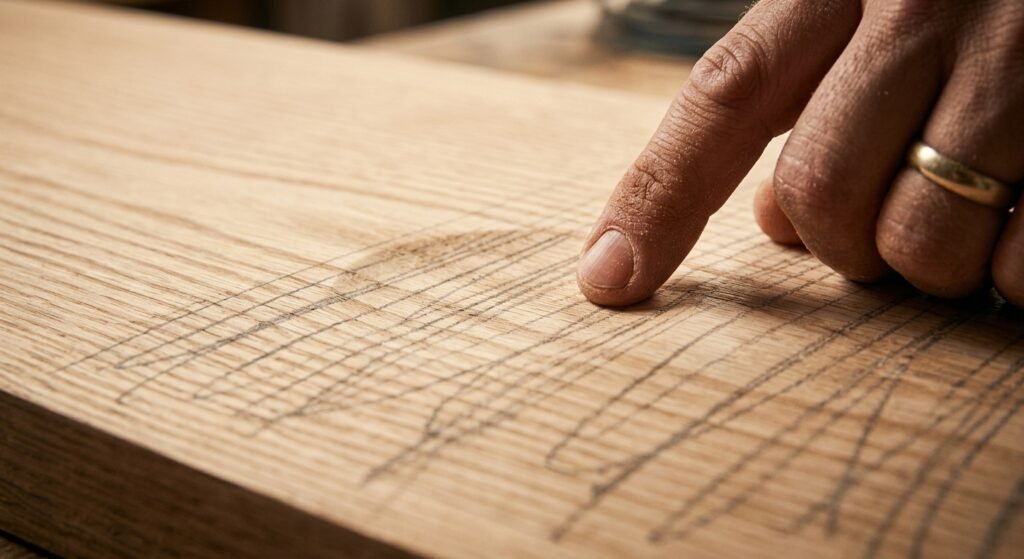 A band of marks near the edge may mean the surface is rounded or that you did not sand evenly near the border. Corners often hold pencil marks too, because machines miss them.
You have two choices. If the dip is shallow, you can keep sanding until the marks are gone, which will bring the rest of the surface down to the same level. This is fine for tiny flaws. If the dip is deep, sanding the whole board down to meet it would take away too much wood. In that case, you may want to fill the spot, use a plane or a scraper to level the high areas, or live with a small flaw.
Here is a real example. A woodworker glued up a tabletop from five boards. After the first pass with 80 grit, pencil marks remained along two of the glue lines. The boards were not quite level with each other. He used a hand plane to take down the high edges, sanded again and the marks vanished. Without the pencil, he would have missed the problem until the finish showed a ridge across the table.
When you finish, wipe the surface with a clean rag or a quick wipe with a barely damp cloth to lift the dust. Let it dry fully before you apply stain, paint or shellac. Leftover graphite can show up under a clear finish, so make sure the marks are completely gone.
The trick is easy, but the benefits are real. It improves your results and saves effort, and it takes almost no extra time. Here are the main reasons it is worth adding to your routine.
One of the biggest dangers in wood sanding is taking off too much. Over-sanding can ruin a project fast. Thin veneer can wear through in seconds, a sharp edge turns round and a flat panel gets a hollow in the middle. Once the wood is gone, you cannot put it back.
The pencil trick helps prevent this because it tells you when to stop. As soon as the marks are gone, you know that grit has done its job. You do not need to keep sanding just to be safe. That means less wood removed, fewer thin spots and a crisper shape on edges and details.
This matters even more with plywood and veneered boards, where the top layer is thinner than paper. It also matters on curved parts and carved grooves, where heavy sanding can wipe out a shape you worked hard to cut. On a curve, use a flexible pad or a sponge, and let the pencil marks show where your sanding is reaching.
The trick also keeps you from working one area too long. Because you see where the marks remain, you move your effort to those spots instead of sanding what is already done.
Moving through the grits in order is the key to a smooth, even surface. Each finer grit is supposed to remove the scratches left by the previous one. If you skip ahead before those scratches are gone, they stay in the wood and show up under stain as dark lines.
The pencil trick makes this step easy. When you mark the surface fresh before each grit, you see right away whether the new paper has covered every part of the board. When all the marks are gone, you can move on to the next grit with confidence. If you only sand until it feels smooth, you can easily miss a patch that still carries deep scratches from the coarse paper.
A good plan looks like this. Start with 80 grit to level the wood and remove cutting or planer marks. Move to 120 to remove the coarse scratches. Then use 180, and finish with 220 for a smooth surface that is ready for stain, paint or shellac. Scribble before each step and sand until the marks are gone. You will get better results with very little extra work.
The result is a more even surface that takes stain without blotchy patches. A well-sanded board looks better, feels better and holds a finish longer.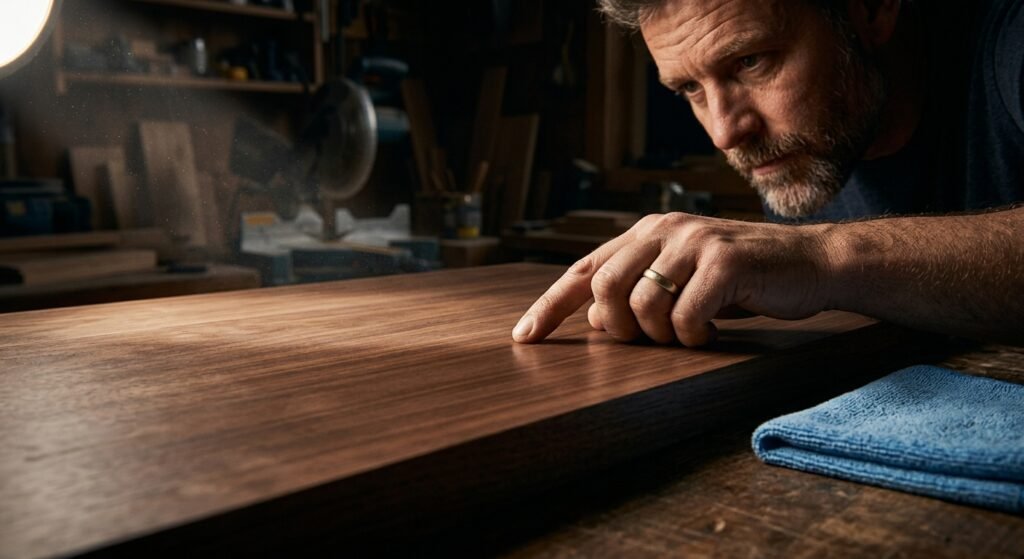
The pencil trick sanding method is one of the easiest tips in woodworking, and one of the most useful. A few light scribbles show you where you have sanded, where you missed and where the surface is not flat. That makes it easier to remove scratches, avoid over-sanding and move through the grits with confidence.
You do not need fancy equipment. A number 2 pencil, a block or sander and some sandpaper are all it takes. Mark the wood, sand until the marks are gone, check for low spots and repeat with each finer grit. Your finished piece will look cleaner and feel smoother.
Try it on your next project, even a small one. Grab a scrap board and see how the marks fade. If you have your own tips or tricks, leave a comment and share them with other woodworkers.
Yes. It works on softwoods like pine and hardwoods like oak and maple. On very dark wood, use a lighter colored pencil or chalk so the marks are easier to see. On rough or open-grain wood, the graphite may settle into the pores, so sand a little longer to clear it.
It is best not to. Ink and marker soak into the wood and are hard to sand away. They can bleed through stain or paint and ruin the finish. Stick with graphite, which sits on top of the wood and wears off easily.
Only if you leave them on the wood. The whole point is to sand until the marks are gone. After your final grit, wipe the surface with a clean rag to check that no graphite remains. A quick wipe with a barely damp cloth also helps lift any dust before you finish.
Yes, for the best results. Fresh marks before each grit show you that the new paper has reached every part of the surface. It only takes a few seconds and it keeps you from skipping spots. It is a small step that gives better results.
Yes, it works with all of them. With a belt sander, check your marks often because the tool removes wood fast. With an orbital sander, use steady, overlapping passes. For hand sanding, a block keeps the surface flat. Pick the tool that fits your project.
Light is better. You want lines that you can see but that sand away easily. If you press too hard, the graphite may sink into the grain and take a lot more effort to remove. A light scribble from a number 2 pencil is usually enough.
It does. On curved or grooved parts, use a flexible sanding sponge or a pad that bends with the shape. Draw your pencil lines along the curve and sand until they fade. This keeps you from sanding too much in one spot and flattening the shape.