Physical Address
304 North Cardinal St.
Dorchester Center, MA 02124
Physical Address
304 North Cardinal St.
Dorchester Center, MA 02124

You are halfway through a trim project, and the paint is already waiting. Then you reach the spot where the molding runs right up to an outlet. The wood is rough, the corner is tight and a small metal box sits an inch from your sandpaper. Most people either rush past this spot or skip it altogether, and that is when the problems start.
Learning how to sand moldings with sockets in the way takes a little patience, but it is not hard. You just need to put safety first, pick the right tools and sand by hand in small, careful strokes. This guide walks you through every step, from turning off the power to wiping away the last bit of dust. Whether you are refinishing old baseboards or installing new trim, you will get a clean, smooth result without damaging the wood or the wiring.
Sanding a long, open piece of trim is easy. You find a rhythm, move along the grain and finish in a few minutes. Things change the moment an outlet, a light switch or a wall socket is part of the picture. The space is tight, the shapes are odd and there is a real risk of hurting yourself or damaging something in the wall.
There are two main problems. One is safety, and the other is the shape of the work. Both need a plan before you touch the wood.
The biggest danger is electricity. Even when the faceplate is on, a socket may have live wires just behind it. If you remove the cover or poke around the opening with a tool, you can touch a live terminal by accident. A metal sanding tool, a damp cloth or even a scrap of foil-backed paper can create a path for electricity. That can cause a shock, a burn or a short circuit.
Sanding dust is another hazard that people forget. Fine wood dust can drift into the open box and settle on the wiring. In large amounts it can be a fire risk, and it can also get into the outlet and cause poor contact over time. Paint dust and old finish dust may carry harmful materials as well, especially in older homes.
Then there are the sharp edges of the electrical box. Metal boxes often have rough or bent edges where the wall meets the opening. When you reach in with your hand, a corner can cut your finger in a second. Plastic boxes are safer, but their edges can still crack or chip if you press too hard.
For all of these reasons, one rule matters above all others. Never sand near an outlet unless the power is off and you have checked that it is off. Do not skip that step, even for a quick job.
The second challenge is the wood itself. Moldings are rarely flat. They have curves, ridges, grooves and rounded edges, and where they meet a socket the shapes get even more complicated. The trim may be notched, cut at an angle or pushed tight to the box. You often have only a few inches of room to work with.
A power sander does not fit in these spots. It is too big and too fast, and a small slip can chew a groove into the wood or round over a sharp line. Even a small piece of sandpaper held in your fingers can leave dents if you press too hard on one spot.
A friend of mine learned this the hard way. He tried to use a small detail sander on a baseboard that ended at a wall outlet. The corner of the pad caught the edge of the cutout and left a deep gouge in the wood. He had to fill it, sand it again and repaint the whole piece. A few minutes of hand sanding would have done the job.
The lesson is simple. Near sockets, go slow, go by hand and use tools that bend to the shape of the wood.
This is the most important section of the guide. Skipping these steps is not worth the risk. They take about ten minutes, and they protect both you and your home.
Start at the breaker box, which is the main electrical panel in your house. Find the breaker that controls the room where you are working. Panels are usually labeled, but labels can be wrong or missing, so do not trust them completely.
Flip the breaker to the off position. If you are not sure which one is right, turn off the main breaker for the whole house. It is a small hassle, but it is the safest option.
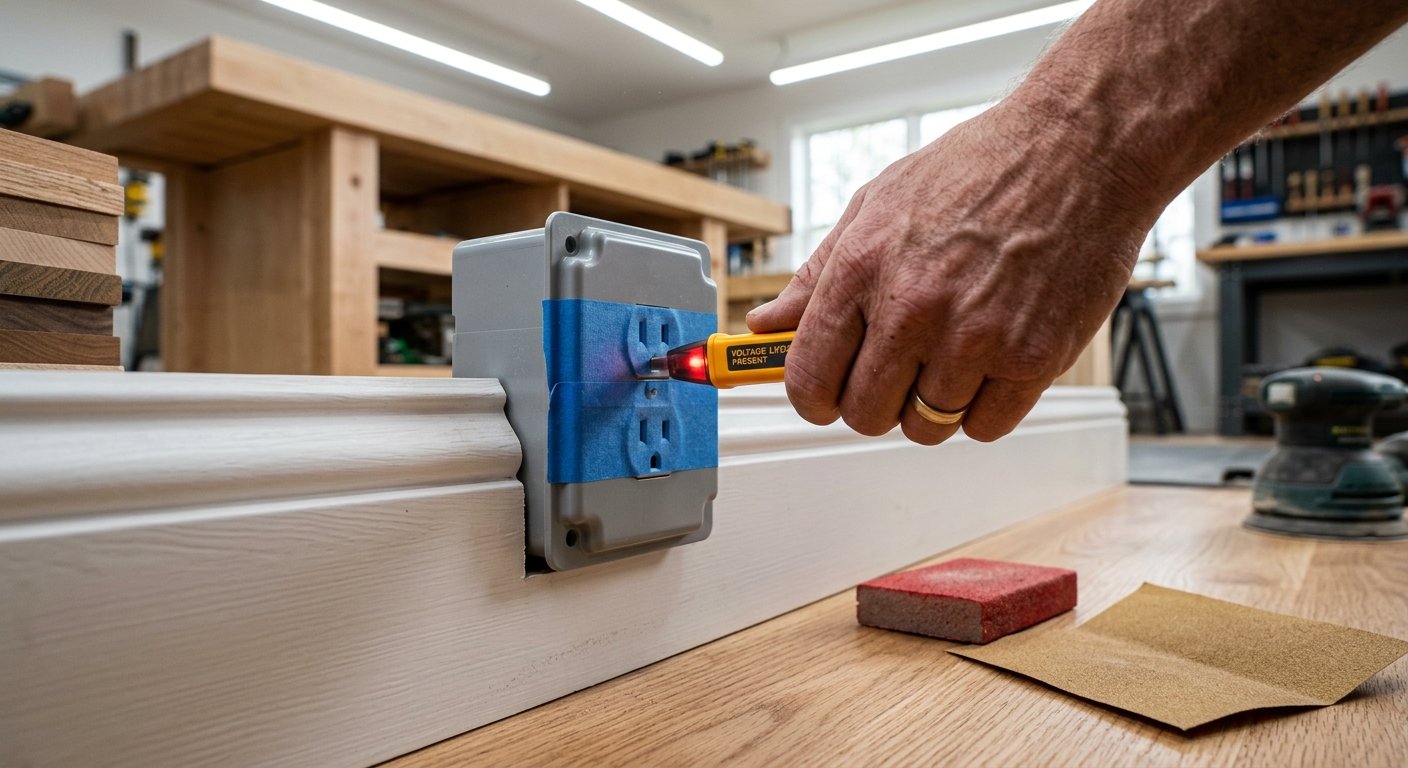
Now test. Go back to the room and plug a lamp or a small radio into the outlet. If it does not turn on, that is a good sign. Even better, use a non-contact voltage tester. This is a cheap pen-shaped tool that beeps or lights up when it senses electricity. Hold it near each socket and switch in the work area. If it stays quiet, the power is off.
Test the tester first on a socket you know is live, so you can be sure it works. Then check the sockets you plan to work around. Some rooms have outlets on more than one circuit, so check every one.
Leave a note on the breaker panel, such as a piece of tape with the words “Do not turn on.” This stops someone else in the house from flipping the power back on while you are working. If you can, work in daylight, or use a battery-powered lamp since the room lights may also be off.
With the power off, take off the faceplate. This is the plastic or metal cover that sits over the outlet. Use a screwdriver to remove the center screw or the two side screws, and set the cover and the screws in a small bowl so they do not get lost.
Now look at the receptacle, which is the part with the slots where you plug things in. Do not touch the wires or the metal terminals on the sides. Leave the receptacle screwed to the box. If you have to move it, you may need an electrician.
The next step is to protect it. Cover the receptacle with painter’s tape. Press the tape down over the whole face, including the slots. This keeps dust, paint and small chips of wood out of the openings. 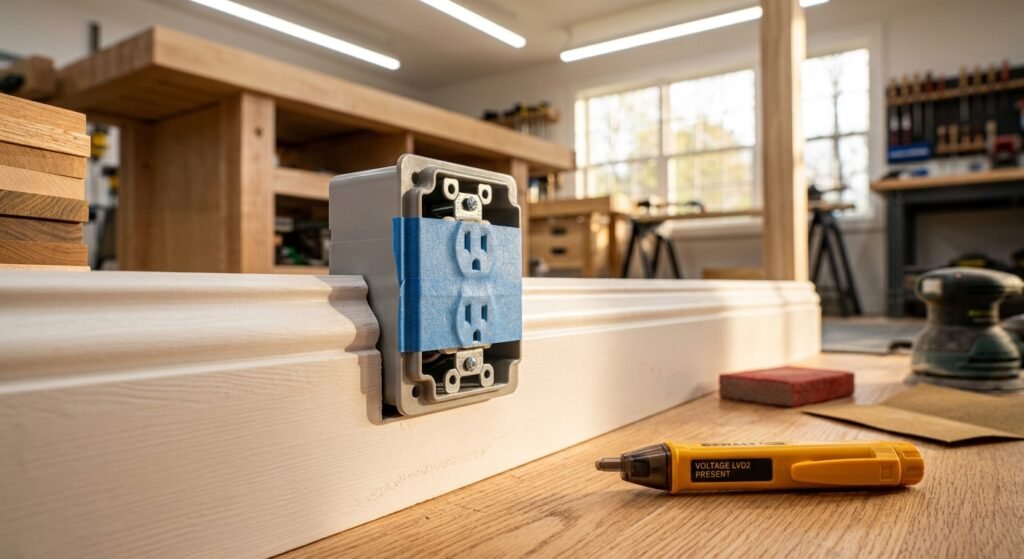 For the gap around the electrical box, you can tuck a strip of tape or a small piece of cardboard along the edges.
If you remove the faceplate, you will also be able to sand and paint the molding right up to the edge of the box. This gives a much cleaner result than trying to work around the cover. It is also a good time to look at the opening. If the wall around the box is cracked or the box looks loose, make a note and fix it before you finish.
One more safety point. If your home was built before 1978, the paint on the trim may contain lead. Test it with a lead test kit before you sand. If it tests positive, stop and follow safe practices for lead paint, or hire a professional. Sanding lead paint creates dust that is very harmful, especially to children and pregnant women. Wear a proper dust mask rated for fine particles for all sanding jobs, and goggles to protect your eyes.
You do not need a lot of tools for this job. In fact, simple tools work best. The goal is to reach into tight spaces and follow the shape of the molding without cutting into it.
A sanding sponge is the first tool to reach for. It is a block of foam with sand grit on the surface. Because it is soft, it bends to fit curves and rounded edges. It is perfect for the contoured parts of a molding and for edges near the electrical box. You can also rinse many sponges and reuse them, though you should only do that away from the outlets and with the power off.
A contour pad, or a flexible foam pad, works much the same way but is thinner. Wrap a piece of sandpaper around it and push it into the groove or curve. These pads come in different shapes to match common molding profiles. If you have a simple rounded edge, a small foam block works well.
A detail block has a small, flat or pointed shape that fits into corners. Some are triangle-shaped and some have a narrow edge for grooves. They are very helpful at the end of a run of trim, where it meets a socket and the corner is too tight for your fingers. You can also use a dowel or a paint stirrer wrapped with sandpaper to reach tiny spaces.
If you want to protect the sharp edge of the electrical box, you can add a layer of painter’s tape or a thin strip of cardboard along it. That keeps the sandpaper from scraping the metal and keeps your fingers safe as well.
A few extras are worth having. A soft brush or an old paintbrush lifts dust out of grooves. A small vacuum with a brush attachment sucks up the rest. A clean, dry cloth or a tack cloth is handy at the end. And a work light helps you see fine scratches and rough spots.
Leave the power sander in the garage for this job. A random orbital sander or a belt sander is too large and too aggressive for the area around a socket, and the dust it throws will go straight into the outlet opening.
Grit tells you how rough the sandpaper is. A low number is coarse and removes wood fast. A high number is fine and leaves a smooth surface. The right plan moves from coarse to fine, and each step removes the scratches left by the one before.
For most trim that has old paint or a rough surface, start with 120 grit. This is coarse enough to remove drips, bumps and rough spots without cutting too deep. If the wood is in very rough shape, or you need to remove a lot of old finish, you can begin with 80 grit, but use a light hand near the socket.
Next, move to 150 or 180 grit. This step removes the scratches from the first pass and gives the wood a smooth, even feel. For painted trim, you can often stop around 180 or 220 grit. For stained wood, finish with 220 grit so the stain goes on evenly without dark scratches.
If you add a coat of primer or paint, give it a light sanding with 220 or even 320 grit between coats. This knocks down any bumps and helps the next coat go on smoothly. Use very light pressure and a sponge near the edges so you do not cut through the paint.
A good rule is to never skip more than one step in the grit order. Jumping from 80 straight to 220 leaves deep scratches that the fine paper cannot remove. Take your time and let each grit do its job.
Now that the power is off and the area is protected, you are ready to sand. Follow these three steps in order. Work slowly, and check your progress often. Good light helps a lot here.
Start by looking closely at the area where the molding meets the socket. Check the cutout, which is the notch in the trim that fits around the electrical box. See if the edges are rough, split or uneven. Also look for gaps between the molding and the box, and between the trim and the wall.
If you see a crack or a gap, fill it before you sand. Use a good wood filler for bare wood, or a paintable caulk or spackle for painted trim. Push the filler in with a small putty knife, keep it away from the wires and the box, and smooth it flat. 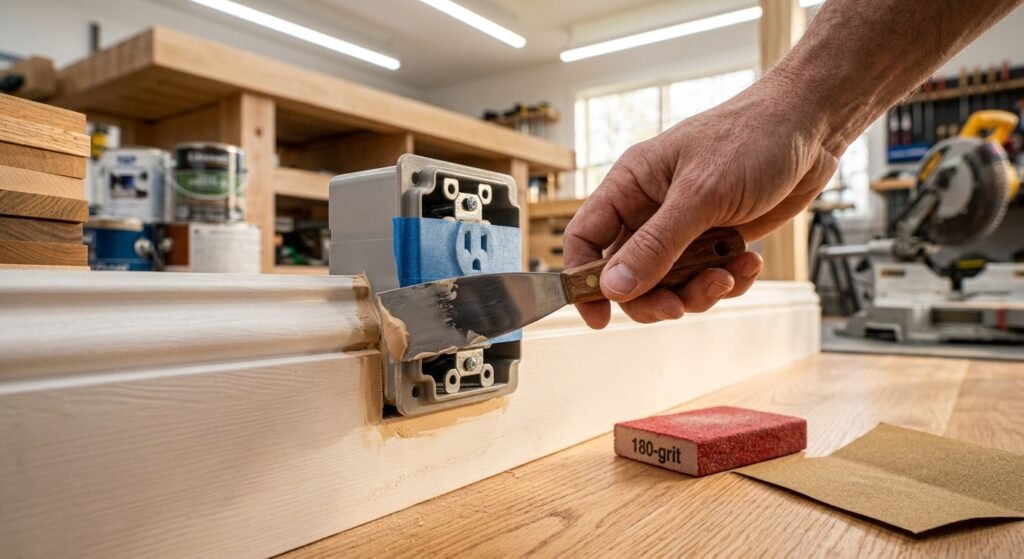 Be careful not to let the filler get inside the box or on the receptacle. Your tape should help block it.
Let the filler dry fully. Most fillers need at least an hour, and thick fillers take longer. Read the label for the dry time. If you sand too early, the filler will smear and clog your paper.
Once it is dry, use a small piece of 120 grit paper on a flat block to level the filler with the rest of the surface. Sand lightly, and stop as soon as it feels flush. If the cutout edge is rough, give it a gentle pass with a folded piece of sandpaper to remove splinters. Take care not to round it too much, since a clean, sharp edge gives a neat fit around the faceplate.
Here is a quick tip. After filling, run your finger along the joint. If you can feel a bump or a ridge, sand a bit more. If you can feel nothing, you are done. Your fingers are better at finding flaws than your eyes.
Now comes the main sanding work. Take your sanding sponge or contour pad and begin with the coarser grit. Sand with the grain of the wood, which usually runs along the length of the molding. Sanding against the grain leaves scratches that show up under paint and stain.
Use light pressure. Let the sandpaper do the work. Pressing hard does not make the job faster, and it is the main cause of gouges and flat spots on a curved edge. Move the sponge in short, smooth strokes along each curve, and follow the shape of the molding.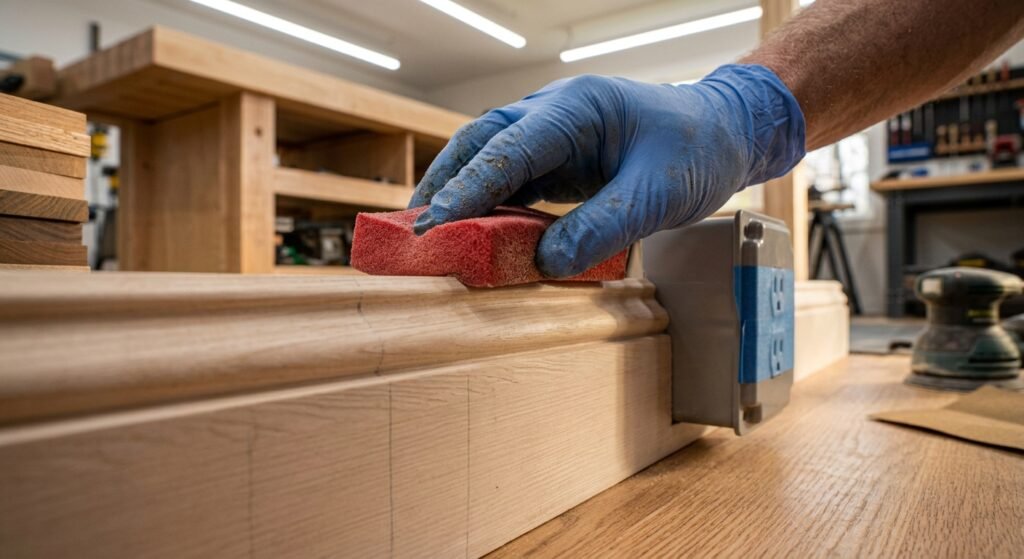 For grooves, fold the paper and use the edge, or wrap it around a dowel.
When you get close to the socket, slow down even more. Keep your hand away from the box, and use the sponge only on the wood. If you need to get into the corner where the trim meets the box, use a small detail block or a folded piece of paper held with your fingertips. Try to sand away from the box, not toward it, so that if your hand slips you move away from the opening.
After the first pass, check the surface. Run your fingers over the wood and look at it from the side under a bright light. You should see an even, dull surface with no shiny spots, drips or rough patches. If you still see old finish or bumps, make another pass.
Then switch to the next finer grit and repeat. Go to 150 or 180, then to 220 for stain. A neat trick is to draw light pencil lines on the molding before each grit. When the marks are gone, you know the new paper has done its job. This is a great way to make sure you did not miss any spots near the socket.
For the very last pass near the outlet, use a fine sanding sponge or a worn piece of 220 paper. This gives a soft, smooth edge that takes paint beautifully.
Dust is the enemy of a good finish. If it stays on the wood, it will mix with the paint or stain and leave rough spots and tiny bumps. Around a socket it is even more important to clean well, since dust can settle inside the box.
Start with a soft brush to sweep the dust out of grooves and corners. Brush away from the outlet, not toward it. Then use a vacuum with a brush attachment to pick up the rest. Hold the nozzle a few inches from the receptacle so you do not pull loose the tape or touch any metal.
Next, wipe the wood with a clean, dry cloth or a tack cloth. A tack cloth is slightly sticky and lifts the finest dust. Do not use a wet rag near the socket. Water and electricity do not mix, and even with the power off, a damp cloth can push moisture into the box. If you need to use a slightly damp cloth on the wood further away, wring it out well and keep it clear of the outlet area.
Check your work one last time with a flashlight held at a low angle. If you see any dust, scratches or rough spots, fix them now.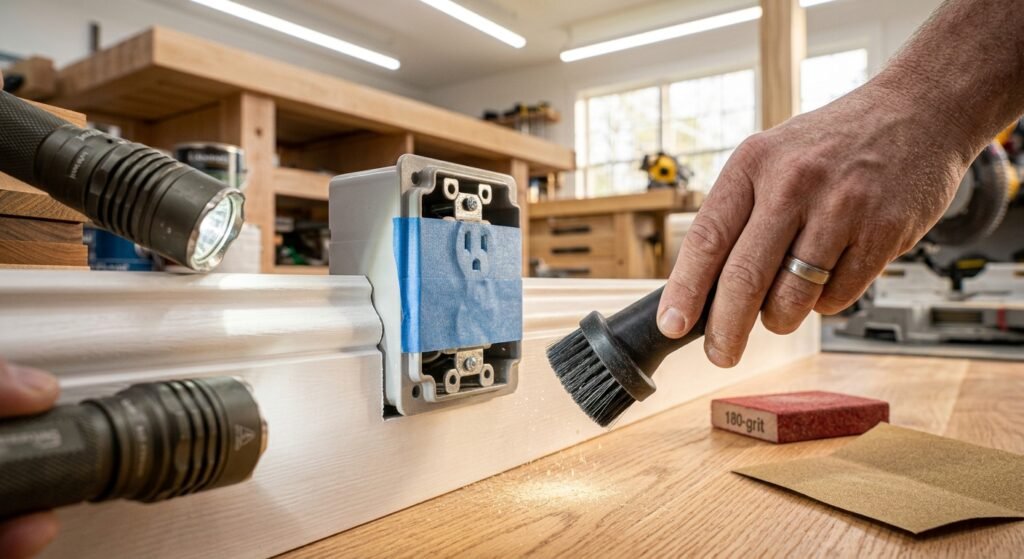
When you are fully done, take off the painter’s tape slowly, and make sure no bits of tape or dust fall into the box. Then paint or stain the trim, let it dry fully and put the faceplate back on. Only after the covers are in place and the paint is dry should you go back to the breaker box and turn the power on. Test the outlet with a lamp to make sure it works.
Sanding trim near an outlet takes more care than a plain piece of wood, but it is a job anyone can do. The key is to turn off the power, test it, protect the receptacle and sand by hand with flexible tools. Fill gaps before you start, move through the grits one at a time and finish by cleaning away every bit of dust.
Do not rush the work. A few extra minutes near the socket will give you clean lines, a smooth finish and a safer project. If you ever feel unsure about the wiring, stop and call a licensed electrician. It is always better to ask for help than to take a risk.
Now it is your turn. Grab some sponges, tape and sandpaper, and give it a try on your next trim project. If you have your own tips for working around outlets, share them in the comments and help other DIY readers.
Yes. Even if you do not plan to touch the wires, it is the safest way to work. Dust, tools and your hands can all come close to live parts by accident. Turn off the breaker, test the outlet and only then start. It takes a few minutes and removes the biggest risk.
It is best not to. Power sanders are too big for tight spots, and they can gouge the wood or hit the box. They also blow dust everywhere, including into the outlet. Use a power sander on the open parts of the trim if you like, and switch to hand sanding as you get near the socket.
Yes, with the power off. Taking off the faceplate lets you sand and paint the molding all the way to the box, and it keeps the cover free of dust and paint. Cover the receptacle with painter’s tape while you work, and put the faceplate back only when everything is dry.
Start with 120 grit for rough wood or old paint, then move to 150 or 180. Finish with 220 grit if you plan to stain. For sanding between coats of paint, use 220 to 320 grit. Do not skip too many steps, or you will leave scratches behind.
Protect the wall with painter’s tape along the edge of the trim. Use a small detail block or a sponge folded to a point, and sand in short strokes along the grain. Keep light pressure and check often. A thin piece of cardboard held against the wall also works as a shield.
It is better to use a dry cloth, a soft brush or a vacuum near the outlet. Water can get into the box and cause damage or a shock once the power is back on. If you must use a damp cloth, wring it out well and keep it far from the electrical box.
If your house was built before 1978, test the paint first with a lead test kit. If lead is present, do not dry sand it. Follow safe lead paint practices or hire a certified professional. Lead dust is very harmful, so it is not worth the risk.