Physical Address
304 North Cardinal St.
Dorchester Center, MA 02124
Physical Address
304 North Cardinal St.
Dorchester Center, MA 02124

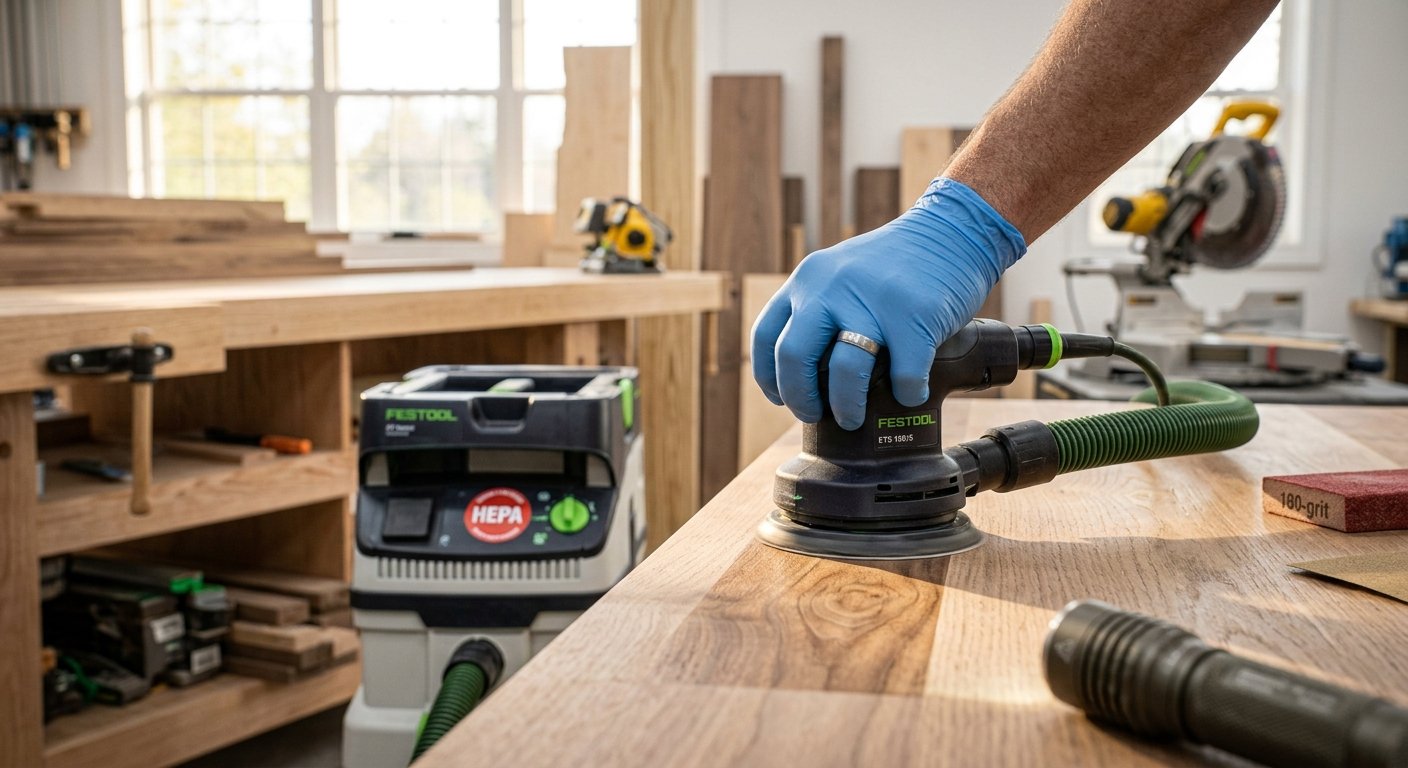
You finish a sanding job, and the whole shop looks like it snowed. A pale layer sits on the bench, the tools, your clothes and even the coffee cup you forgot to cover. Worse, you can taste it in the back of your throat. If that sounds familiar, you are not alone, and you are also not helpless.
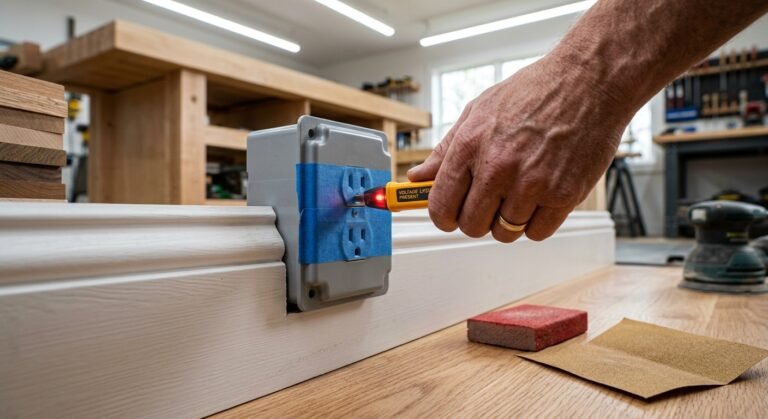
Learning how to collect dust when sanding is one of the best upgrades you can make to your workshop. It keeps your lungs safer, your finish cleaner and your cleanup much shorter. If you have already read our guide on how to sand moldings around electrical sockets, you know how easily dust drifts into places it should not go, like outlet boxes and tight corners. The same lesson applies to the whole shop. In this guide you will learn why capturing dust matters, which tools work best and how to set up both power sanding and hand sanding so most of the mess never leaves the surface.
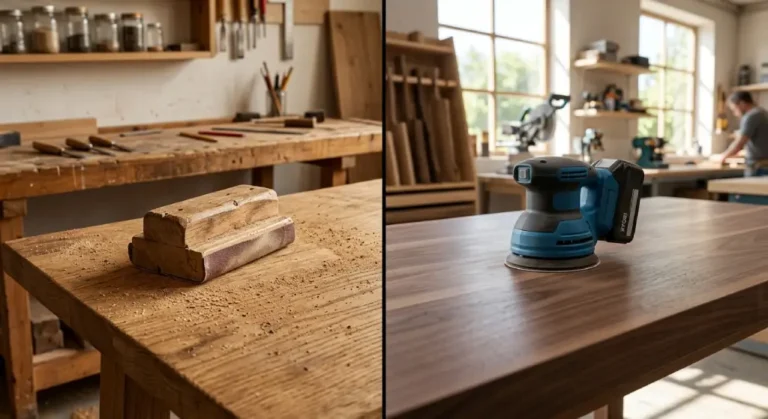
Many people treat dust as a cleanup problem. They sweep it up at the end of the day and move on. But dust is more than a mess. It affects your health, your tools and the quality of your work, and the worst part is that you cannot always see it happen.
The dust you see on the bench is the easy part. The dangerous part is the dust you cannot see. Sanding breaks wood into very small pieces, and the finest ones stay in the air for hours. Scientists call particles smaller than 2.5 microns PM2.5. They are about thirty times thinner than a human hair, and they slip past the natural filters in your nose and throat and settle deep in the lungs.
Over time this can cause coughing, wheezing, sore eyes and trouble breathing. Some wood dust can also trigger allergies and asthma. Certain hardwoods, such as oak, beech and exotic species, are linked to a higher risk of nose and sinus problems with long exposure. Health agencies treat hardwood dust as a known cancer risk for people who work around it for years.
A woodworker I know spent decades sanding in a small garage with just a paper mask. In his fifties he started to get constant coughs and a stuffy nose. His doctor told him it was likely from years of breathing fine dust. He now uses a dust extractor, wears a proper respirator and runs an air cleaner, and he says the difference was clear within a month.
Also think about what you are sanding. Old paint can contain lead, and some boards are treated or glued with chemicals. Sanding these materials can release harmful dust. Collecting it at the source is the best way to keep it out of the air you breathe.
A good setup works in layers. Collect most of the dust at the tool, filter the air in the room and wear a mask or respirator rated for fine particles as backup. No single step does everything, but together they keep your lungs much safer.
Dust collection is not only about health. It also helps your sandpaper last longer and gives you a better finish.
When dust stays on the surface, it gets trapped under the sandpaper. Those loose bits act like tiny rocks, and they can scratch the wood in random directions. This is a common cause of swirl marks, deep scratch lines and little curly marks that people call pigtails. These flaws are hard to see on bare wood but show up badly once you apply stain or a clear finish.
Dust also clogs the paper. The grit on a sanding disc is made to cut wood. When the spaces between the grains fill with dust, the paper stops cutting and starts rubbing. This makes heat, burns the wood and wears out the disc much faster. Clogged paper is one of the biggest reasons people think their sandpaper is cheap and weak when the real problem is dust.
With good dust extraction, the dust is pulled away as you sand. The paper stays cleaner and cooler, cuts faster and lasts longer. You may find that a disc lasts two or three times as long. Over a year, that saves real money, and it saves time because you change discs less often.
The surface also stays cleaner. Without extraction, dust settles back onto the board and gets pressed into the grain, especially on open-pored woods like oak and ash. Then it shows up under the finish as dull patches. A cleaner surface means you spend less time wiping, and your stain or paint goes on smoother.
You do not need a huge budget or a factory-size system. A few well-chosen tools can capture most of the dust from a home shop. The key is to match the equipment to the kind of work you do.
The most common starting point is a shop vacuum. It is affordable, easy to find and works with most sanders. A shop vac has strong suction, which is great for picking up chips and debris. The downside is that its filter is often basic. Fine dust can clog it quickly or even pass right through, and then blow back into the room.
A dedicated dust extractor is built for the job. It looks like a shop vac but is designed for use with power tools. It moves more air, handles fine dust better and often has a self-cleaning filter that shakes loose dust off automatically. Many models also turn on and off with the tool, so the vacuum starts the moment you begin sanding. That small feature saves a lot of frustration.
The most important feature is the filter. A HEPA filter captures at least 99.97 percent of particles as small as 0.3 microns. This is the standard you want for sanding, because the finest dust is the most harmful. Look for a vacuum or extractor that says HEPA on the label, or at least a high-quality filter rated for fine dust. A cheap paper filter or a bag with large pores will let the worst dust escape.
A smart trick is to add a cyclone separator between the hose and the vacuum. This is a small bucket-style device that spins the air and drops most of the dust into a bin before it reaches the filter. The filter stays cleaner, suction stays strong and you spend less money on replacement filters.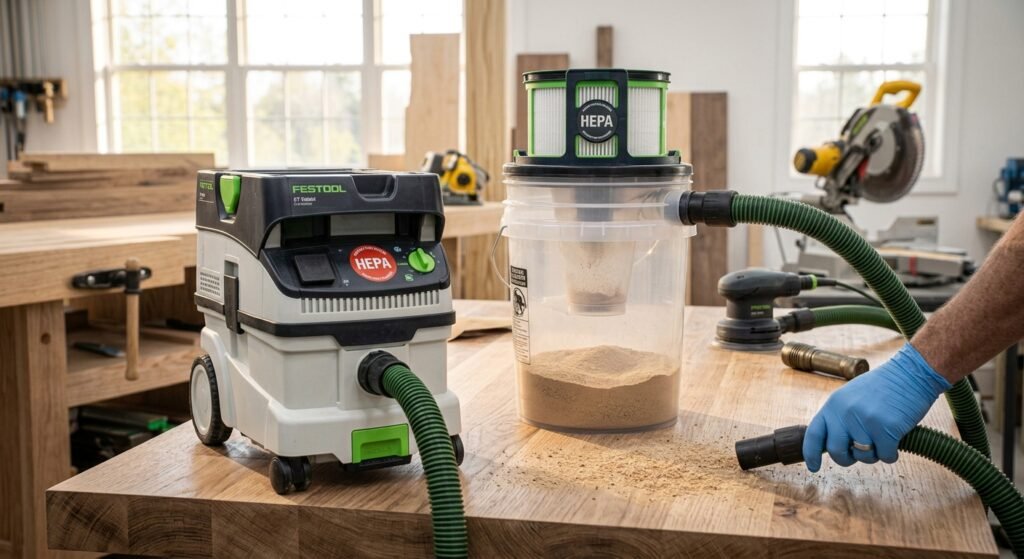 It is a cheap upgrade that makes a big difference.
So which should you choose? If you sand now and then, a good shop vac with a HEPA filter and a cyclone will do the job. If you sand every week, or you work with fine woods or old paint, a dedicated extractor is well worth the extra money.
Even a good vacuum cannot catch every speck, especially when you hand sand or work on large pieces. That is where other tools come in.
A down-draft table has a perforated top. A fan or a vacuum pulls air down through the holes, so dust is sucked away from your face and into a filter or collection box. You place the workpiece on top and sand as usual. The dust falls down instead of rising up. These tables work well for small and medium parts such as drawers, boxes and trim pieces. They are also great for hand sanding, since you do not need a tool with a vacuum port.
An overhead air filtration unit is a different kind of tool. It hangs from the ceiling or sits on a shelf and filters the air in the whole room. It pulls in dusty air, cleans it through filters and sends clean air back out. It will not catch the dust at the source, but it removes the fine particles that escape. Run it while you work and for at least thirty minutes afterward, since fine dust stays in the air long after you finish sanding.
The best approach is to combine tools. Use a vacuum at the sander to catch most of the dust, a down-draft surface for small parts and an air cleaner to clear the leftovers. Add a good mask, and you have a strong system for any shop, large or small.
Most modern power sanders have a dust port, which is a small opening where you can attach a hose. Hooking it up is not hard, but a poor connection can ruin your results. A loose fit or a mismatched hose lets dust leak out and reduces suction.
The biggest challenge is that sanders and vacuums use different hose sizes. A random orbital sander may have a small port around 1.25 inches wide, while a shop vac hose may be 2.5 inches. Brands also differ from one another. A direct connection often does not fit.
This is where universal hose adapters help. These are stepped or tapered rubber cuffs that fit a range of sizes. You can push one onto the sander port and then press the vacuum hose into the other end. Many kits come with several sizes, so one set may cover all your tools.
When you shop for adapters, measure your sander port and your hose first. Take the numbers with you or write them down. Look for adapters made of flexible rubber or soft plastic, since they seal better than hard plastic. A good adapter should fit snugly and stay in place when you move the sander around.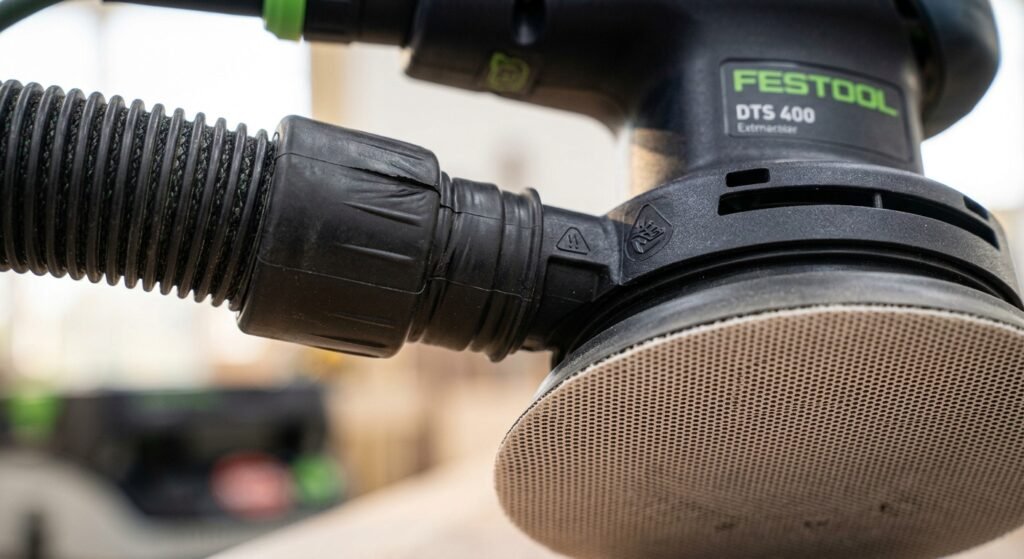
If there is a small gap, wrap a layer of tape around the joint. Painter’s tape or duct tape works fine. Air leaks may seem small, but they reduce suction a lot. Test the setup by running the vacuum and putting your hand near the connection. If you feel air pulling in, there is a leak.
Also choose a hose that is the right size. A thinner hose, around 1.25 inches, is lighter and easier to handle with a small sander. A wider hose moves more air but can be heavy and stiff. Many woodworkers keep a thin hose for sanding and a wide one for bigger tools.
One more tip. Check that the holes in your sanding discs line up with the holes in the sander pad. If they do not match, dust cannot get through. Buy discs made for your sander, or use a brand that fits your pattern.
Here is something that surprises many people. When dust and air rush through a plastic hose, they build up static electricity. Over time the hose can hold a charge, and you may feel a small zap when you touch it or the tool. It is usually harmless, but it can be startling when you are holding a running sander, and it can make you drop the tool.
The bigger concern is that static sparks near fine dust can be a fire risk in rare cases. This is more of an issue in large dust collection systems, but it is still a good reason to take static seriously.
An anti-static hose is the fix. It has a thin wire built into the wall, which carries the charge away. For the best result, connect that wire to the tool or the vacuum, and use a hose and vacuum made to work together. Many extractors sold for sanding already come with a hose like this.
If you do not have one, there are simple steps that help. Keep your hose short, since a longer hose builds more static. Use a rubber or conductive hose when you can. Do not coil the hose in a tight loop. Working in very dry air makes static worse, so a little humidity in the shop can help.
None of this is a reason to avoid dust collection. A small static zap will not hurt you, and a proper hose makes the whole setup safer and more pleasant to use.
Not every job calls for a machine. A lot of fine work is done with a block and a sheet of paper, and this is where dust often gets worse. Hand sanding does not have a built-in vacuum port. Still, you have good options.
You can build a simple down-draft box in an afternoon with scrap material. It works like a small version of a down-draft table and costs very little.
Start with a sturdy box made from plywood or MDF. A size of about 20 by 24 inches and 6 inches deep is good for most small projects. Make sure the sides and bottom are sealed well, because gaps leak air and weaken suction. Wood glue and a bit of caulk along the seams do the job.
Cut a round hole in one side or the bottom that fits your vacuum hose, and add an adapter if needed. Then make the top. Use a sheet of pegboard or drill a grid of holes about a half inch wide and two inches apart in a piece of plywood. This is the surface where you place your work. You can also lay a piece of perforated sheet over the top to protect it.
To use the box, connect the vacuum hose and turn it on. Place your workpiece on the top and sand. The vacuum pulls the dust through the holes and into the hose, and the box acts like a dust trap. 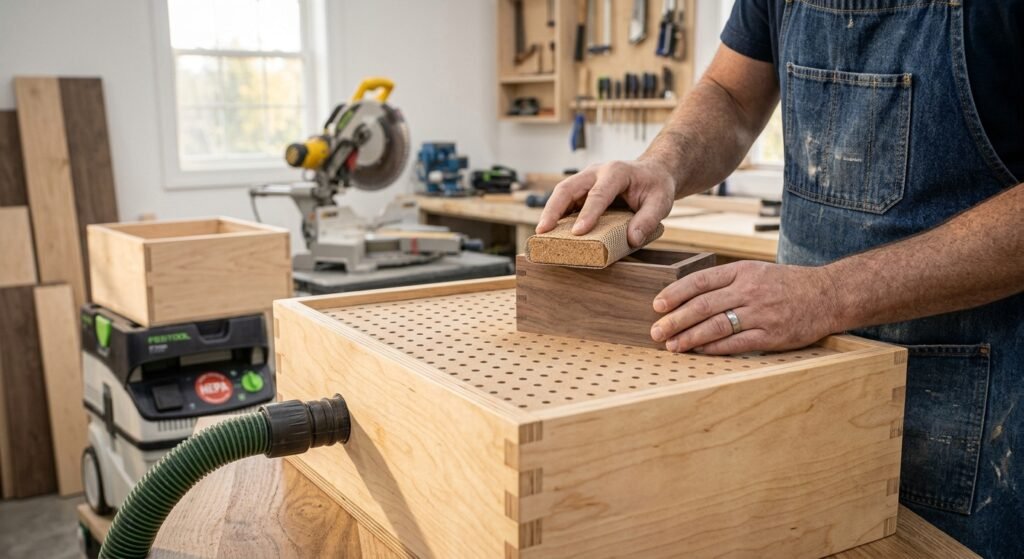 If the piece is small and light, it may stick to the top from suction, which is actually helpful because it holds the work steady.
Make a few improvements to get the best results. Add a lip around the edge of the top to keep tools from sliding off. Put a strip of rubber or foam around the sides so air does not leak. For wide boards, cover the unused holes with tape so that the suction stays focused on the area where you sand. Many hobby woodworkers build one of these and wonder why they waited so long.
This box also works well for small trim pieces, picture frames and cabinet doors. When you work near an outlet or in a spot where dust control matters, it keeps the area much cleaner.
The kind of abrasive you use also affects how much dust you collect. Standard sandpaper has a solid backing, so dust piles up on the surface or gets trapped under the paper. Even discs with holes only pull dust through a few spots.
Mesh abrasives, also called net sanding discs or sheets, have an open weave like a screen. The grit is bonded to the net, and the whole surface lets air pass through. When you connect a vacuum, dust is pulled away across the entire face, not just at a few holes.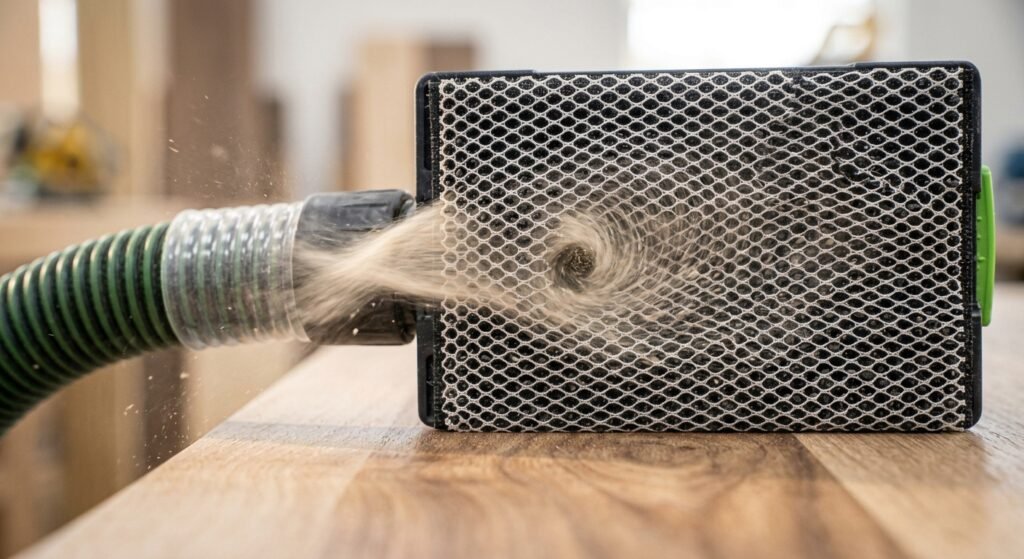 This keeps the paper cleaner, so it cuts better and lasts longer.
Mesh abrasives have other benefits. They clog much less, which means you do not have to change them as often. They stay cooler, which prevents burn marks. They also work well on painted surfaces and drywall, where regular paper clogs quickly. Many users find that one mesh disc outlasts several regular ones.
There are a few trade-offs. Mesh costs more per piece, though it often saves money in the long run. It also works best with a vacuum. Without suction, you lose much of the advantage. And some people find that mesh gives a slightly softer feel at the finest grits, so they finish with a regular sheet for the final pass.
Standard sandpaper still has its place. It is cheap, easy to find and works well for quick jobs and small details. For hand sanding with a block, you can find mesh sheets that wrap around a standard block. Some sanding blocks also have a port for a vacuum hose.
A good rule is to use mesh for big, dusty jobs and when you have a vacuum connected, and standard paper for small, quick tasks. Try both on a test board and see which you like better.
Dust may seem like part of the job, but it does not have to be. A little planning keeps the air cleaner, your lungs safer and your work looking better. Start at the source with a good vacuum or extractor with a HEPA filter. Use the right adapter and an anti-static hose for power sanders. Build a simple down-draft box for hand sanding, and think about mesh abrasives for the big jobs. Finish with an air cleaner and a proper mask.
You do not need to do everything at once. Pick one upgrade this week, such as an adapter or a cyclone, and see how it feels. Then add another when you are ready. Small steps add up to a much healthier shop.
Ready to try it? Hook up your vacuum to your sander on your next project and notice the difference. And if you have your own dust collection tricks, share them in the comments to help other woodworkers.
It is not a good idea. Household vacuums have small filters that clog quickly with fine dust, and the dust can pass through and blow back into the room. They can also overheat. Use a shop vac or a dust extractor with a good filter instead.
Yes. Even a very good system does not catch everything. Some fine dust always escapes into the air, especially when you change discs or empty the bin. Wear a mask or a respirator rated for fine particles as backup.
A HEPA filter is the best choice because it captures very small particles. If your vacuum does not have one, look for a high-quality fine dust filter. Pair it with a cyclone separator to keep the filter clean and the suction strong.
The most common causes are a clogged filter, a leaky hose connection or mismatched sanding discs. Check that the holes in your disc line up with the pad. Empty the vacuum, clean the filter and seal any gaps with tape. A hose that is too long or kinked also hurts suction.
Yes, especially fine dust that stays in the air. It can irritate your nose, eyes and lungs, and long exposure to some hardwood dust is linked to serious health problems. Good dust collection and a proper mask lower the risk a lot.
For many people, yes. They clog less, last longer and work well with a vacuum. If you sand often or do big jobs, they usually save money over time. For small, occasional work, regular sandpaper is fine.
Run it for at least thirty minutes after you finish, and longer in a small closed shop. Fine dust can hang in the air for hours, so give the filter time to clean it out. Keep a door or window open if you can.