Physical Address
304 North Cardinal St.
Dorchester Center, MA 02124
Physical Address
304 North Cardinal St.
Dorchester Center, MA 02124
Cutting tiles looks simple until you try it. One wrong move, and you’ve got a cracked tile, jagged edges, or a pile of expensive waste. That’s where a good tiles cutter comes in. Whether you’re laying a new bathroom floor, refreshing your kitchen backsplash, or tackling a full home renovation, the right tile cutter can make the difference between a clean, professional finish and a frustrating afternoon.
This guide walks you through everything you need to know about tiles cutters. You’ll learn what they are, how they work, the different types available, and how to pick the best one for your project. We’ll also cover floor tile types, step-by-step cutting techniques, and answer the most common questions people ask. By the end, you’ll feel confident choosing and using a tile cutter, no matter your skill level.
A tile cutter is a specialized tool designed to cut ceramic, porcelain, glass, and stone tiles with accuracy and clean edges. Manual tile cutters use a score-and-snap mechanism for quick, straight cuts, while electric tile cutters use a diamond blade to cut harder materials and create precise straight, angled, or curved cuts. Choosing the right tile cutter depends on the tile material, thickness, and the type of cut required.
A tile cutter is a tool designed to cut ceramic, porcelain, and other types of tile into the exact shapes and sizes you need. Instead of breaking tiles by hand or guessing your measurements, a tile cutter gives you clean, straight cuts every time. It’s one of the most useful tools in any tiling project, from small DIY jobs to large commercial installations.
So how does a tile cutter actually work? Most manual tile cutters use a simple but clever method called “score and snap.” First, you place the tile on the cutter’s flat base. Then you run a small, sharp cutting wheel across the surface of the tile to create a shallow groove, or score line. This weakens the tile along that exact line. Finally, you apply gentle pressure with the cutter’s handle, and the tile snaps cleanly along the score.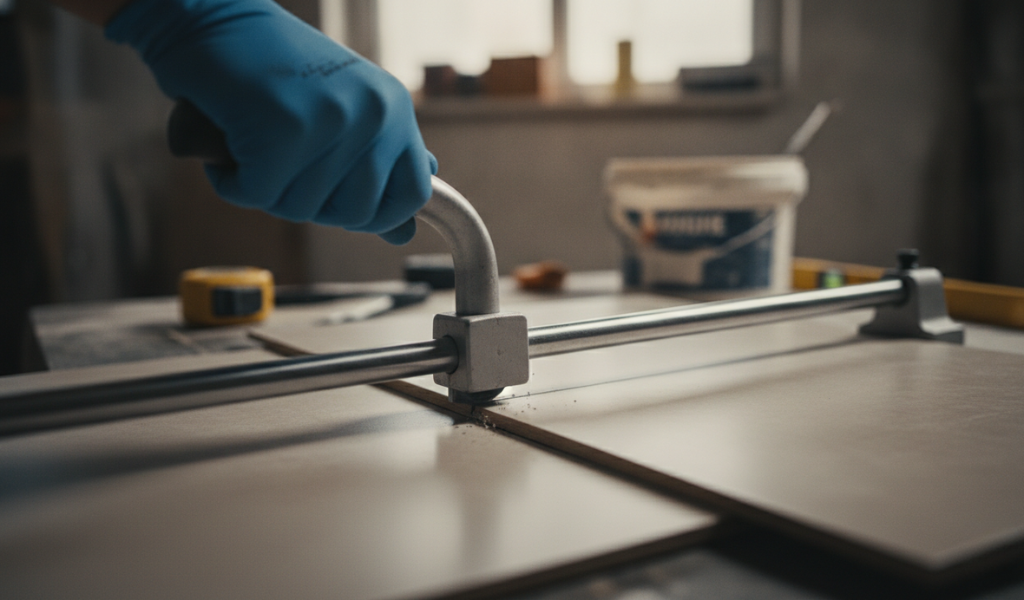
Electric tile cutters work differently. They use a spinning diamond-tipped blade, often cooled with water, to slice straight through the tile. This method is more like using a saw and works well for thicker, harder materials such as porcelain or natural stone.
The beauty of a tile cutter is its precision. A skilled DIYer can score and snap dozens of tiles in minutes, keeping waste to a minimum and edges sharp. Understanding how your cutter works is the first step toward getting great results, so take the time to learn your tool before you start your project.
Before you choose a tile cutter, it helps to understand the material you’ll be cutting. Different types of floor tile have different properties, and some are much harder to cut than others. Knowing what you’re working with will guide your tool choice and your technique.
Ceramic tile is one of the most popular flooring choices, and for good reason. It’s affordable, comes in countless colors and patterns, and is relatively soft compared to other tiles. This softness makes ceramic easy to cut, even with a basic manual tile cutter. If you’re new to tiling, ceramic is a forgiving material to practice on.
Porcelain is a denser, harder cousin of ceramic. It’s fired at higher temperatures, which makes it more durable and water-resistant. The trade-off is that porcelain is tougher to cut. A standard manual cutter may struggle with thick porcelain, so many people turn to a stronger manual model or an electric wet saw for these jobs.
Natural stone tiles, such as marble, granite, slate, and travertine, bring a premium look to any space. However, stone is dense, uneven, and often brittle. Cutting it usually requires a wet saw with a diamond blade to avoid cracking. Score-and-snap cutters generally aren’t strong enough for stone.
Glass tile is common in backsplashes and decorative accents. It’s beautiful but fragile, and it chips easily if handled roughly. Cutting glass calls for a specialized glass cutting wheel or a wet saw with a fine blade. Patience matters here, because rushing leads to cracks.
Mosaic tiles are small tiles often joined together on a mesh backing. Because the individual pieces are tiny, you’ll sometimes cut the mesh by hand and use a wet saw or nippers for the tiles themselves. Mosaics require a delicate touch.
Matching your cutter to your tile is essential. A tool that breezes through ceramic might fail completely on porcelain or stone, so always consider the material first.
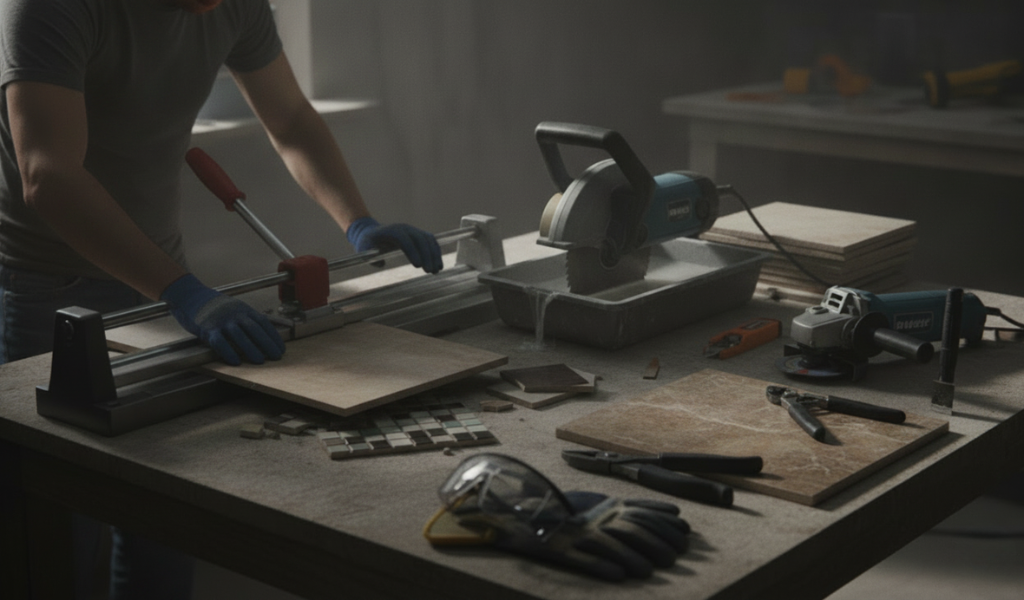
There are several different types of tile cutters on the market, each suited to specific jobs. Picking the right one saves time, money, and frustration. Here’s a closer look at the main options.
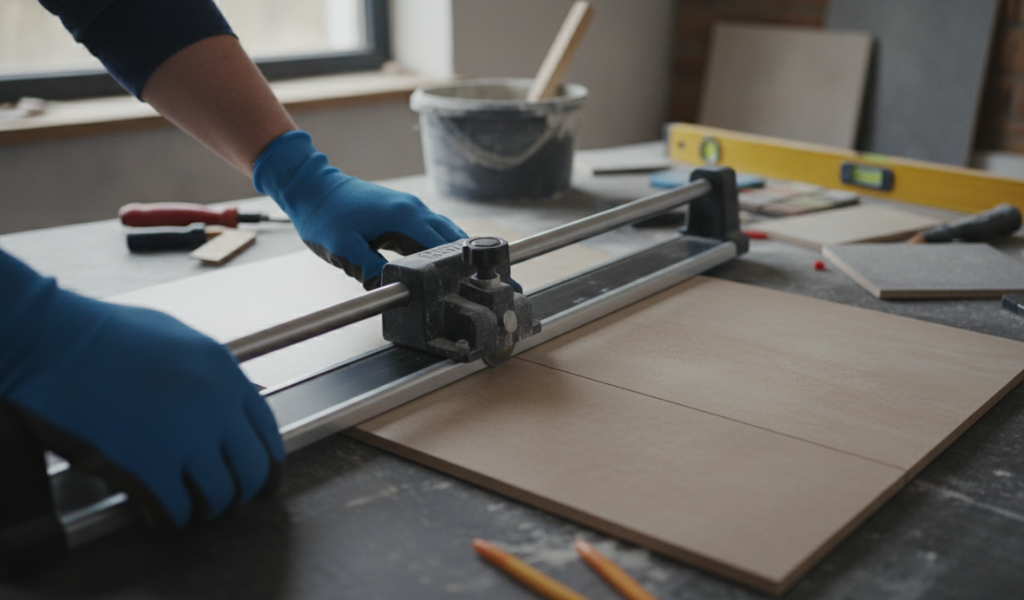
Manual tile cutters are the go-to choice for most home projects. They’re affordable, lightweight, and need no electricity. As described earlier, they work by scoring the tile and then snapping it along the line. Manual cutters handle straight cuts on ceramic and thinner porcelain with ease. For a weekend DIYer tiling a bathroom or kitchen, a manual cutter is often all you need.
The main limitation is that manual cutters only make straight cuts. They can’t handle curves, holes, or very thick stone. They also take a little practice to master, since uneven pressure can cause a poor snap.
Electric tile cutters, often called wet saws, use a water-cooled diamond blade to slice through tile. They’re powerful, fast, and capable of cutting hard materials like porcelain and natural stone. The water keeps the blade cool and reduces dust, which makes for cleaner cuts and a safer workspace.
Wet saws are ideal for large projects or tough materials. The downsides are cost, size, and the mess that comes with using water. For a major renovation or a flooring job involving stone, though, a wet saw is worth the investment. Many home improvement stores also rent them by the day, which is a smart option if you only need one for a single project.
Tile nippers look like pliers and are used for small, irregular cuts. They’re perfect for nibbling away at edges, shaping tiles around pipes, or trimming mosaic pieces. Nippers won’t give you a perfectly straight line, but they’re excellent for detail work that other cutters can’t manage.
An angle grinder fitted with a diamond blade is a versatile option for cutting curves, notches, and holes. It’s handy for cutting tiles already fixed to a wall or floor. Angle grinders create a lot of dust and require care to use safely, so they’re better suited to experienced users.
For very small jobs or thin tiles, a simple handheld tile scribe can do the trick. You score the tile with the scribe and snap it over a straight edge. This low-cost method works fine for occasional cuts but isn’t practical for big projects.
Each of these different types of tile cutters has its place. Many tilers keep more than one on hand so they’re ready for any cut a project throws at them.
Now for the practical part. Learning how to cut tiles using tile cutters is easier than you might think, especially with a manual model. Follow these steps for clean, accurate results.
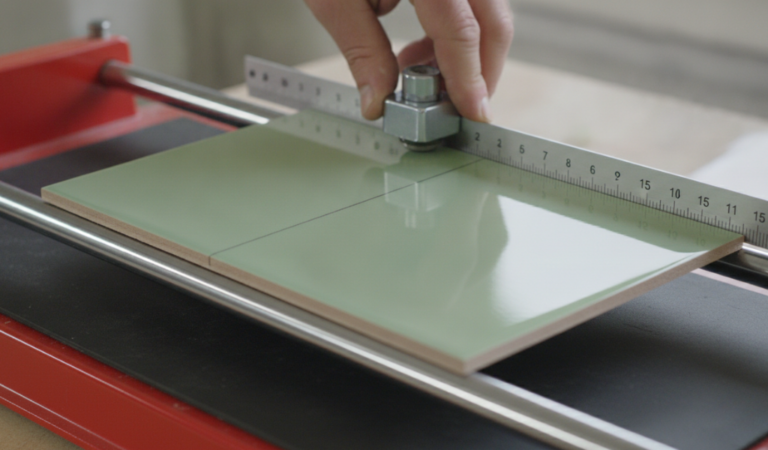
Accuracy starts with measuring. Use a tape measure to find the exact size you need, then mark your cut line on the tile with a pencil or marker. The old carpenter’s rule applies here too: measure twice, cut once. A clear, straight line is your guide for the whole process.
Place the tile flat on the base of your manual cutter. Line up your marked line with the cutter’s guide or scoring wheel. Many cutters have a built-in ruler and angle guide, which helps you make repeated cuts at the same size. Make sure the tile sits flush and won’t shift.
With the tile in position, press the scoring wheel down and push it smoothly across the tile in one steady motion. Apply firm, even pressure. You only need to score once. Going over the line multiple times can cause a rough, uneven edge. You should hear a light scratching sound as the wheel cuts the glaze.
After scoring, position the cutter’s snapping mechanism over the tile and press down firmly on the handle. The tile should break cleanly along the score line. If it doesn’t snap right away, check that your score line was deep and even.
Freshly cut tiles often have sharp or slightly rough edges. Use a tile file, rubbing stone, or sandpaper to smooth them out. This step makes the tiles safer to handle and gives your finished work a polished look.
When using an electric wet saw, the process is similar but you’ll guide the tile slowly into the spinning blade while the water keeps it cool. Always wear safety glasses and keep your fingers well clear of the blade.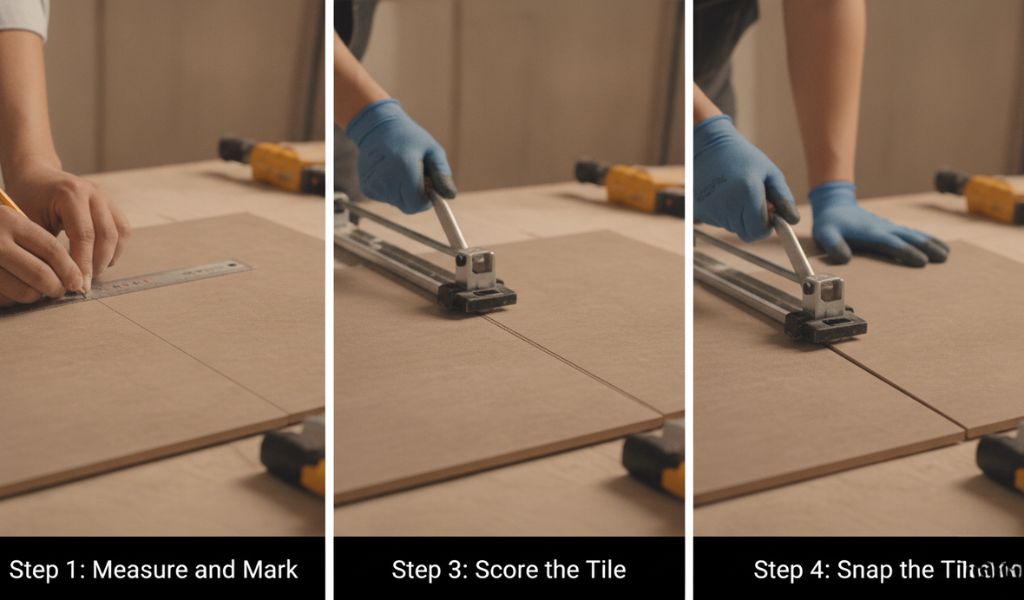
With a bit of practice, these steps become second nature. Don’t be discouraged if your first few cuts aren’t perfect. Tiling is a skill that improves quickly with repetition.
Knowing how to choose the right tile cutter for your project is the key to a smooth job. The best cutter for you depends on a few important factors. Let’s break them down.
Start with the material you’re cutting. For soft ceramic, a manual tile cutter is more than enough. For dense porcelain or natural stone, you’ll likely need an electric wet saw with a diamond blade. Matching the tool to the material is the single most important decision you’ll make.
A small backsplash or a single bathroom floor calls for a simple, affordable manual cutter. A large project, such as tiling several rooms, benefits from the speed and power of a wet saw. If you’re only doing one big job, renting a wet saw can save you money compared to buying one.
If your project requires only straight cuts, a manual cutter or wet saw will do. But if you need to cut around pipes, fit tiles into corners, or create curved edges, you’ll want tile nippers or an angle grinder in your kit. Plan for the trickiest cut in your project, not just the easiest.
Tile cutters range from inexpensive handheld scribes to costly professional wet saws. A quality manual cutter offers great value for most home projects. There’s no need to overspend on heavy-duty equipment for a small job, but don’t go too cheap if you’re cutting hard materials, as a weak tool will only cause frustration.
Make sure your cutter can handle the size of your tiles. Large-format tiles need a cutter with a longer cutting length. Check the maximum tile size your chosen cutter supports before you buy or rent.
By weighing material, project size, cut types, budget, and capacity, you’ll land on the right tool with confidence. A little planning here prevents a lot of headaches later.
A few practical insights can take your tiling from good to great. Here are some tips drawn from real-world experience.
Practice on spare tiles first. Before cutting your good tiles, run a few practice cuts on offcuts or extras. This helps you get a feel for the pressure and motion your cutter needs.
Keep your cutting wheel sharp. A dull scoring wheel produces ragged cuts and weak snaps. Replace the wheel when it stops scoring smoothly, as it’s a cheap part that makes a big difference.
Buy extra tiles. Always order around 10 percent more tile than you think you need. Mistakes happen, and having spares means you won’t run short mid-project or struggle to match a batch later.
Cut tiles glaze-side up. When using a manual cutter, score on the finished surface. This keeps the visible side clean and reduces chipping where it shows.
Take your time. Rushing is the enemy of a clean cut. Slow, steady movements almost always beat fast, careless ones.
These small habits add up to a noticeably better finish. Even seasoned tilers stick to these basics on every job.
Once your cutter is set up and you’ve geared up for safety, these techniques will help you achieve a polished result.
Whenever possible, line up your cuts with the grout lines. This produces clean edges with little to no chipping, and it keeps the finished surface looking seamless. Cutting away from these natural lines often leads to visible damage.
Keep the tile cutter at a true right angle as you cut. If your angle drifts, your tiles won’t fit together neatly, and you’ll end up with uneven gaps. Use a ruler or another measuring tool to confirm everything lines up before you commit to the cut.
Before you cut anything for real, lay out your tiles and plan your cuts. A dry run lets you check your measurements and arrangement, so you catch mistakes before they become permanent. This simple habit has saved countless DIYers from costly do-overs.
When you’re working on larger flooring areas, keeping cuts perfectly straight can be tricky. A T-square is your best friend here—it gives you a reliable straight edge to follow, which makes the whole job smoother and dramatically reduces the repairs you’ll need to do later.
Even experienced installers slip up now and then. Knowing what to watch for helps you sidestep the most frequent errors.
Prepare your surfaces properly. The blade on a cutter is razor-sharp and will tear through the wrong materials in an instant. Only use these tools on tiles—the surface they were designed for—and make sure your work area is clean and ready.
Don’t rush the job. It’s tempting to speed through, especially since these tools are built for efficiency. But rushing is exactly how tiles end up chipped and cracked. Move slowly through each tile, and your patience will pay off in a flawless finish.
Line everything up before fastening. Measure twice, cut once. Confirm that your tiles are properly aligned before you fix them in place. A few extra moments of checking prevents the headache of a floor that doesn’t line up.
Don’t let frustration take over. Tile cutting can test your patience. If you make too many quick, careless cuts, you’ll snap and chip tiles you can’t reuse. Stay calm, take breaks if you need to, and treat each cut with care.
Cutting ceramic tile is no walk in the park, but with these precautions, you can power through your project without a pile of broken tiles to show for it.
A tile cutter is one of the most valuable tools you can own for any tiling project, big or small. Once you understand what a tile cutter is and how it works, the different types of floor tile, and the various types of tile cutters available, you’re well on your way to a professional finish. Add in the right cutting technique and a thoughtful choice of tool, and there’s very little standing between you and a beautiful new floor or wall.
The most important takeaways are simple. Match your cutter to your tile material, plan for the cuts your project needs, and never rush the scoring and snapping steps. With a quality tile cutter and a bit of patience, even a first-time DIYer can achieve clean, accurate results.
Ready to start your next project? Take a moment to assess your tiles, pick the cutter that fits your needs, and put these tips into action. Your perfect tile job is closer than you think. If you found this guide helpful, explore our other tiling resources to keep building your skills.
For most beginners, a manual tile cutter is the easiest tool to learn. It uses a straightforward score-and-snap method, needs no electricity, and works well on ceramic and thinner porcelain tiles. With a little practice on spare tiles, even a first-timer can make clean, straight cuts.
Yes, but it depends on the thickness and hardness of the porcelain. A good-quality manual cutter can handle thinner porcelain tiles. For thick, dense porcelain, an electric wet saw with a diamond blade is a more reliable choice that reduces the risk of cracking.
It comes down to your project. If you’re cutting soft ceramic and only need straight cuts, a manual cutter is enough. If you’re working with natural stone, thick porcelain, or need curved and detailed cuts, a wet saw is the better option. For one-off big jobs, renting a wet saw can be cost-effective.
For cuts around pipes, corners, or other obstacles, use tile nippers or an angle grinder fitted with a diamond blade. Mark your shape first, then nibble or grind away small sections until the tile fits. These tools handle the irregular cuts that straight cutters can’t.
Cracking usually happens for one of three reasons: the score line wasn’t deep or even enough, you scored the tile more than once, or you applied uneven pressure when snapping. Make a single, smooth, firm score, then snap with steady pressure to fix the problem.
After cutting, use a tile file, rubbing stone, or fine sandpaper to gently smooth the cut edge. This removes sharp spots, makes the tile safer to handle, and gives your finished installation a clean, professional look.
A good rule is to order about 10 percent more tile than your measurements call for. This covers cutting mistakes, breakages, and future repairs. For complex patterns or large-format tiles, you may want to add a little more as a buffer.