Physical Address
304 North Cardinal St.
Dorchester Center, MA 02124
Physical Address
304 North Cardinal St.
Dorchester Center, MA 02124

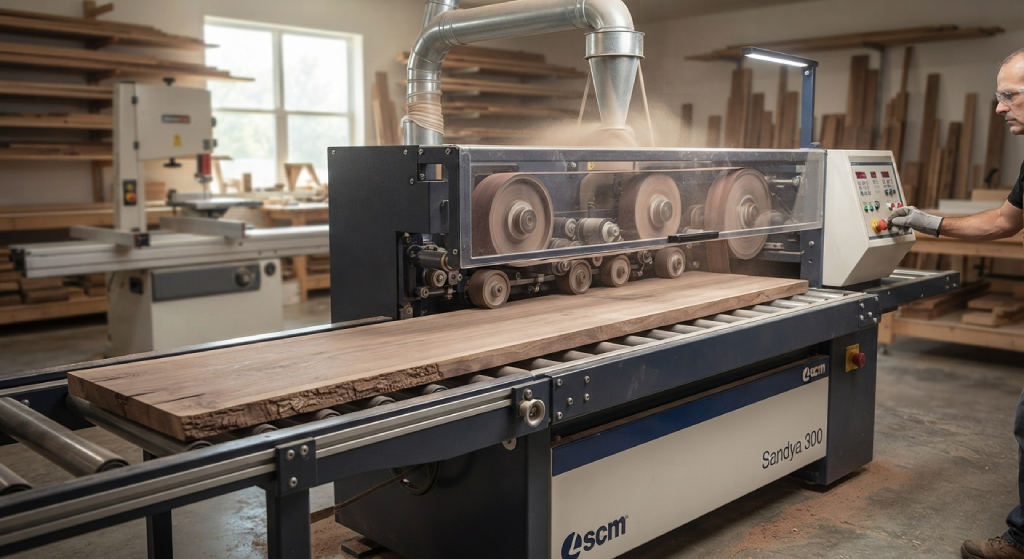
If you have ever run your hand across a perfectly smooth wooden tabletop and wondered how that flawless finish came to be, chances are an automatic sanding machine for wood was involved. These machines have changed the way furniture makers, cabinet shops, and flooring companies handle one of the most time-consuming parts of woodworking. Instead of spending hours sanding by hand, an automatic sanding machine for wood can finish a board in seconds while keeping the surface even from edge to edge.
In this guide, we will break down exactly how these machines work, what parts make them tick, and how to get the best results from them. Whether you run a small workshop or manage a full production line, understanding the mechanics behind automatic wood sanders will help you choose the right equipment and avoid costly mistakes.
An automatic wood sanding machine is built to remove material from a wooden surface using abrasive belts, drums, or discs, without needing a person to guide the wood by hand the entire time. The machine feeds the wood through on its own, applies consistent pressure, and sands the surface using calibrated rollers or belts.
Unlike a handheld orbital sander or a basic belt sander, these machines are designed for repeatable results. Once you set the thickness, speed, and pressure, every board that passes through comes out looking nearly identical. This consistency matters a lot in furniture manufacturing, flooring production, and cabinet making, where uneven sanding can ruin an otherwise good piece of wood.
There are a few common types of automatic sanders you will run into. Wide belt sanders are the most popular choice for flat panels and boards. Drum sanders work well for thicker stock and rougher surfaces. Brush sanders are often used for a softer, more natural finish, especially on rustic or reclaimed wood. Each type uses a slightly different mechanism, but the core idea stays the same: feed the wood in, remove material evenly, and send out a smooth board on the other end.
The sanding process inside these machines happens in a few connected stages. Understanding each stage helps explain why the final surface comes out so consistent compared to manual sanding.
Everything starts with the feed system. Most automatic sanders use a conveyor belt or a set of feed rollers to pull the wood into the machine at a steady pace. This feed rate is adjustable, and it plays a bigger role than most people realize. If the wood moves too fast, the sanding belt does not have enough contact time to remove material properly, leaving rough spots. If it moves too slow, you risk burning the wood or removing more material than needed.
Good feed systems also hold the wood flat and steady as it travels through. Some machines use rubber-coated rollers that grip the surface without leaving marks, while others rely on a combination of top pressure rollers and a moving table. The goal is simple: keep the board flat and moving at a controlled speed so the sanding belt can do its job evenly.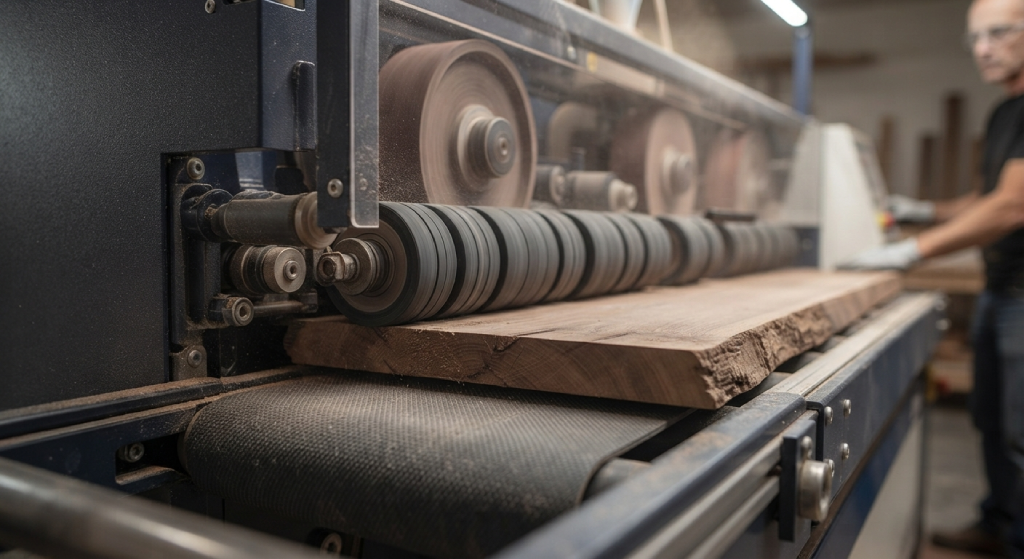
Once the wood enters the working area, it comes into contact with the abrasive belt or drum. This is where the actual material removal happens. The belt spins at high speed, and as the wood passes underneath (or in some designs, above) it, the abrasive grit shaves off thin layers of wood fiber, imperfections, and rough spots.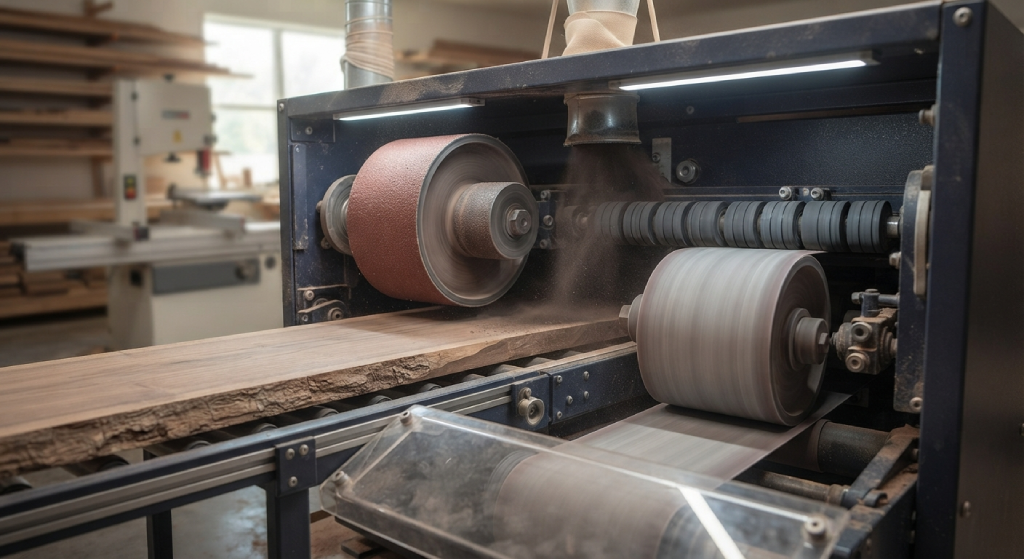
Most industrial machines use more than one sanding head. A common setup includes a coarse grit belt first, followed by a finer grit belt. The first pass handles rough leveling and removes thickness variations, while the second pass smooths out any marks left behind and prepares the surface for finishing. This two-stage approach is similar to how you would sand by hand, moving from coarse to fine grit, except the machine does it automatically and far more consistently.
The final stage focuses on surface quality rather than material removal. By this point, most of the rough sanding is already done, and the machine is refining the texture. Some automatic sanders include a brush or soft pad head at the end of the line to polish the surface, remove dust, and open up the wood grain slightly, which helps stain or finish absorb more evenly later on.
This is also where you will notice the difference between a cheap sander and a well-built one. A properly calibrated finishing stage leaves the wood ready for staining or painting with almost no extra hand sanding needed, while a poorly tuned one might leave faint lines or uneven texture that shows up once finish is applied.
To really understand how an automatic sanding machine for wood works, it helps to know what is happening mechanically inside the housing. Several core components work together every time you run a board through.
The abrasive belt or drum is the heart of the machine. This is the part that physically contacts the wood and removes material. Belts are usually made from aluminum oxide, ceramic, or zirconia abrasives, each suited to different wood types and sanding goals.
The motor drives the belt or drum at high speed, and motor power directly affects how much material the machine can remove without slowing down or overheating. Larger production machines use more powerful motors to handle hardwoods and thicker stock without struggling.
The pressure system, often made up of pads or rollers, controls how firmly the abrasive contacts the wood. Some machines use rigid pressure pads for flat, even sanding, while others use segmented or platen-style pads that flex slightly to follow small variations in the wood surface.
The conveyor or feed table moves the wood through the machine at a set speed. On better machines, this table height is adjustable, allowing you to sand boards of different thicknesses without changing settings drastically.
Finally, the control panel lets the operator set feed speed, sanding pressure, and sometimes belt tension. On newer digital models, you can even save presets for different wood types, which speeds up production when switching between jobs.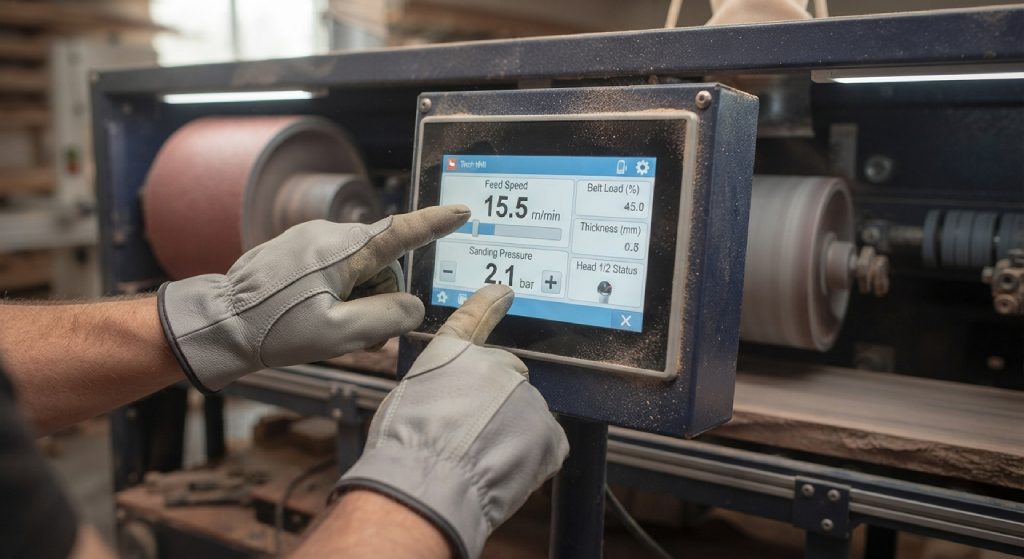
Picking the right sanding belt is one of those details that seems small but makes a huge difference in the final result. Belts come in different grit levels, materials, and backing types, and matching them to your project matters more than people expect.
Grit number tells you how coarse or fine the abrasive is. Lower numbers, like 60 or 80 grit, are coarse and used for heavy material removal or leveling rough boards. Mid-range grits, around 120 to 150, are good for general smoothing. Fine grits, from 180 up to 240 or higher, are used for final finishing before staining or painting.
The abrasive material also matters. Aluminum oxide belts are affordable and work well for general softwood and hardwood sanding. Zirconia belts last longer and handle heat better, making them a good choice for high-production environments. Ceramic belts are the most durable and are typically reserved for tough materials or heavy-duty industrial use where belt life needs to be maximized.
A practical tip that many shops overlook: always match your belt choice to the wood species you are working with. Softwoods like pine tend to clog belts faster because of resin and softer fibers, so a slightly coarser or open-coat belt works better. Hardwoods like oak or maple can handle finer grits without clogging as quickly. Using the wrong belt type not only slows down production but also shortens the belt’s lifespan, costing you more in the long run.
Speed and pressure are the two settings that most directly affect your sanding results, and getting them right takes a bit of practice combined with paying attention to the wood in front of you.
Feed speed controls how fast the wood moves through the machine. A slower feed speed gives the abrasive more contact time, which means more material removal and a smoother finish, but it also increases the risk of burning the wood, especially with denser species. A faster feed speed reduces the risk of burning but may leave the surface rougher if the belt does not have enough time to work through imperfections.
Sanding pressure refers to how hard the abrasive presses against the wood. Too much pressure can gouge softer woods or create uneven spots, especially if the board has slight warping. Too little pressure leaves the surface unevenly sanded, with some areas smoother than others.
A good rule many experienced operators follow is to start with lighter pressure and a moderate feed speed, then run a test board through and check the results before adjusting. Small changes to either setting can make a noticeable difference, so it is worth taking the time to dial in your machine rather than guessing.
Temperature also plays a role here. If you notice the wood coming out warm or slightly discolored, that is usually a sign the feed speed is too slow or the pressure is too high for that particular wood type. Adjusting one of those two variables usually solves the problem quickly.
Sanding produces a huge amount of fine dust, and without a proper dust collection system, that dust becomes a real problem, both for the machine and for the people working around it. Wood dust can clog the abrasive belt, reduce sanding efficiency, and create a fire hazard if it builds up inside the machine housing.
Most automatic sanding machines include a built-in dust extraction port connected to a vacuum or dust collection system. As the belt sands the wood, air is pulled through the machine, carrying dust particles away from the working area and into a collection bag or filter system. This keeps the belt cleaner for longer and helps maintain a consistent sanding quality throughout the day.
Beyond machine performance, dust collection is also a health and safety issue. Fine wood particles floating in the air are not good to breathe in over long periods, and a solid extraction system protects workers while keeping the shop floor cleaner. Many shops pair their sanding machine with a centralized dust collection system that also serves other equipment like table saws and planers, which is more efficient than running separate units for each machine.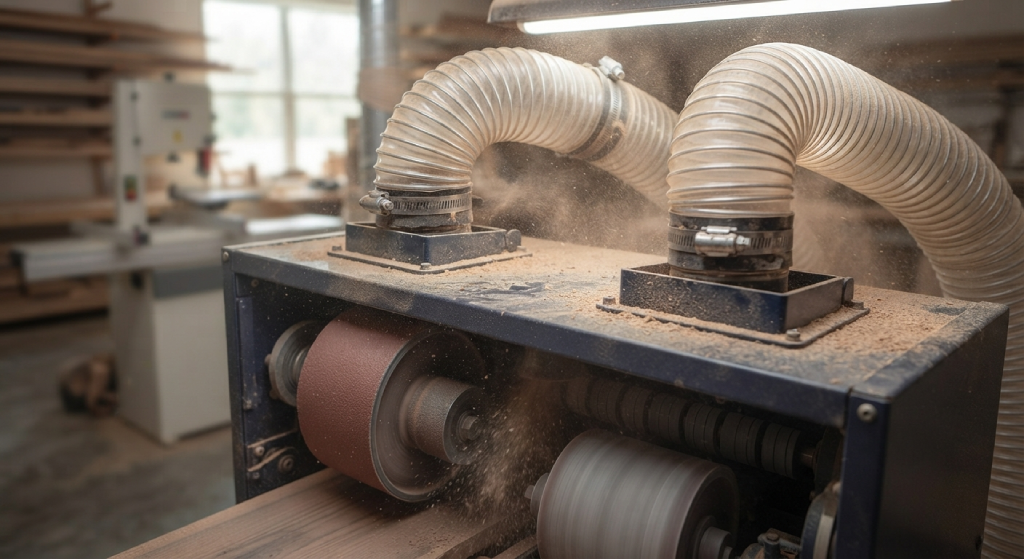
Regularly checking and cleaning filters is a simple maintenance step that gets overlooked far too often. A clogged filter reduces suction power, which means dust starts settling back onto the wood surface and inside the machine, eventually affecting sanding quality.
Even with a well-built automatic sanding machine for wood, operator mistakes can lead to poor results or unnecessary wear on the equipment. Knowing what to avoid saves time, material, and money.
One frequent mistake is running the feed speed too fast for the wood type or thickness being sanded. This often leaves visible sanding marks or uneven spots that require extra hand finishing afterward, which defeats the purpose of using an automatic machine in the first place.
Another common issue is skipping grit stages. Jumping straight from a coarse belt to a very fine one without an intermediate step often leaves scratch marks from the coarse grit still visible, since the fine belt cannot remove those deeper marks efficiently.
Ignoring belt wear is another problem shops run into. A worn-out belt loses its cutting ability and starts polishing the wood instead of sanding it properly, which can actually seal the wood grain and cause finish adhesion problems later. Replacing belts on a regular schedule, rather than waiting until they visibly fail, keeps sanding quality consistent.
Overloading the machine with boards that are too thick, too warped, or too wide for the feed system can also cause jams or uneven sanding. Always check the machine’s rated capacity before running unusual sizes through it.
Lastly, neglecting regular maintenance, like cleaning rollers, checking belt tension, and inspecting pressure pads, leads to gradual performance decline that is easy to miss day to day but adds up over time into noticeably worse results.
An automatic sanding machine for wood takes what used to be a slow, physically demanding task and turns it into a fast, repeatable process. From the feed system pulling the board in, to the sanding belts removing material in stages, to the dust collection keeping everything clean, every part of the machine plays a role in the final finish. Understanding how these pieces work together helps you choose the right belt, set the correct speed and pressure, and avoid the common mistakes that hold back sanding quality.
If you are running a woodworking shop or thinking about upgrading your equipment, taking the time to learn these mechanics pays off in smoother finishes, less rework, and a more efficient production line. Start by matching your belt grit to your wood type, dial in your feed speed carefully, and keep your dust collection system in good shape. Small adjustments in these areas often make the biggest difference in final results.
What is the difference between an automatic sanding machine and a manual sander?
A manual sander requires a person to guide the tool across the wood surface, while an automatic sanding machine feeds the wood through on its own using rollers or a conveyor system, applying consistent pressure and speed without constant hand guidance.
Can automatic sanding machines work on both hardwood and softwood?
Yes, most machines can handle both, but the belt grit and feed speed usually need to be adjusted depending on the wood density and resin content to get the best results.
How often should I replace the sanding belt?
This depends on usage, but a good habit is to inspect the belt regularly for glazing or reduced cutting ability and replace it as soon as sanding quality starts to drop, rather than waiting until it fails completely.
Why is my wood coming out with burn marks after sanding?
Burn marks usually happen when the feed speed is too slow or the sanding pressure is too high, causing excess friction and heat buildup on the wood surface.
Do automatic sanding machines need a dust collection system?
Yes, a proper dust collection system is essential for keeping the belt clean, maintaining sanding efficiency, reducing fire risk, and protecting workers from breathing in fine wood dust.
What type of sanding belt is best for furniture making?
Aluminum oxide belts are a common and affordable choice for general furniture work, while zirconia or ceramic belts are better suited for high-volume production or harder wood species.
Is it necessary to sand with multiple grit stages instead of just one?
Yes, using multiple grit stages, starting coarse and moving to fine, produces a smoother and more even finish, since a single grit alone cannot remove rough marks and refine the surface at the same time.