Physical Address
304 North Cardinal St.
Dorchester Center, MA 02124
Physical Address
304 North Cardinal St.
Dorchester Center, MA 02124

Learning how to remove stain from wood is one of those skills that pays off again and again, whether you are restoring a family heirloom, flipping a thrift store find, or fixing up your kitchen cabinets. A blotchy old finish or a dark, uneven tone can make even solid wood furniture look tired. The good news is that removing stain from wood is not as intimidating as it looks once you understand the right tools, techniques, and order of steps. In this guide, you will learn everything from identifying the type of stain on your piece to sanding, stripping, and prepping the wood for a fresh finish.
Many people search for this topic after noticing water rings, sun fading, or a color they simply do not like anymore. Others want to know how to remove dark water stains from wood specifically, since these stubborn marks tend to sit deeper in the grain than surface discoloration. We will cover that too, along with mistakes to avoid and safety tips that keep the whole process smooth from start to finish.
There are plenty of reasons someone might want a piece of wood back to its natural state. Maybe the current stain color clashes with a new room design, or the finish has worn thin and looks patchy in spots. Sometimes it is about correcting a mistake, like a stain that turned out darker or more orange than expected. Other times the wood itself has damage hiding underneath, such as scratches or dents that only a full strip down will reveal.
Removing old stain also gives you a clean slate. If you are trying to match furniture pieces from different sets, stripping them all down to bare wood and restaining them the same shade is often the easiest fix. It is also common before selling or donating furniture, since buyers usually prefer neutral or updated tones over dated finishes.
Not every piece of wood furniture needs to be stripped. Stain removal usually becomes necessary when the finish is peeling, cracking, or has turned cloudy from moisture exposure. It is also worth doing when the existing color is uneven, blotchy, or simply the wrong shade for your space.
Another common trigger is water damage. A glass left on a table without a coaster, or a plant pot that leaked, can leave a ring or a dark patch that sits below the surface finish. In these cases, a light cleaning will not fix it, and you will need to remove the stain down to the affected layer. If you are dealing with this exact issue, our section further down on how to remove dark water stains from wood walks through the steps in detail.
Lastly, stain removal is often needed before repairs. If a chair leg needs to be reglued or a tabletop needs a crack filled, you usually cannot do that work properly with a stained and sealed surface in the way.
People often use these terms interchangeably, but they mean different things. Removing stain refers to stripping away the color and sometimes the topcoat to expose bare wood underneath. Refinishing is a broader term that includes removing the old finish, repairing any damage, and applying a brand new stain and sealant.
If your goal is simply to lighten or change the color, stain removal alone might be enough, followed by a fresh coat of your chosen shade. But if the wood has scratches, water damage, or an uneven texture, refinishing is the better route because it addresses both looks and structural condition. Understanding which one you actually need will save you time and product, since a full refinish takes more steps and more patience than a simple stain strip.
Before grabbing sandpaper or a chemical stripper, it helps to know what kind of stain you are dealing with. This affects which removal method will work best and how long the process will take.
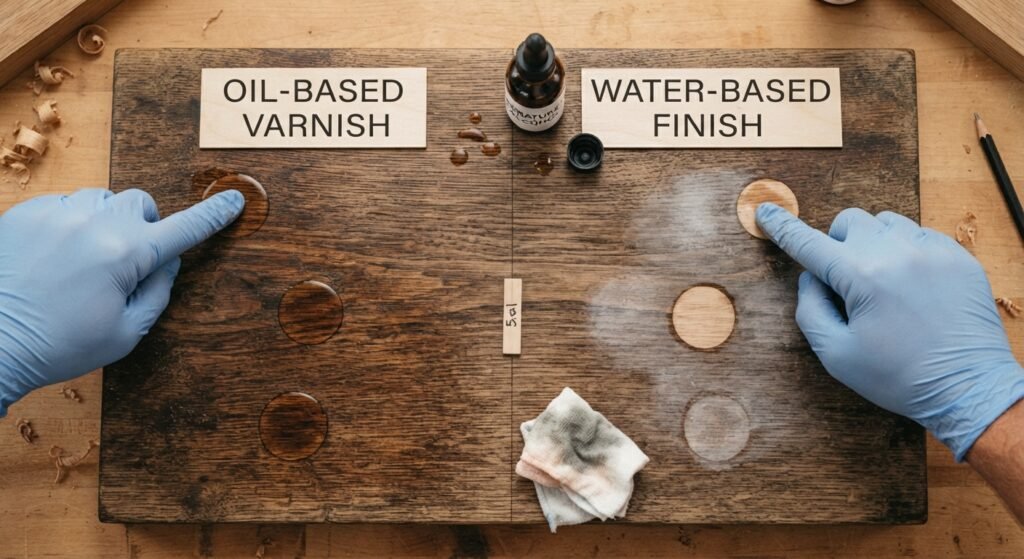
Oil-based stains soak deeper into the wood fibers and tend to be more resistant to both sanding and stripping. They often have a richer, warmer tone and were the standard choice for decades, so older furniture is likely to have this type. Water-based stains sit closer to the surface, dry faster, and are generally easier to remove since they do not penetrate as far into the grain.
A simple test is to rub a small hidden area with a rag dipped in denatured alcohol. If the color starts to lift, you are likely dealing with a water-based stain. If nothing happens, it is probably oil-based and will need a stronger stripping approach.
Knowing the stain type changes your whole strategy. Water-based finishes may respond well to lighter sanding or even a stripping gel with a shorter dwell time. Oil-based stains usually require a more aggressive chemical stripper or a longer sanding session with coarser grits before you get down to raw wood. Using the wrong method wastes time and can also damage the wood surface if you sand too aggressively when a chemical approach would have worked better.
Having the right supplies on hand before you start makes the whole job go faster and prevents mid-project trips to the hardware store.
For most stain removal projects you will want sandpaper in a range of grits, from coarse (60 to 80) to fine (150 to 220), along with a sanding block or an orbital sander for larger surfaces. A chemical paint and stain stripper is useful for stubborn or deep stains, along with a putty knife or plastic scraper to remove softened finish. Clean rags, mineral spirits, and a shop vacuum for dust cleanup round out the basics. If you are working on carved details or tight corners, a small wire brush or detail sanding sponge helps reach areas a flat sander cannot.
Even though this is a home project, proper safety gear matters. Wear chemical-resistant gloves any time you are handling strippers or solvents. A dust mask or respirator is important during sanding, especially with older furniture that might have lead-based finishes. Safety glasses protect your eyes from flying dust and splashing chemicals, and it is smart to wear long sleeves and old clothes you do not mind ruining.
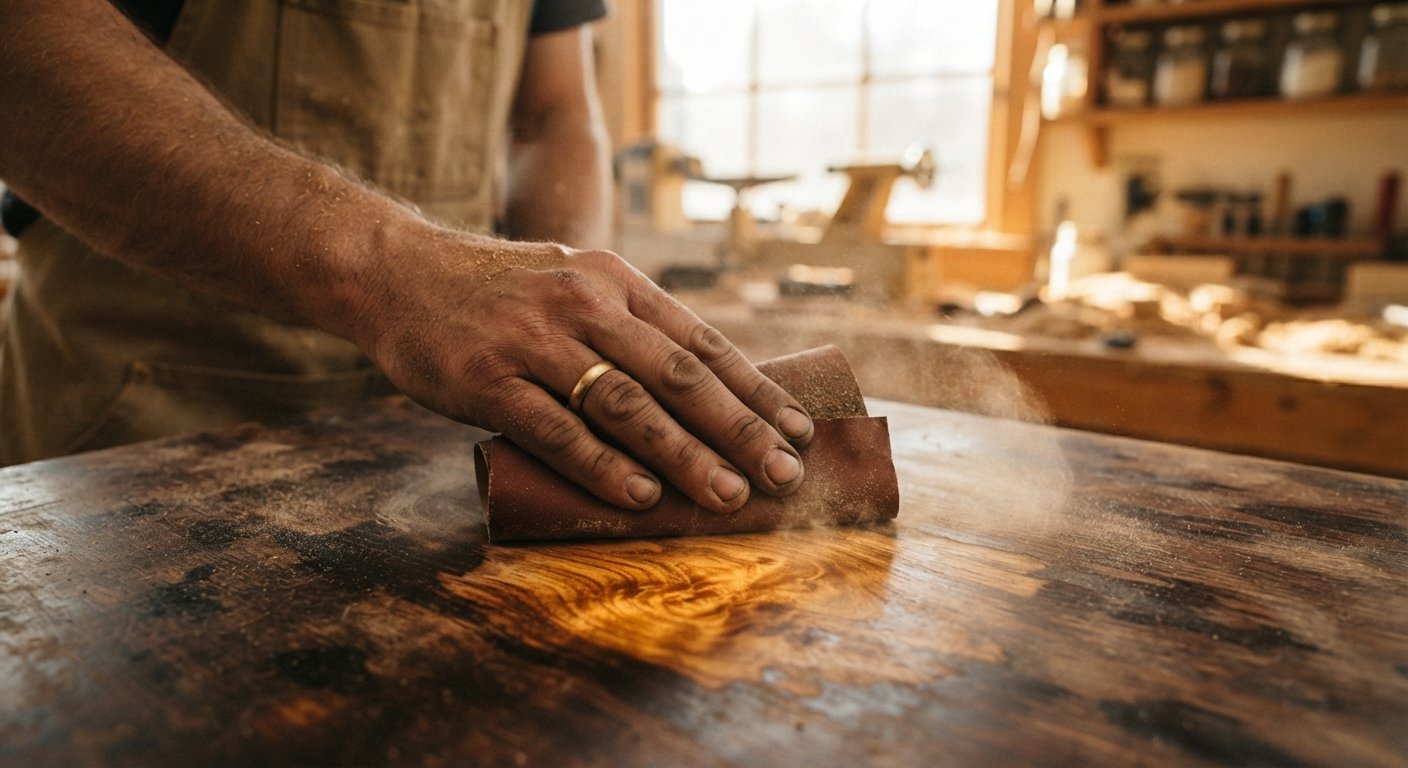
Sanding is the most straightforward and widely used method, especially for smaller or flat surfaces like tabletops and dressers.
Start with a coarser grit if the stain is thick or the finish is heavily built up, typically in the 80 to 100 range. If the stain is lighter or the wood is more delicate, starting around 120 grit prevents unnecessary damage to the surface. Coarse grits remove material fast but leave visible scratches, so they are only the starting point, not the finish line.
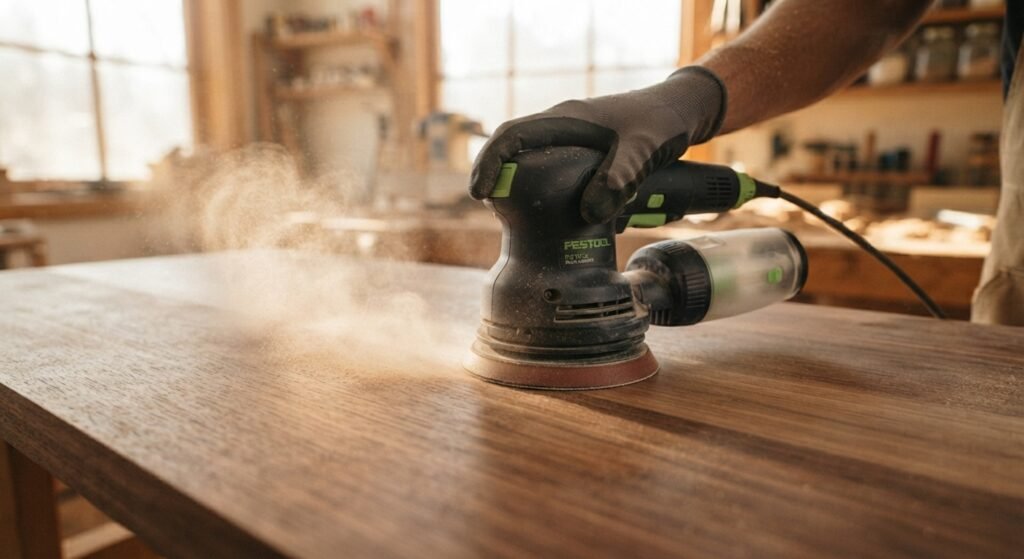
Always move your sandpaper in the same direction as the wood grain rather than across it. Sanding against the grain creates scratches that are very hard to hide once you apply a new stain, since stain settles into every scratch and highlights it. Use even, moderate pressure and let the sandpaper do the work rather than pressing down hard, which can gouge the surface or wear through thin veneer.
Once the old stain is mostly gone with the coarse grit, move up to a medium grit like 150 to smooth out the scratches left behind. Finish with a fine grit, around 220, to leave the wood smooth and ready for a new finish. Skipping grits in this sequence usually means visible scratch marks will still show through the new stain later, so it is worth taking the extra few minutes to work through each stage properly.
Chemical strippers are the go-to option when sanding alone would take too long or when the wood has detailed carvings, moldings, or curves that are hard to sand evenly. Apply a generous, even layer of stripper using a natural bristle brush, since some strippers can dissolve synthetic bristles. Let it sit for the time recommended on the product label, usually somewhere between 15 and 30 minutes, until the finish starts to bubble and soften.
Once the stain has softened, use a plastic scraper to gently lift it away, working with the grain to avoid gouging the wood. For stubborn spots or detailed areas, a stiff bristle brush or steel wool can help work the stripper into corners. After scraping, wipe the surface down with mineral spirits or the neutralizer recommended by the stripper manufacturer to remove any residue before moving on to sanding or refinishing. This method tends to be less physically tiring than sanding an entire piece by hand, though it does require good ventilation and patience while the chemical does its work.
Not everyone wants to deal with sawdust and power tools, and there are a few ways to remove stain without sanding at all. Chemical strippers, as covered above, are the main non-sanding option and work well on most stain types. Another approach for lighter stains is using a mixture of baking soda and water made into a paste, applied directly to the stained area and left to sit before wiping away, though this works better for surface stains than deeply set ones.
Oxalic acid, sold as wood bleach, is another sanding-free option particularly effective on dark stains and water marks. Mix it according to package directions, apply with a brush, let it sit, then rinse thoroughly. This method lightens the wood significantly and works well when you want to remove color without altering the wood’s texture. For antique pieces where you want to preserve original tool marks or a hand-planed surface, these non-sanding methods are often the better choice since sanding can remove those unique details permanently.
The right technique can vary depending on what kind of wood piece you are working on, since floors, furniture, and cabinets each come with their own considerations.
Furniture pieces like tables, dressers, and chairs are usually small enough to move outside or into a well-ventilated garage, which makes both sanding and chemical stripping easier to manage. Take apart removable pieces like drawers or doors first, since this gives you better access and avoids uneven stripping around hardware. Pay close attention to joints and edges where old stain tends to build up.
Wood floors require a different scale of approach, usually involving a drum sander or orbital floor sander for the bulk of the room, with a hand sander or detail sander for edges and corners. Chemical stripping is possible for floors but far more labor-intensive over a large area, so sanding is generally preferred. Always test in a closet or under a rug first to see how the wood responds before tackling the whole floor.
Cabinets often have doors, drawers, and trim pieces that should be removed and worked on separately for the best results. Since cabinets are usually painted or stained wood with a lot of visible surface area in a kitchen or bathroom, a chemical stripper combined with light sanding tends to give the cleanest, most even result. For smaller wood projects like picture frames or shelves, a simple sanding approach is often enough since the surface area is manageable and detailed work is minimal.
Dark stains, especially those caused by water or age, need a slightly different strategy than standard color removal.
Surface stains sit on top of the wood fibers and usually respond well to light sanding or a mild cleaning solution. Deep stains, on the other hand, have penetrated into the wood grain itself, often because moisture carried tannins or minerals down into the fibers. You can usually tell the difference by lightly sanding a small test spot. If the dark color disappears after a light pass, it was a surface stain. If it remains even after sanding through several layers, you are dealing with a deep stain that needs a stronger approach like oxalic acid bleach.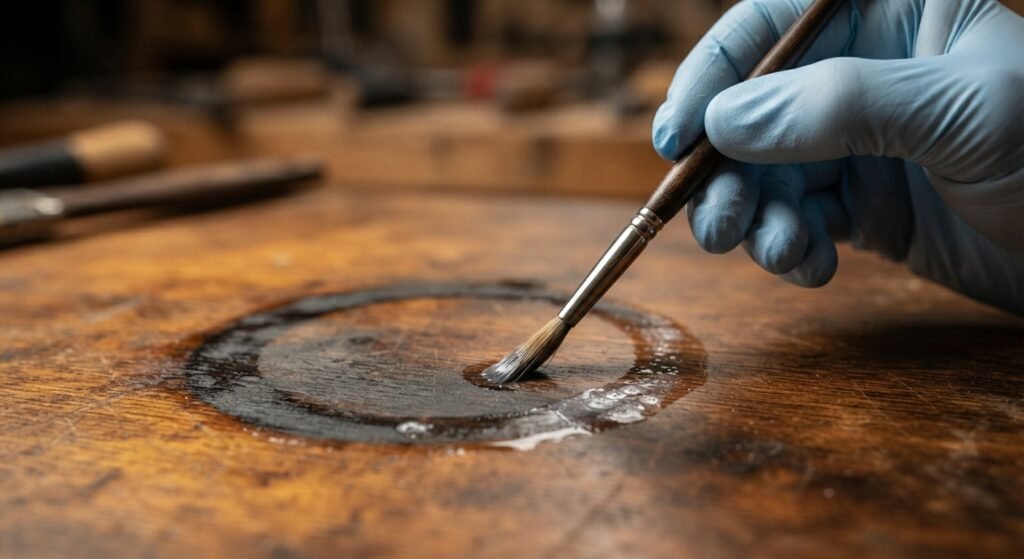
For stubborn dark marks, oxalic acid remains one of the most effective treatments since it specifically targets the minerals and tannins that cause dark discoloration. Apply the mixed solution generously to the stained area, let it work for the recommended time, then rinse and allow the wood to dry fully before checking the result. Sometimes a second application is needed for very old or deep stains. This same process is exactly how to remove dark water stains from wood that has sat under a leaking vase or a sweating glass for too long, since the tannins from the water and wood react together to form that grayish black mark. Patience matters here, since rushing the process or scrubbing too hard can damage the wood surface without fully lifting the stain.
Even simple projects can go wrong without realizing it until the new finish goes on and problems become obvious.
Pressing down hard while sanding might feel like it speeds things up, but it usually just creates uneven spots, digs grooves into softer wood, and wears through thin veneers faster than expected. Let the sandpaper grit do the work and keep your pressure light and consistent across the whole surface.
Jumping straight into stripping or sanding without first cleaning the piece, removing hardware, or checking for wax buildup often leads to a messy, uneven result. Old wax or polish can clog sandpaper quickly and prevent chemical strippers from working properly, so a quick wipe down with mineral spirits before starting saves a lot of frustration.
Not every stripper works on every finish, and using a product designed for paint on a stubborn oil-based stain may leave you disappointed with the results. Likewise, starting with sandpaper that is too fine wastes time, while starting too coarse on delicate wood can cause permanent damage. Reading product labels and testing on a hidden spot first avoids these costly mistakes.
Once the old stain is gone, the wood needs a bit of preparation before it is ready for a new finish or stain.
After sanding or stripping, a significant amount of fine dust and chemical residue can remain on the surface. Wipe the piece down thoroughly with a tack cloth or slightly damp rag, and follow up with a shop vacuum on any crevices or carved details where dust likes to hide. Any leftover residue can interfere with how evenly a new stain absorbs into the wood.
If you used a chemical stripper or a water-based cleaning method, give the wood adequate time to dry fully before moving forward. Applying stain or sealant to damp wood can trap moisture underneath, leading to bubbling or an uneven finish later. Depending on humidity, this can take anywhere from a few hours to a full day or two.
Run your hand over the entire surface to feel for rough patches, remaining old finish, or spots that were missed during sanding. A final light pass with fine grit sandpaper, around 220, ensures everything is smooth and ready to accept a new stain evenly. This is also a good time to fill any cracks, dents, or gouges with wood filler before the final finishing steps.
Yes, and this is actually one of the most common reasons people go through the removal process in the first place. Once the wood is clean, dry, and sanded smooth, it is ready to accept a brand new stain color. Choose a stain that complements the wood type, since different species like oak, pine, and maple absorb color differently and can produce unexpected results.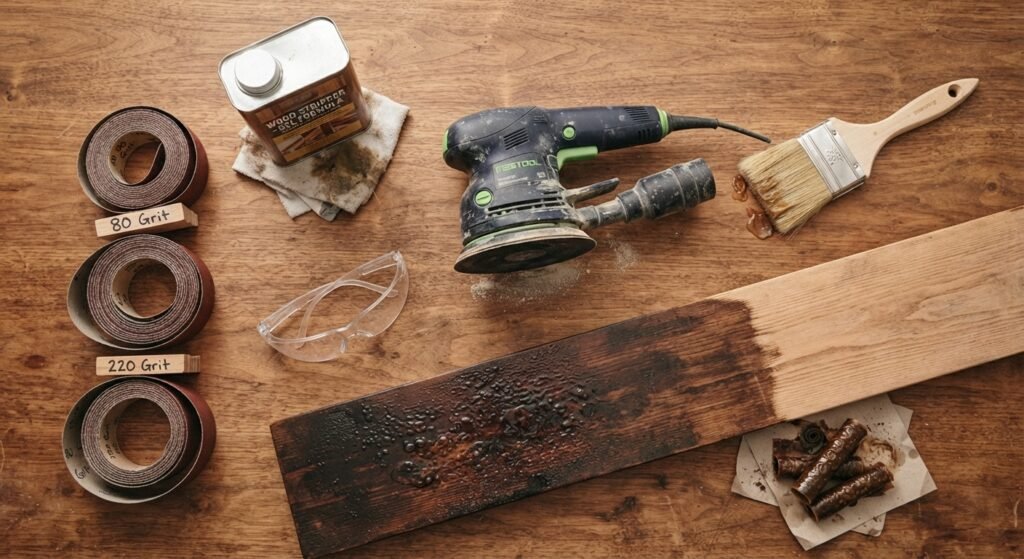
It is a good idea to test the new stain on a hidden section, like the underside of a table or the inside of a cabinet door, before committing to the entire piece. This lets you see exactly how the color will look and gives you a chance to adjust application time or technique if the shade comes out darker or lighter than expected. After staining, a protective topcoat like polyurethane or wax seals in the color and protects the wood from future scratches, spills, and everyday wear.
Working with sanding dust and chemical strippers means taking a few precautions to keep yourself and your space safe throughout the project.
Chemical strippers can irritate skin and eyes on contact, so gloves and safety glasses are non-negotiable. A properly rated dust mask or respirator protects your lungs from fine wood dust and chemical fumes, which is especially important if you are working indoors or for extended periods.
Always work in a well-ventilated space, ideally outdoors or in a garage with the door open and a fan running. Chemical strippers release strong fumes that can build up quickly in an enclosed room, leading to headaches or dizziness if ventilation is poor. Keep windows open and take breaks in fresh air if you start feeling lightheaded.
Used rags, especially those soaked in oil-based products, can pose a fire hazard if bundled up and thrown away carelessly, since they can spontaneously combust as they dry. Lay them flat outside to dry completely before disposal, or soak them in water and seal them in a metal container. Check your local regulations for disposing of chemical stripper waste, since many areas have specific guidelines for hazardous household materials.
Removing stain from wood takes a bit of patience, but the process itself is very manageable once you understand which method fits your project. Sanding works well for flat surfaces and smaller pieces, chemical strippers save time on detailed or heavily finished wood, and treatments like oxalic acid handle stubborn dark and water stains that regular methods cannot touch. Whether you are refreshing an old dresser, fixing up kitchen cabinets, or restoring a hardwood floor, taking the time to prep properly and choose the right technique will give you a smooth, even surface ready for a beautiful new finish. Once you have the bare wood back, the fun part begins: picking a new stain color and bringing the piece back to life.
What is the fastest way to remove stain from wood?
Chemical strippers are generally the fastest method, especially for larger or heavily stained surfaces, since they soften the finish in minutes rather than requiring extended sanding time.
Can vinegar remove stain from wood?
Vinegar can help lift very light surface stains and is sometimes used in homemade cleaning solutions, but it is not strong enough for deep or oil-based stains and works best as a light cleaning step rather than a full removal method.
Does removing stain damage the wood?
When done correctly with proper technique and grit progression, removing stain does not damage the wood. Problems usually happen from sanding too aggressively, using the wrong chemical, or skipping proper drying time between steps.
How long does it take for a chemical stripper to work?
Most strippers need somewhere between 15 and 30 minutes to soften a finish, though thicker or older stains may need a second application or a longer dwell time based on the product instructions.
Can I remove stain from wood without any chemicals?
Yes, sanding is a completely chemical-free method, and mild options like baking soda paste or oxalic acid wood bleach can also handle certain stains without harsh solvents.
Why does my wood still look dark after sanding?
This usually means the stain has penetrated deep into the wood grain rather than sitting on the surface. In these cases, an oxalic acid treatment is often needed to fully lift the discoloration.
Is it necessary to remove all the old stain before restaining?
For the most even and predictable results, yes. Leftover old stain can cause blotching or an uneven tone once new stain is applied, so a thorough removal process gives the best final finish.