Physical Address
304 North Cardinal St.
Dorchester Center, MA 02124
Physical Address
304 North Cardinal St.
Dorchester Center, MA 02124

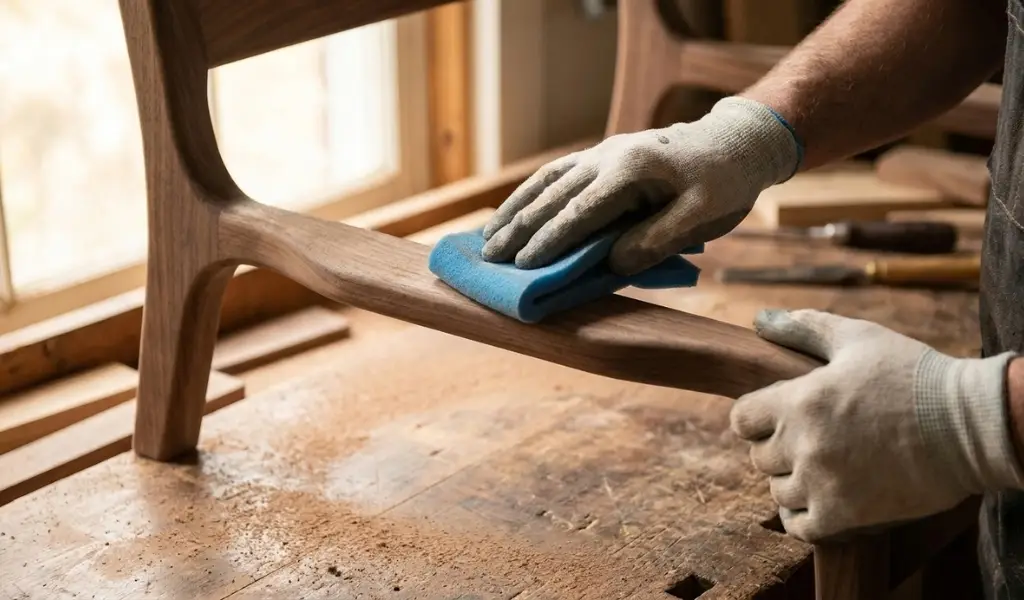
Flat surfaces are forgiving. A curved surface is not. If you have ever pressed a flat sanding block against a rounded chair leg or a curved table edge, you already know the problem, you end up with a flat spot pressed into what should be a smooth, continuous curve. Learning how to sand curved wood and rounded shapes properly is one of those skills that separates a piece that looks handcrafted in the best way from one that looks like someone fought the wood and lost.
This guide is part of our broader look at The Complete Guide to Sanding Wood, and it focuses specifically on the tools and techniques that work for curves, contours, and rounded edges where flat sanding tools simply do not conform. Whether you are working on a curved table edge, a rounded chair spindle, or a carved detail, the right approach keeps the shape of the surface intact while still getting it smooth.
Below we will cover why curved wood behaves so differently under sandpaper, the tools that actually work for contour sanding, a full step by step process, and how to move through your grits without losing the shape you worked so hard to create. By the end you will have a clear system for tackling curves with confidence instead of guesswork.
Sanding a flat surface is mostly about consistency, moving evenly across a surface that stays the same shape the whole time. Curved wood throws that consistency out the window, since the surface itself is constantly changing direction under your hands.
The biggest challenge with sand curved wood is that rigid tools, like a standard flat sanding block, only touch the highest points of a curve, pressing those points down while leaving the rest of the contour untouched. Keep sanding that way and you end up with a series of small flat spots instead of one smooth curve, which is often more noticeable and harder to fix than if you had just used the wrong grit. Preserving the original contour means using tools and sanding pads that actually flex and conform to the curved surface rather than fighting against it.
Grain direction gets complicated fast on a curved surface. On a flat board, the grain usually runs in one predictable direction. On a rounded chair leg or a carved profile, the grain can shift direction multiple times across a single curve, especially where the wood was shaped by turning or carving rather than simply cut from a straight board. Always sand in the direction of the grain where you can, but expect to adjust your angle repeatedly as you move around a complex curve, since sticking to one fixed direction across the whole piece often means sanding against the grain somewhere along the way.
The right tools make contour sanding dramatically easier, and most of what you need is inexpensive and easy to find.
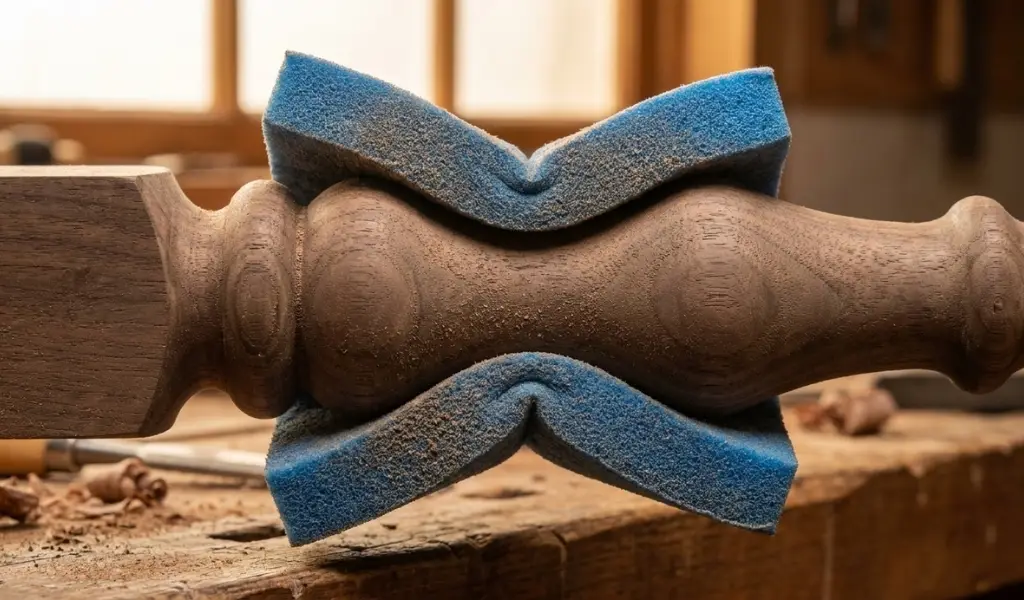
A flexible sanding pad or sanding sponge is the workhorse for most curved surfaces. Unlike a rigid block, these foam pad style tools bend and conform to curved surfaces as you work, spreading pressure evenly across the contour instead of concentrating it on the highest points. Sanding sponges typically come in multiple grits built into one block, which is handy for quick grit changes without swapping tools mid project.
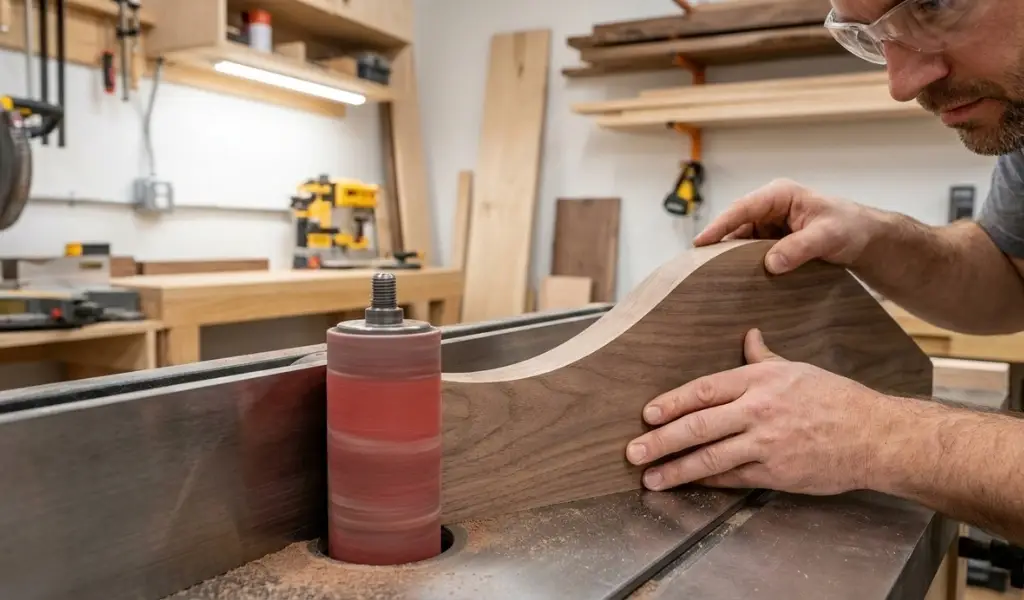
For larger curved surfaces like table edges, chair components, or larger carved panels, power tools speed things up considerably. A spindle sander uses a rotating and oscillating cylindrical sanding drum that is ideal for curved and concave areas, letting you press the workpiece against the moving abrasive rather than moving a tool across the wood. Drum sanders work on a similar principle for larger pieces. A flap wheel, made of overlapping strips of sandpaper mounted on a spinning wheel, is especially good for cylindrical shapes and tight curves, since the flexible flaps conform to the profile as the wheel spins. Keep the wheel moving constantly to avoid burning or over-sanding any one spot.
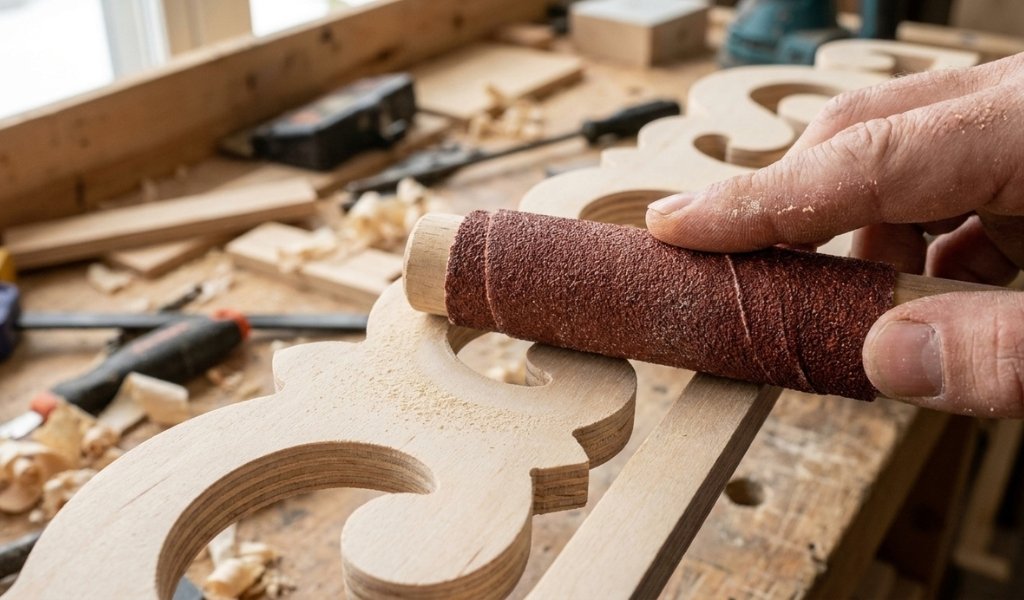
For tight curves and detail work, simple shop made tools go a long way. Wrap sandpaper around a dowel or a section of PVC pipe that roughly matches the radius of your curve, and you instantly have a tool that conforms to that specific profile. This trick works particularly well for inside curves and concave sanding, where a flat block or even a sponge cannot reach into the tightest part of the curve. Different diameter dowels or pipes let you match your sanding aid to whatever curve you are working on that day.
Once you have assembled the right tools, working through a curved piece follows a logical sequence from rough shaping to smooth finish.
Start by assessing the surface and choosing a grit based on both the wood type and how rough the current surface is. Hardwoods and pieces coming straight from a lathe or carving tools often need to start around 80 to 100 grit to remove tool marks and uneven spots. Softer woods or surfaces that are already fairly smooth can often start at 120 grit instead, since starting too coarse on soft wood can remove more material than you actually need.
With your starting grit chosen, work the flexible sanding pad or sponge across the curve using light, even pressure. Let the sander do the work rather than pressing hard, since curved surfaces are more prone to uneven sanding when pressure is inconsistent. Move the pad in smooth, continuous motions rather than short scrubbing strokes, checking periodically that you are not creating any flat spots by lingering too long in one area.
As you work around the curve, always sand in the direction of the grain as much as the shape allows. On sections where the grain shifts direction, adjust your stroke angle to follow it rather than sanding straight through in one fixed direction. This takes a bit more attention than flat sanding, but it prevents the scratch marks that show up clearly once finish is applied, especially on curves where light hits the surface from multiple angles.
Progressing through grits on a curved surface requires a bit more care than on a flat board, mainly because it is easy to lose track of exactly where you have and have not sanded evenly.
Before moving up to your next grit, run your hand across the entire curved surface, since touch often catches scratches and rough spots that are hard to see, especially in low light or on darker woods. A quick wipe with a damp cloth can also help reveal remaining scratches by temporarily darkening the wood grain and making surface imperfections more visible. Only advance to the next grit once the whole curve feels consistently smooth, not just the parts that were easiest to reach.
Work through your grits the same general way you would on a flat surface, typically moving from 100 or 120 up through 150, 180, and 220, but pay extra attention to blending each grit change smoothly across the whole curve. Skipping grits or rushing through a stage tends to show up more obviously on curved surfaces than flat ones, since the changing light angle across a rounded shape reveals scratch patterns that a flat surface might hide.
The final pass on a curved piece is what determines whether it feels professionally finished or just adequately sanded.
After your last grit pass, a light hand buffing with a fine grit sanding sponge or even a worn piece of your finest sandpaper helps even out the entire curve one more time. Use your bare hand to guide the sponge along the contour, since your fingers can feel subtle high spots or roughness that your eyes might miss entirely. This final touch is especially important on pieces that will be handled often, like chair arms or table edges, where the feel of the wood matters just as much as how it looks.
Once the surface feels uniformly smooth across the whole curve, wipe away all dust with a soft cloth or tack cloth before moving on to finish. Curved surfaces tend to collect sanding dust in ways flat surfaces do not, especially in any concave sections, so a thorough cleaning here prevents dust from getting trapped under your finish later.
If you are applying a stain or wood conditioner before a topcoat, test it on a scrap piece with a similar curve first, since curved surfaces can sometimes absorb finish unevenly depending on how the grain runs across different parts of the contour. Applying finish in thin, even coats and checking the surface as you work helps catch any spots that need another light hand sanding before the finish fully cures.
Sanding curved wood and rounded shapes takes a bit more patience than flat work, but the payoff is a piece that feels genuinely well made under the hands, not just good looking from a distance. Choosing flexible tools that conform to the contour, paying close attention to grain direction as it shifts across the curve, and taking the time to check your work by touch rather than sight alone will get you there.
Next time you are facing a curved table edge, a turned spindle, or a carved detail, resist the urge to reach for a flat sanding block out of habit. Grab a sanding sponge, wrap some sandpaper around a dowel, or let a spindle sander do the work, and take your time working through the grits. The smooth, professional result is worth the extra care.
Can I use a regular orbital sander on curved wood?
An orbital sander works fine on gentle curves or large radius surfaces, but for tighter curves it tends to create flat spots since its base is rigid. Flexible sanding sponges or a spindle sander are better choices for tighter contours.
What is the best tool for sanding inside curves or concave shapes?
A dowel or piece of PVC pipe wrapped with sandpaper works well for concave sanding, since you can match the diameter to the curve. A spindle sander is the power tool equivalent for larger concave areas.
How do I know if I am creating flat spots while sanding a curve?
Run your hand along the surface regularly while sanding. Flat spots often feel like a subtle change in the curve’s shape, and they become more obvious under raking light or when you view the piece from different angles.
Should I always sand in the direction of the wood grain on curves?
Yes, as much as the shape allows. Since grain direction often shifts across a curved profile, you may need to adjust your sanding angle several times as you move around the piece to stay aligned with the grain.
What grit should I start with on a curved piece fresh off the lathe?
Most turned or carved hardwood pieces benefit from starting around 80 to 100 grit to remove tool marks, then progressing up through medium and fine grits before finishing.
Can sanding sponges replace sandpaper entirely for curved work?
For most curved and contoured surfaces, yes, since sanding sponges conform to the shape better than flat sandpaper on a rigid block. Flat sandpaper still has its place on straight sections or larger flat areas within the same piece.
How do I prevent swirl marks when using a flap wheel on curves?
Keep the flap wheel moving constantly rather than holding it in one spot, and use light, even pressure. Lingering too long in one area is what typically causes visible swirl marks or uneven material removal.