Physical Address
304 North Cardinal St.
Dorchester Center, MA 02124
Physical Address
304 North Cardinal St.
Dorchester Center, MA 02124
Tiling a kitchen backsplash or updating a bathroom floor is an incredibly rewarding home renovation project. But when you reach the edges of the room, you inevitably need to cut your tiles to fit. Many homeowners assume they need to rent an expensive, messy wet saw to get the job done. While wet saws or electrical tile cutter have their place, they take up a lot of room and spray water everywhere. For most standard jobs, there is a much simpler solution. Learning how to use a manual tile cutter will save you time, keep your workspace clean, and help you achieve professional-looking results on a budget.
This simple tool requires no electricity or water, yet it delivers precise, straight lines with just a little bit of practice. In this comprehensive guide, we will walk you through exactly what this tool is, how it functions, and the exact steps you need to follow to cut your tiles perfectly every time. We will also share some real-life insights to help you avoid common beginner mistakes.
To use a manual tile cutter, measure and mark the tile, align it on the cutter, score the surface with the cutting wheel in a single pass, then apply pressure with the breaker foot to snap the tile along the scored line. Finish by smoothing rough edges with a sanding stone if needed.
Before diving into the specifics, it helps to understand the broad category of tile cutting tools. What is a tile cutter? Simply put, it is any device designed to alter the shape or size of a tile so it fits perfectly into a designated space. Tile cutters generally fall into two main categories: motorized wet saws and manual snap cutters.
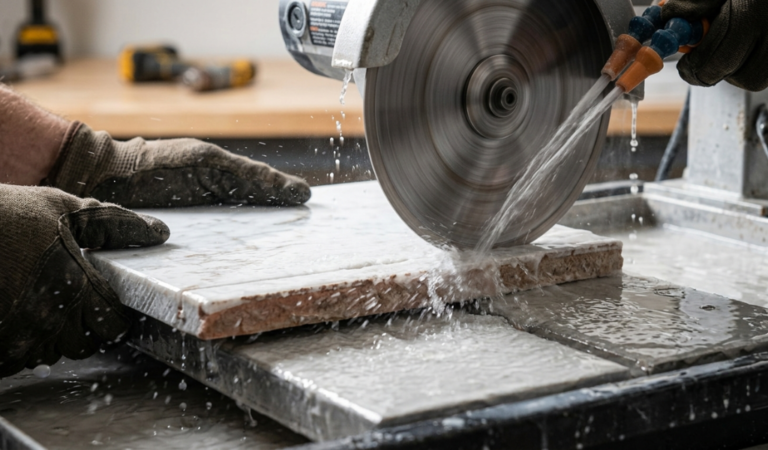
Wet saws use a spinning diamond blade and a steady stream of water to grind through tough materials like thick natural stone or heavy-duty outdoor pavers. They are excellent for large, complex jobs. However, they are also bulky, loud, and require working outdoors or in a heavily prepped area to manage the water runoff. For everyday indoor renovations, a manual alternative is usually the smarter choice. Actually, there is a debate between choosing manual vs electrical tile cutter that which one is that best or good for perfection.
If you want to skip the heavy machinery, you need to understand the alternative. What is a manual tile cutter & how does it work? A manual tile cutter is a specialized hand-operated tool designed to score and snap tiles to achieve clean, straight cuts without electricity.
The device features a flat metal base to support the tile and two metal guide rails. A carriage glides along these rails, holding a small tungsten carbide scoring wheel and a metal snapping foot, often called a breaker.
The operation relies on a simple principle of physics. First, you drag the scoring wheel across the glazed surface of the tile. This creates a tiny, shallow incision or weak point along your exact cutting line. Next, you position the breaker foot flat against the tile and apply firm downward pressure. Because the tile is rigid, the applied pressure forces it to snap cleanly right along the weakened score line. Think of it like scoring a piece of glass or snapping a scored chocolate bar. It provides precise, controlled breaks rapidly and easily.
Using the right tool for your specific material is the secret to a successful DIY project. While manual cutters are incredibly versatile, So understand how to choose the right cutter for for tile project but they are not meant for every single scenario. Because electrical saw or cutter will give you more perfection and it will save your time too .But Manual cutter will be game changer if you use it correctly. Here is a breakdown of when to use a manual tile cutter for the best results.
Cutting tile by hand requires patience and care. Because of this, manual cutters shine during small or medium-sized projects like kitchen backsplashes, guest bathroom floors, or laundry room walls. If you are tiling an entire commercial building or a massive outdoor patio, a motorized saw will save your arms from fatigue.
Manual tile cutters only perform straight lines. You can place a tile at an angle to achieve a diagonal straight cut, but the blade will only travel in one linear direction. If you need to make curved cuts, L-shaped cuts around electrical outlets, or intricate shapes to fit around plumbing pipes, you will need a wet saw or an angle grinder.
These tools are specifically designed to cut ceramic and porcelain. These materials snap beautifully when scored. Some high-end manual cutters can also handle glass tiles, but you must check the manufacturer’s product specifications first. Natural stone, granite, marble, and metal tiles will not snap evenly and must be cut with a wet saw.
While snapping tiles by hand is generally very safe, pieces of sharp ceramic can still fly through the air. You should always gather the right safety gear and preparation tools before you begin.
You will need:
Once your tools are gathered and your safety gear is on, you are ready to start. Follow these clear steps to achieve a flawless cut.
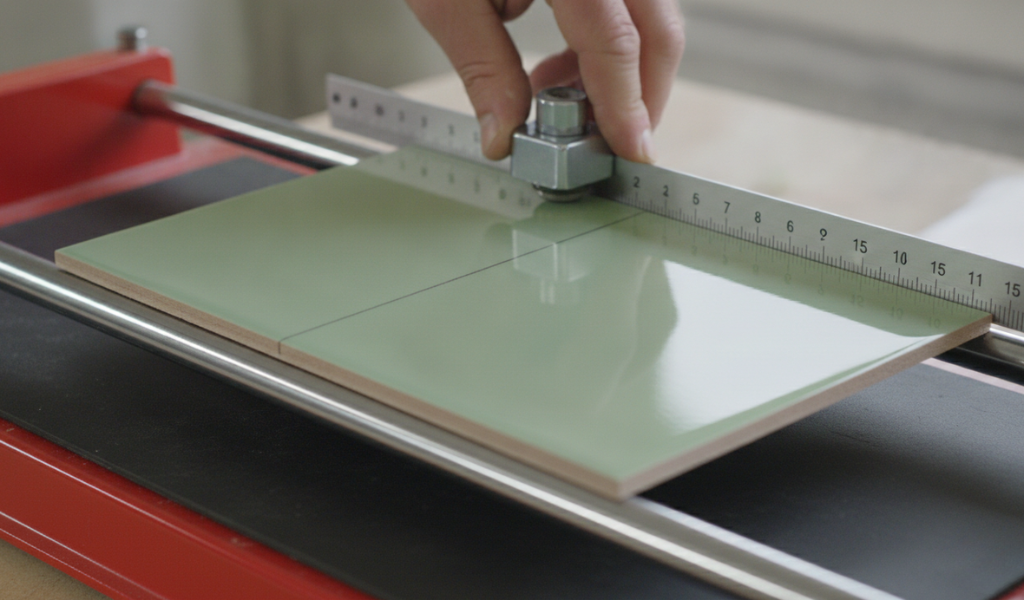
Accuracy is everything. Start by measuring the gap on your wall or floor where the partial tile will go. Transfer that measurement to your tile. Use a pencil and a straight edge to draw a visible cutting line directly onto the glazed top surface of the tile. Double-check your numbers before you proceed.
Place the tile onto the padded base of the cutter. Push the top edge of the tile flush against the top fence of the machine. Align your pencil mark perfectly with the path of the scoring wheel.
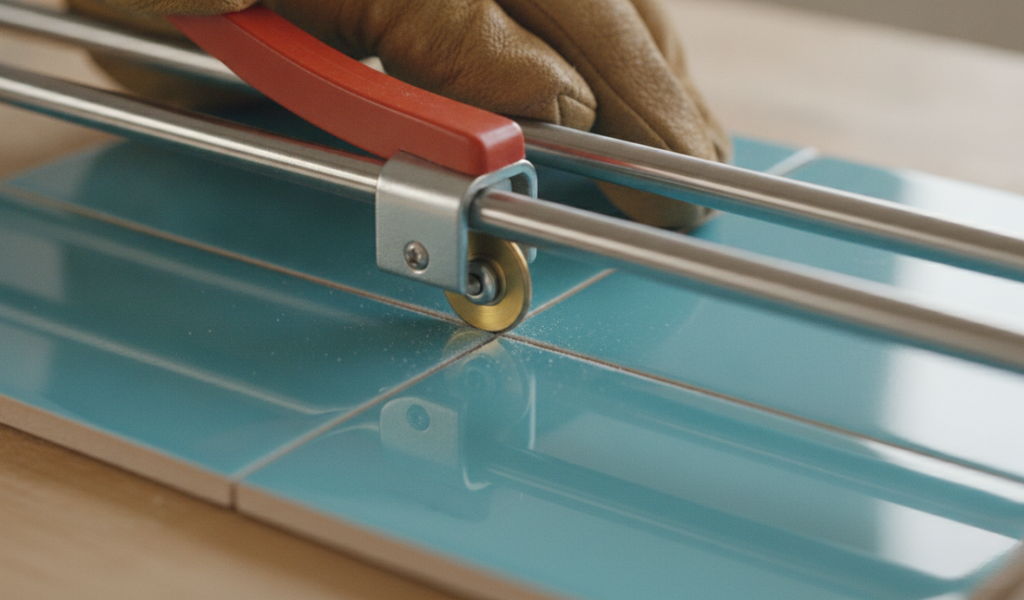
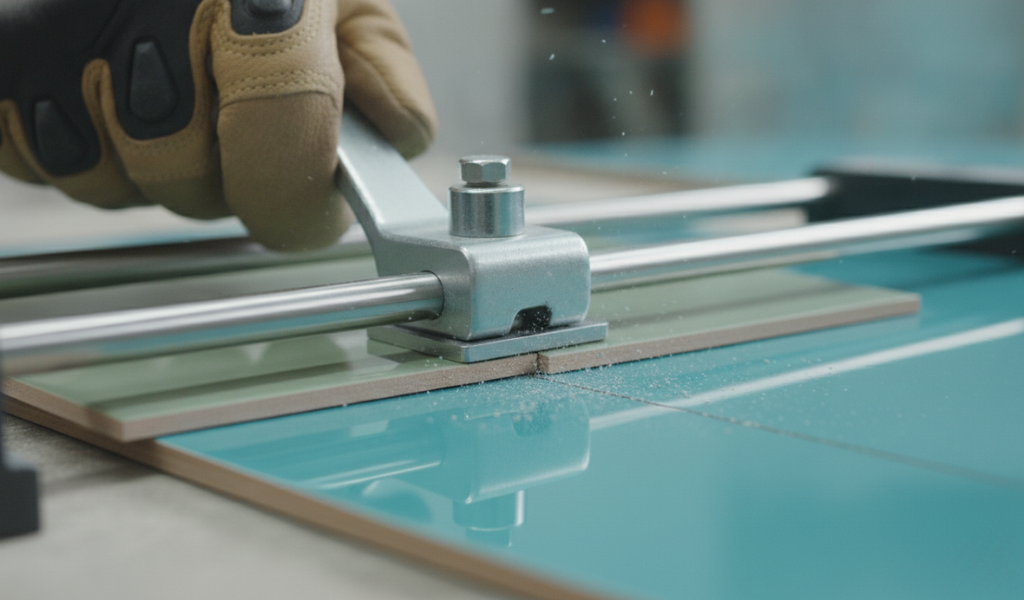
Bring the carriage down so the tungsten carbide wheel rests exactly at the bottom edge of your tile, right on your pencil mark. Grip the handle firmly. Push the carriage forward along the rails, rolling the wheel across the face of the tile using moderate, even pressure.
You should hear a distinct, satisfying scratching sound as the wheel bites into the glaze. The most important rule here is to only make one single pass. Going back and forth over the line multiple times will actually chip the glaze and confuse the break line, leading to jagged edges.
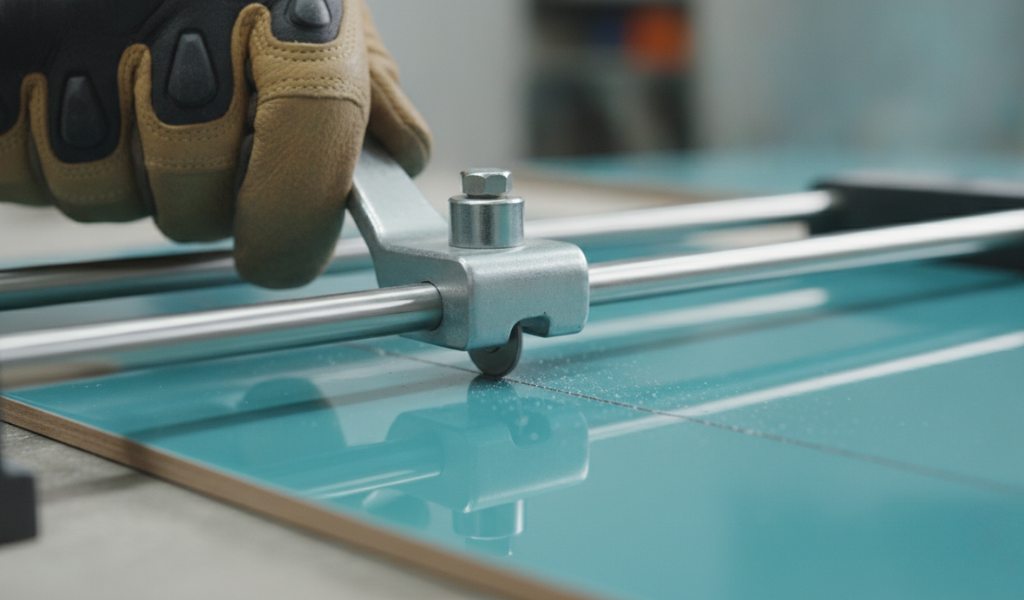
Keep the tile exactly where it is. Slide the carriage back toward the center or bottom of the tile. Lift the handle slightly so the breaker foot drops down and rests flat on the surface of the tile, straddling the score line.
Press down firmly and steadily on the handle. The breaker foot will distribute the pressure evenly on both sides of the score line. With a loud pop, the tile will snap cleanly in two.
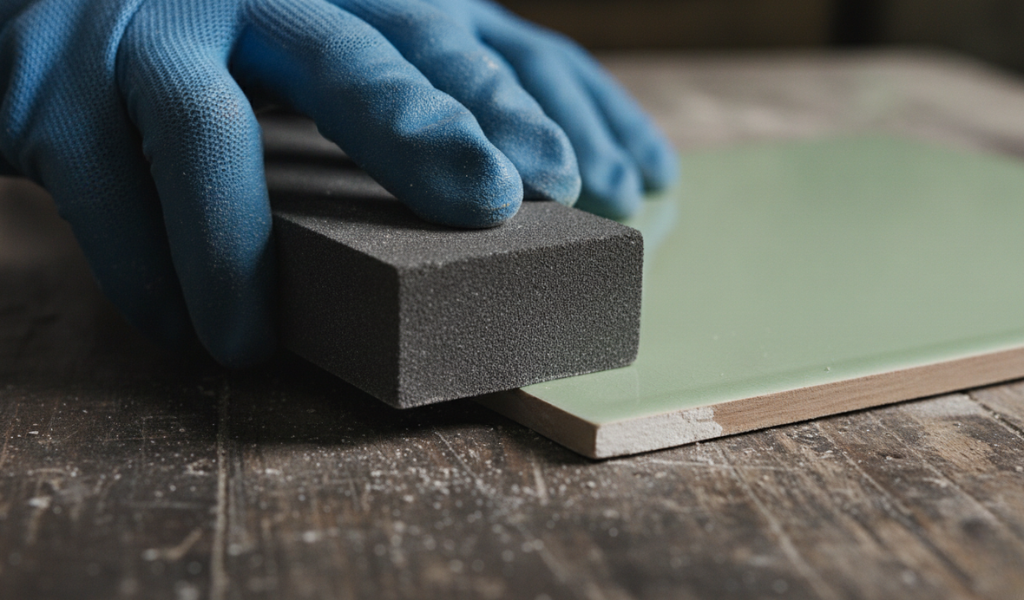
Even with a perfect snap, the freshly broken edge of a ceramic tile can be incredibly sharp. Sometimes, tiny imperfections or burrs will remain on the edge. Grab a tile polishing stone or a piece of medium-grit sandpaper and gently rub it along the cut edge. Smoothing this edge makes the tile safer to handle and ensures your grout lines look professional once the tile is installed on the wall.
Even the best tools require a bit of operator finesse. Here are a few expert tips for manually cutting tile to ensure your project goes off without a hitch.
Because of how the breaker foot operates, manual tile cutters cannot slice off tiny slivers of tile. You generally need to leave at least 3/4 of an inch of material on both sides of the score line for the tool to snap it properly. Always measure carefully so you do not waste expensive materials.
A dull scoring wheel will skip over the glaze rather than cutting into it. This leads to unpredictable breaks. Before starting a big project, test your cutter on a scrap piece of tile. If the score line looks jagged or the tile breaks poorly, it might be time to buy a replacement wheel at your local hardware store.
Real-life DIYers often ruin their first few tiles because they get nervous and try to score the line three or four times. Resist this urge. A single, clean score creates the perfect weak point. Multiple scores create microscopic fractures that cause the tile to shatter unpredictably when you apply pressure.
When snapping the tile, do not slam your hand down on the handle. Apply firm, gradual pressure until the tile pops. Moving too violently can cause the break to travel outside of the scored line, ruining the piece.
Tackling a home renovation can feel intimidating, but having the right knowledge makes all the difference. By learning how to use a manual tile cutter, you empower yourself to work efficiently, cleanly, and safely from the comfort of your home. You eliminate the noise, water spray, and heavy lifting associated with wet saws, allowing you to focus entirely on the precision of your layout.
Remember to take your time, wear your safety gear, and always practice on a few scrap pieces before cutting your most expensive display tiles. If you are ready to take your DIY skills to the next level, grab your measuring tape and start planning your next beautiful room transformation today.
No. Natural stone, such as slate, marble, or travertine, is too dense and porous to snap cleanly. You must use a wet saw equipped with a diamond blade to cut natural stone tiles without shattering them.
Uneven breaks usually happen for three reasons: the scoring wheel is dull, you are scoring the tile multiple times instead of just once, or you are applying uneven, jerky pressure when using the snapping foot.
Manual tile cutters are strictly for straight lines. If you need to cut a curve to fit around a toilet flange or a plumbing pipe, you will need to use tile nippers, an angle grinder, or a specialized wet saw.
You need moderate, consistent pressure. You do not need to use all your body weight. You simply want to press hard enough to hear a continuous scratching sound as the wheel cuts through the top layer of glaze.
A high-quality tungsten carbide scoring wheel can easily last through several standard room renovations. However, if you notice the wheel is skipping, chipping the glaze, or requiring excessive force to leave a mark, it is time to replace it.
While the tool itself does not have a spinning motor, the edges of freshly snapped tiles are essentially as sharp as broken glass.