Physical Address
304 North Cardinal St.
Dorchester Center, MA 02124
Physical Address
304 North Cardinal St.
Dorchester Center, MA 02124

Marble tiles are one of the most beautiful flooring and wall options available. They add a clean, polished look to any bathroom, kitchen, or living space. But if you’ve ever tried to install them yourself, you already know the challenge: marble is not forgiving. Unlike ceramic tiles, which you can score and snap with a manual tile cutter, marble must be cut all the way through. Try to snap it, and it will shatter.
Knowing how to cut marble tiles correctly makes the difference between a professional-looking finish and a pile of broken, expensive stone. Whether you’re tackling your first tile project or you’ve laid floors before, this guide will walk you through everything you need to know, from picking the right blade to making clean straight cuts and smooth curves.
By the time you finish reading, you’ll have a solid understanding of the tools, techniques, and safety steps involved. Let’s get into it.
Not all tiles behave the same way under a blade. Ceramic and porcelain tiles are common types of floor tile that can handle being scored and snapped along a clean line. Marble is a natural stone, which makes it denser and more brittle. It doesn’t have a uniform grain or structure, so a snap cut is likely to crack in the wrong direction.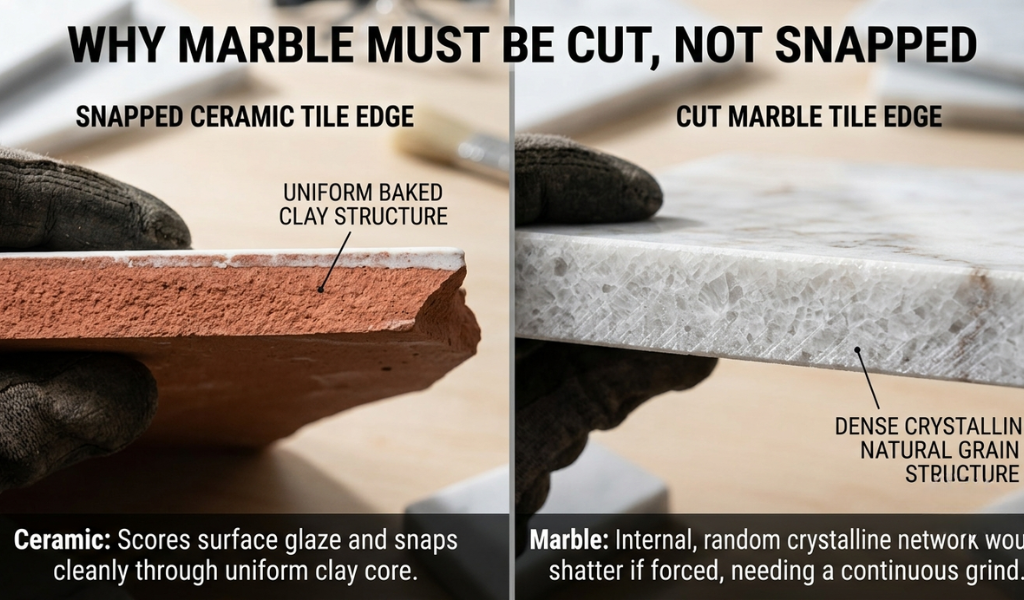
This is why a proper cutting tool with the right blade is essential. You need something that grinds through the stone rather than trying to break it. Once you have the right setup, cutting marble is actually quite manageable, even for beginners.
Getting your tools ready before you start saves a lot of time and frustration. Here’s what you’ll need depending on the type of cut you’re making.
For straight cuts:
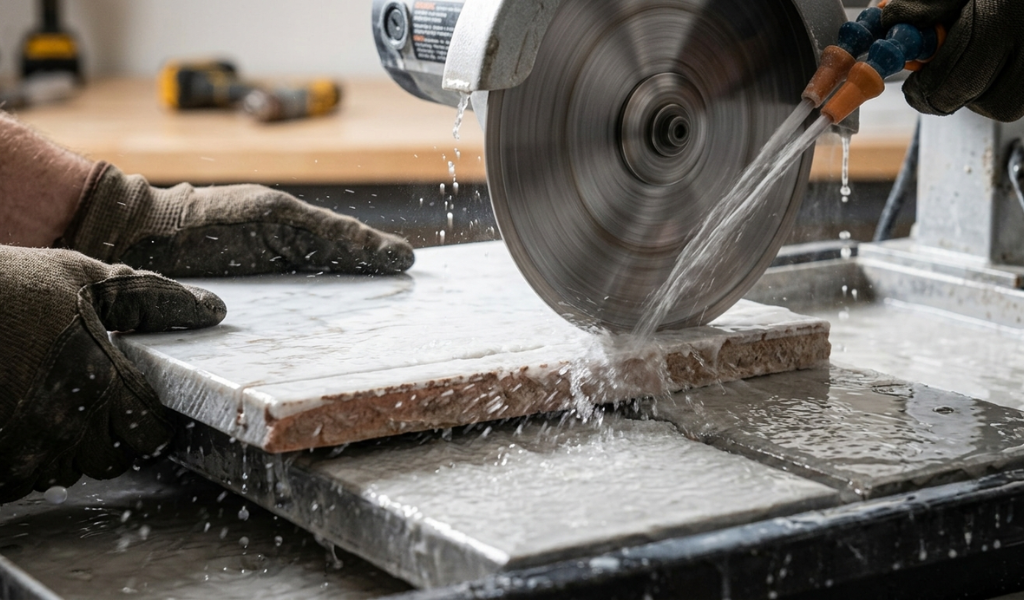
A wet saw is the go-to tool for straight cuts on marble tiles. It uses a spinning blade and a water reservoir to keep the blade cool while cutting. The water also keeps dust down, which is important when working with stone.
For curved cuts:
An angle grinder fitted with a diamond blade works well for cutting curves, notches, or irregular shapes that a wet saw can’t handle.
For both:
You’ll need a diamond blade. This is non-negotiable when cutting marble. Diamond blades are designed to grind through hard materials like stone. Standard saw blades will wear out quickly or cause cracking. You can find diamond blades at any hardware store, and they come in different sizes to fit different machines. Always check your tool’s manual to confirm the correct blade size.
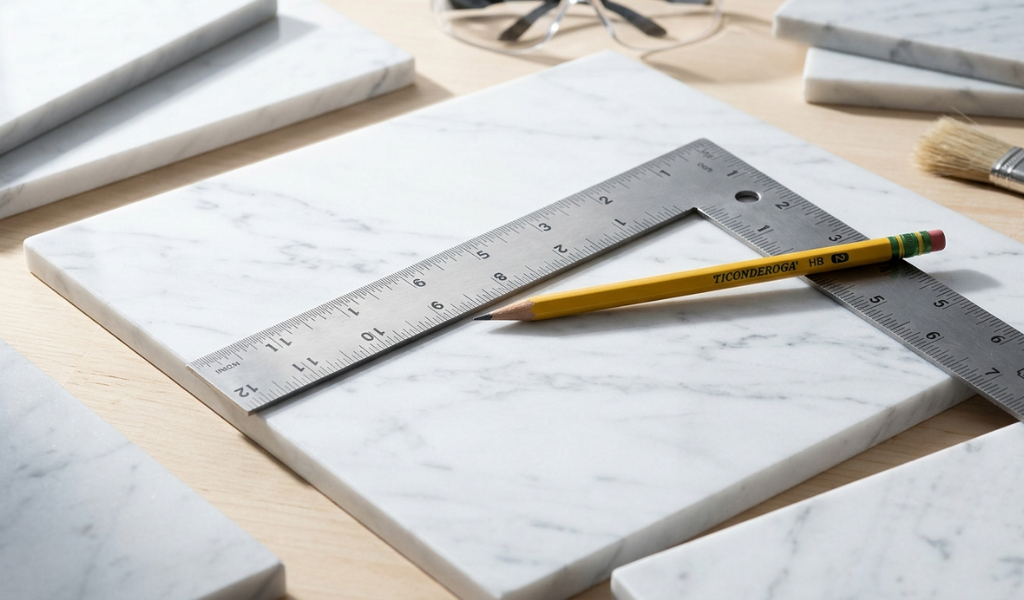
Other useful items include a pencil or marker, a straightedge or ruler, masking tape, and a socket wrench for installing the blade.
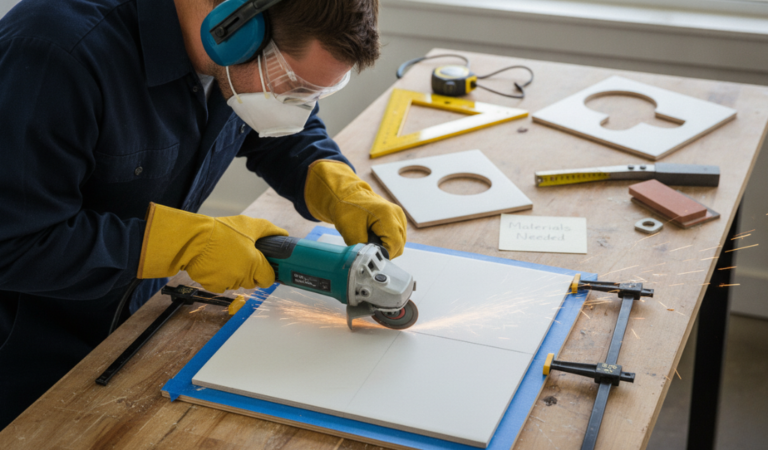
Cutting marble creates a lot of fine dust, and that dust is harmful when breathed in over time. It also sends small fragments flying at speed. Before you switch anything on, make sure you’re protected.
Wear safety glasses to protect your eyes from debris. A respirator or dust mask is important for keeping stone dust out of your lungs. Earplugs are a good idea too, because both wet saws and angle grinders are loud enough to cause hearing damage with repeated exposure. Work gloves are optional but can protect your hands during handling.
You can pick up all of this safety gear at your local hardware store. Don’t skip this step, especially on longer projects where you’ll be cutting many tiles in a row.
Before any blade touches the tile, you need a clear, accurate cut line. Rushing this step causes crooked cuts and wasted tiles.
Place your marble tile on a flat surface. Lay a straightedge along the line you want to cut and draw along it with a pencil. Pencil marks are ideal because they won’t wash off during a wet saw cut, and they wipe off the finished surface cleanly when you’re done.
If you’d rather not mark the tile directly, apply a strip of masking tape along the cut line and draw on that instead. The blade cuts through the tape without any problem.
For curved cuts, a compass works well for tracing clean circular lines. Take your time here. A well-marked tile leads to a clean, accurate cut every time.
A wet saw is the best tool for straight cuts on marble tiles. Here’s how to use one correctly.
Tip the saw on its side and remove the nut that holds the existing blade in place. Take out the old blade carefully to avoid cutting your hand on the edge. Slide the diamond blade in, making sure the teeth face the direction of the blade’s rotation. Tighten the nut firmly with a socket wrench. If your saw came with a blade wrench, use that. Otherwise, a ratchet wrench works just as well.
The water tray sits at the bottom of the machine. Fill it with cold, clean water until the bottom of the blade is just slightly submerged. This keeps the blade cool and stops it from overheating, which can damage both the blade and the tile. It also cuts down on dust considerably.
Because you’re combining water and electricity, always plug your wet saw into a GFCI outlet. These outlets automatically cut power if water reaches any electrical component, which keeps you safe.
The fence is the metal guide that keeps your tile straight as it moves through the saw. Slide your tile against the fence and check where your pencil line sits in relation to the blade. Adjust the fence until the blade lines up with the cut mark. Keep in mind that saw blades typically remove about 1/8 inch of material, so position the blade on the waste side of your line, not the finished side.
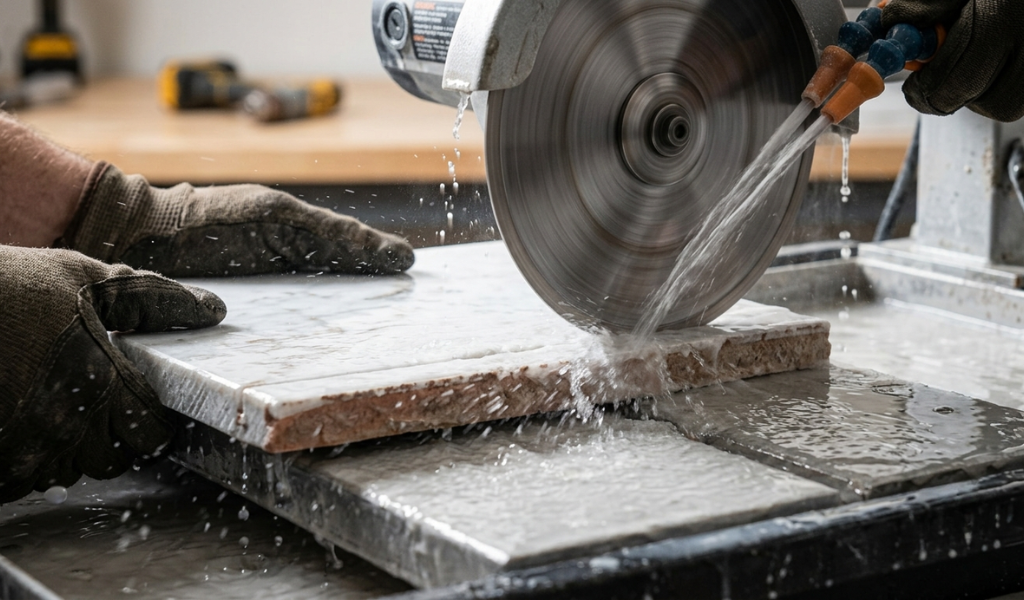
Before cutting all the way through, flip your tile face-down and guide it into the blade just enough to cut about 1 inch (2.5 cm) in from the edge. This is called a relief cut. It releases tension in the stone and greatly reduces the chance of chipping or cracking when you complete the full cut.
Flip the tile back over so the finished surface faces up. Starting from the uncut end of your line, slowly push the tile through the blade in one smooth, steady motion. Don’t rush it. Let the blade do the work. Once the cut is complete, turn off the saw before you remove the tile.
If you’re cutting a narrow strip, use a piece of scrap wood on the far side of the blade to guide and support the smaller piece. This stops it from tipping, breaking, or kicking back toward you.
Straight cuts are great, but what about cutting around a toilet base, a pipe, or a curved wall? That’s where an angle grinder comes in.
Use a ratchet wrench to loosen the nut on the grinder and swap out the existing blade for a diamond blade. Before tightening it back up, check the direction arrow on the blade and compare it to the direction your grinder spins. If they point opposite ways, flip the blade over. Then tighten the nut securely.
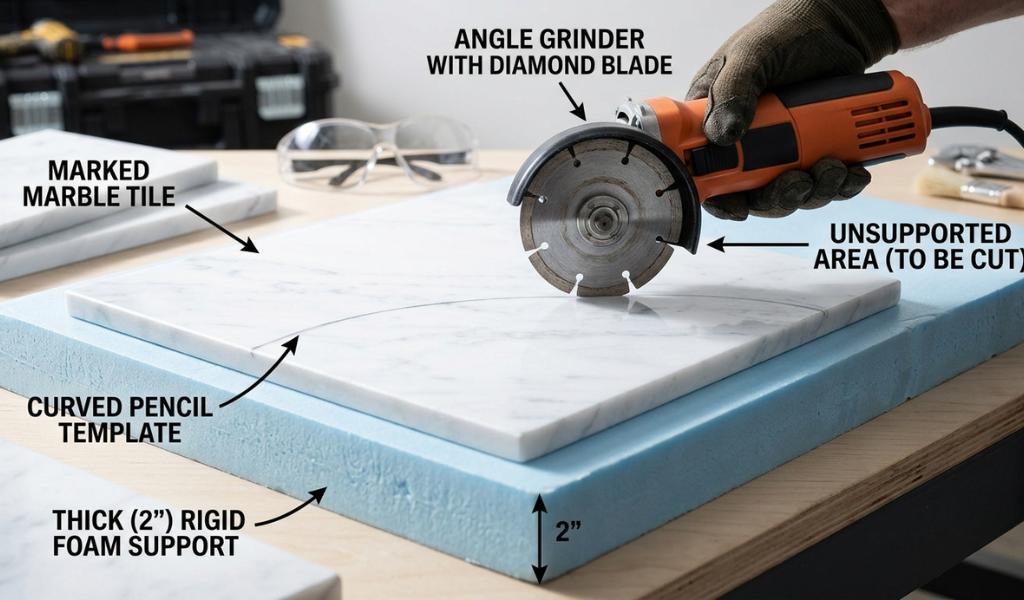
Place a piece of scrap wood or firm foam at least 2 inches (5 cm) thick underneath the tile. This gives the blade somewhere to go once it cuts through, without damaging your table or floor. Never let the tile hang over the edge of your work surface. That’s an easy way to crack an expensive piece of stone.
Switch on the grinder and lower the blade slowly onto the tile at the start of your cut line. Use a gentle, steady motion and follow your marked line, cutting only halfway through the tile on your first pass. Once you reach the end of the line, switch off the grinder. Cutting all the way through in one pass creates too much heat and can break your blade or cause sparks.
Switch the grinder back on and follow the same line again, this time pushing through the rest of the tile to complete the cut. Keep the movement slow and controlled. The blade should glide through cleanly if you follow the groove from your first pass.
Even with the right tools, a few common errors can ruin a good tile.
Pushing the tile too fast through a wet saw is one of the biggest mistakes beginners make. Speed causes chipping along the cut edge. Slow and steady always wins here.
Skipping the relief cut is another one. It only takes a few seconds, but it significantly reduces the chance of the tile cracking during the main cut.
Using a worn or wrong blade leads to rough edges and heat buildup. Always check your blade before starting a project.
Not supporting narrow cut pieces is a mistake that usually results in a broken tile right at the end of the cut. A scrap wood guide on the far side solves this instantly.
If this is your first tile project, here are a few things that will make the whole experience smoother.
Always buy extra tiles. Stone tiles can crack, and cuts don’t always go perfectly the first time. Having a few spares means you won’t be stuck mid-project waiting for a delivery.
A rubber mallet is handy for tapping tiles into place during installation. It gives you control without cracking the tile surface the way a regular hammer would.
Practice your cuts on off-cuts or spare pieces before moving onto your good tiles. Marble is expensive, and getting a feel for the saw or grinder on scrap material first is always worth the time.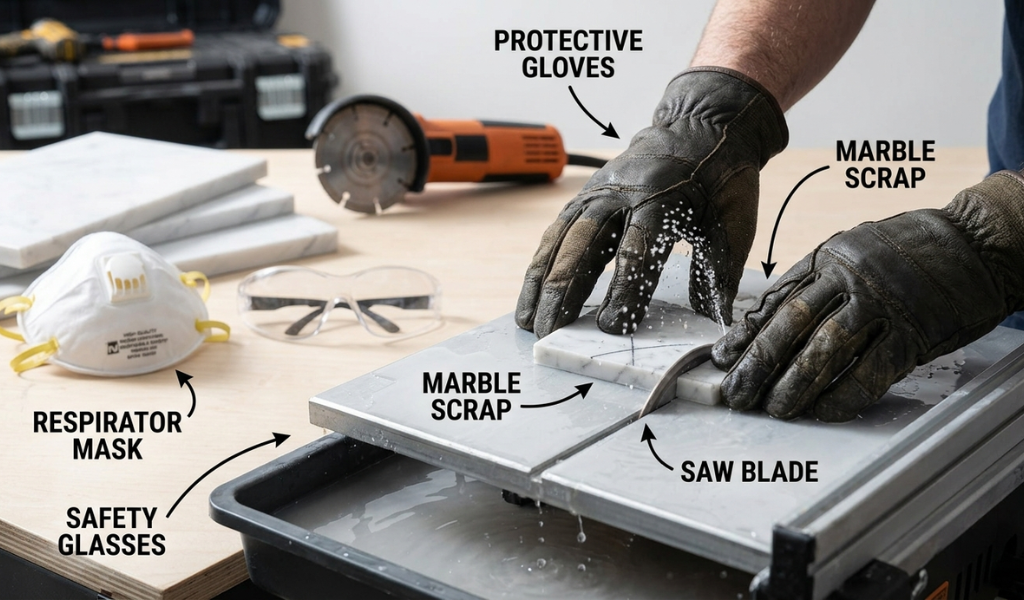
Clean your tiles with a damp cloth after cutting to remove any pencil marks or dust before installation.
Cutting marble tiles takes a bit of care, but it’s well within reach for a confident DIYer. The key is using the right blade, taking your time, and following each step without skipping ahead. A wet saw handles straight cuts cleanly, and an angle grinder takes care of curves. With proper safety gear and a bit of patience, you can get results that look like they were done by a professional.
If you’re just getting started, keep this guide handy throughout your project. And if you found it helpful, feel free to share it with someone else planning their own tile installation.
Can I cut marble tiles without a wet saw?
Yes, you can use an angle grinder with a diamond blade to cut marble tiles. It works well for curves and irregular shapes. However, for long, straight cuts, a wet saw gives a cleaner, more accurate result. If you only have a few cuts to make, an angle grinder can get the job done.
What type of blade do I need to cut marble tiles?
You need a diamond blade. It’s the only type that can grind through dense natural stone without cracking it or wearing out quickly. Make sure the blade size matches your saw or grinder model by checking the instruction manual.
Why can’t I just score and snap marble tiles like ceramic?
Marble is a natural stone with an unpredictable grain structure. Scoring and snapping works on ceramic tiles because they have a consistent, uniform body. Marble will crack in random directions rather than along a clean score line, which is why a full cut is always required.
Is a manual tile cutter suitable for marble?
A manual tile cutter is designed for ceramic and porcelain tiles. It works by scoring the surface and applying pressure to snap the tile. Because marble cannot be snapped cleanly, a manual tile cutter is not suitable. You’ll need a wet saw or angle grinder with a diamond blade instead.
How do I stop marble tiles from chipping when cutting?
Make a relief cut first. Before completing your full cut on a wet saw, flip the tile face-down and cut about 1 inch into the edge. This releases tension in the stone and prevents chipping. Cutting slowly and steadily also makes a big difference.
Do I need to wear safety gear when cutting marble tiles?
Yes, absolutely. Marble dust is harmful when inhaled and should not be taken lightly. Always wear a respirator or dust mask, safety glasses, and earplugs. The dust and noise levels from cutting stone are significant, even for short sessions.
How thick does the support material need to be when using an angle grinder?
The scrap wood or foam placed under the tile should be at least 2 inches (5 cm) thick. This gives the blade enough clearance to cut through the tile completely without hitting your work surface. Never let the tile hang unsupported over the edge of a table, as this increases the risk of cracking.