Physical Address
304 North Cardinal St.
Dorchester Center, MA 02124
Physical Address
304 North Cardinal St.
Dorchester Center, MA 02124

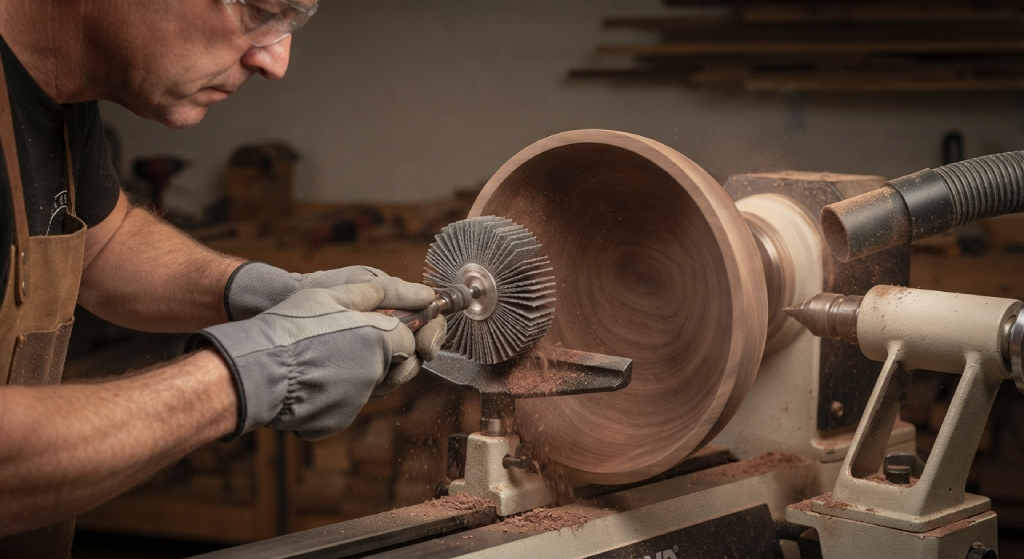
If you have ever struggled to get a smooth, even finish on curved wood surfaces or detailed carvings, a sanding mop for wood might be exactly the tool you have been missing. Unlike flat sanding discs or sheets that only work well on flat surfaces, this flexible tool wraps around contours, edges, and profiles with ease, saving hours of tedious hand sanding.
In this guide, we will break down everything you need to know about sanding mops, how they work, how to pick the right one for your project, and how to use it safely and effectively. By the end, you will understand why so many woodworkers, furniture makers, and hobbyists keep one of these tools within arm’s reach in their workshop.
A sanding mop is a flexible abrasive tool made of strips or flaps of sandpaper attached to a central hub, similar in appearance to a mop head, which is where it gets its name. Instead of a rigid sanding surface, the flaps can bend and flex around uneven shapes, making it one of the most versatile finishing tools available for woodworking.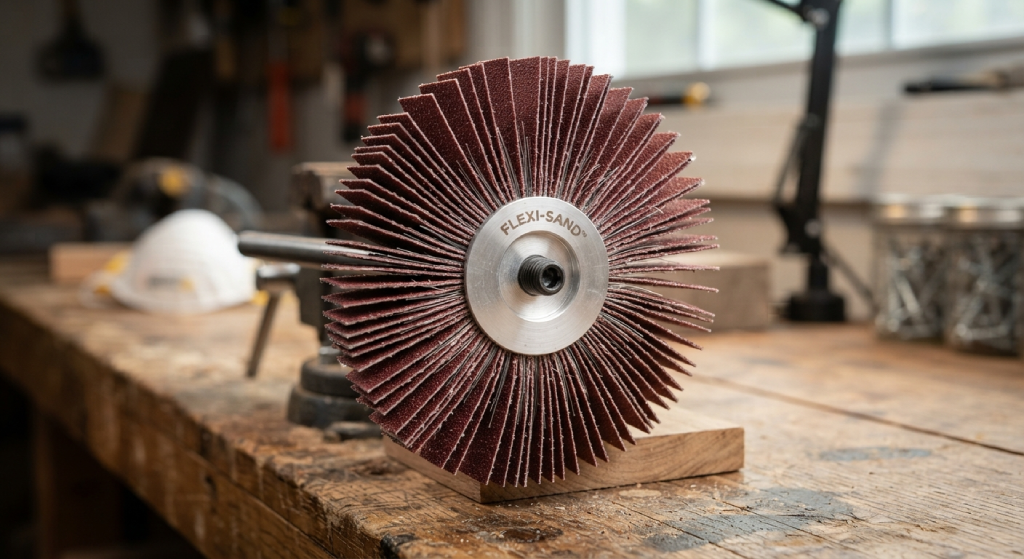
These tools are typically mounted on a drill, bench grinder, or angle grinder, and they spin at high speed to smooth, deburr, or polish wood surfaces. Because the abrasive strips move independently, a sanding mop can reach into grooves, curves, and recessed areas that a flat sander simply cannot access.
The design of a sanding mop is what makes it so effective on irregular surfaces. As the tool spins, the individual abrasive flaps flex and conform to the shape of the wood, applying consistent pressure across the entire contact area. This flexing action allows the mop to sand evenly even on curved chair legs, table edges, or carved details without gouging or flattening the profile.
Because the flaps are constantly rotating and repositioning against the surface, the tool also tends to run cooler than a rigid sanding disc, which reduces the risk of burning the wood. This makes sanding mops a favorite for detailed finishing work where a smooth, scorch-free surface really matters.
Sanding mops are usually made using a combination of a durable core and abrasive strips. The core is often plastic, fiber, or metal, built to withstand the stress of spinning at high speeds without cracking or wobbling. The abrasive flaps themselves are commonly made from aluminum oxide, zirconia, or silicon carbide, each offering a different balance of durability and cutting speed.
Aluminum oxide is a popular all-purpose choice for wood because it cuts smoothly and lasts a reasonable amount of time. Zirconia tends to be more aggressive and long-lasting, which makes it useful for heavier stock removal, while silicon carbide is often chosen for fine finishing work where a polished result is the goal.
A sanding mop is mainly used for smoothing, shaping, and finishing wood surfaces that are difficult to reach with flat sanding tools. Woodturners use it to finish bowls, spindles, and other rounded pieces on a lathe, while furniture makers rely on it to smooth chair spindles, table legs, and decorative moldings.
Beyond general smoothing, sanding mops are also great for removing tool marks left behind by carving, routing, or turning. Many carvers use them as a final step to soften sharp edges and blend transitions between different cuts, giving the piece a more natural, finished look. Because the tool works so well on detailed profiles, it has become a go-to choice for anyone working with spindles, balusters, cabinet doors with raised panels, or ornate trim work.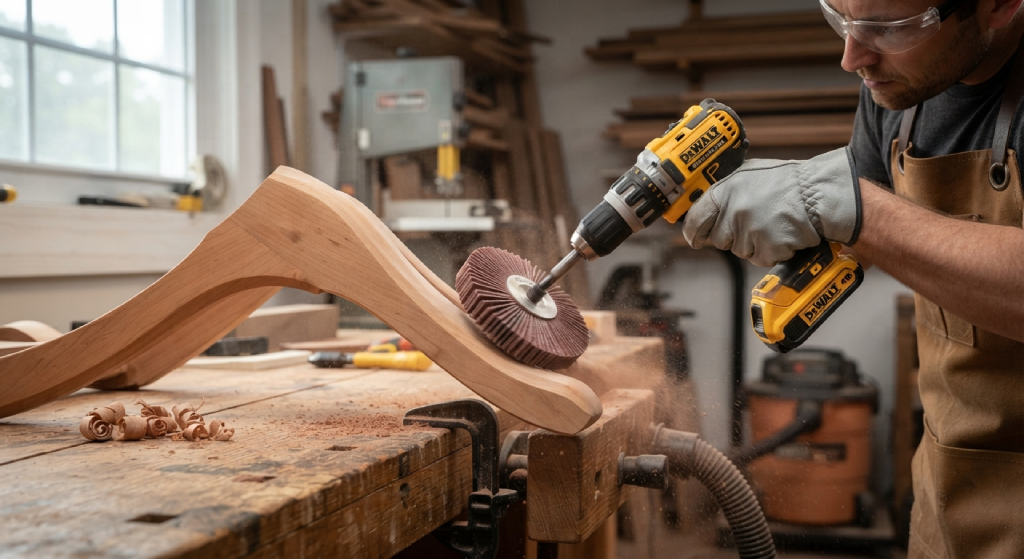
There are several reasons woodworkers reach for a sanding mop over traditional sanding methods, especially when working with shaped or detailed pieces.
One major benefit is time savings. Hand sanding a curved surface can take a long time and often produces uneven results, while a sanding mop can smooth the same area in a fraction of the time with a more consistent finish. Another advantage is reduced risk of gouging. Because the flaps flex rather than staying rigid, there is less chance of digging into soft spots or creating flat areas on a rounded surface, which is a common problem with belt sanders or disc sanders on curved wood.
Sanding mops also produce less heat buildup compared to solid abrasive discs, which helps prevent burn marks, especially on lighter woods like pine or maple that scorch easily. On top of that, these tools tend to last a long time since the individual flaps wear down gradually rather than the entire surface degrading at once, giving you more consistent performance over a longer period before you need a replacement.
Picking the right sanding mop comes down to understanding your project, the type of wood you are working with, and the finish you want to achieve. Two of the biggest factors to consider are grit and size.
Grit refers to how coarse or fine the abrasive material is, and choosing the right grit makes a big difference in your results. Coarse grits, typically in the range of 40 to 80, are best for removing material quickly, smoothing rough surfaces, or shaping raw wood. Medium grits, around 100 to 150, work well for general smoothing once the shape is established. Fine grits, from 180 and up, are ideal for final finishing passes before staining or applying a topcoat.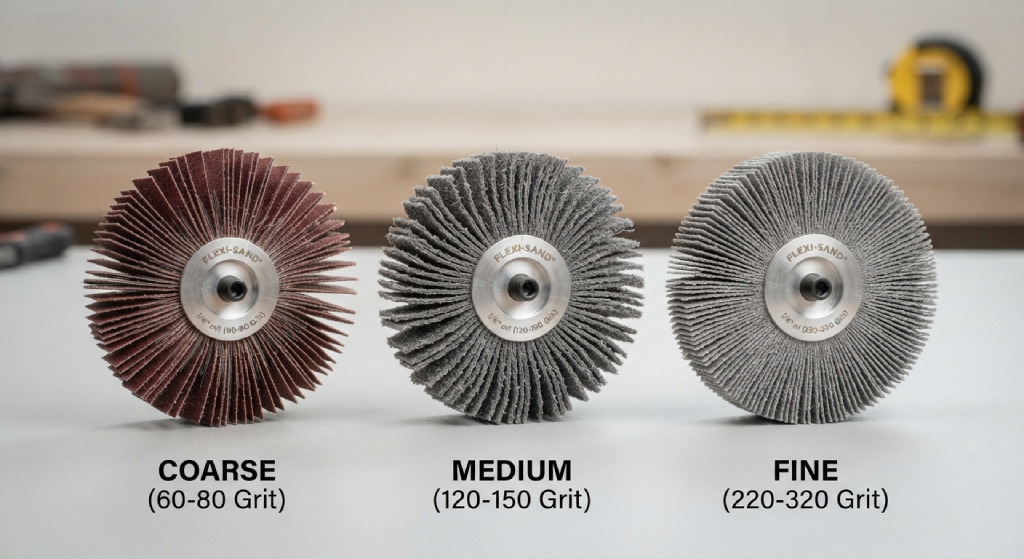
A good rule of thumb is to start with a coarser grit if you are shaping or removing significant material, then move through progressively finer grits to eliminate scratch marks and achieve a smooth, ready-to-finish surface. Skipping grits too quickly can leave visible marks that show up once stain or finish is applied, so it pays to be patient through the process.
Sanding mops come in a range of diameters and widths, and the right size depends on the scale of your project and the tool you plan to use it with. Smaller mops, often used with a drill or rotary tool, are great for detailed work like carving finishes, small spindles, or tight corners. Larger mops mounted on a bench grinder or dedicated finishing machine are better suited for bigger pieces like table legs, bowls, or larger turned items.
The shape of the flaps also matters. Some mops have longer, looser flaps that conform more easily to deep curves, while others have shorter, denser flaps that offer more control and a firmer touch on flatter contoured surfaces. Matching the mop shape to your project shape will give you a cleaner, more even result.
Using a sanding mop correctly takes a bit of practice, but the basic process is straightforward once you get the hang of it. Start by securing the mop onto your drill, grinder, or lathe attachment, making sure it is mounted tightly and spins true without wobbling.
Begin with a lower speed setting, especially if this is your first time using the tool, and gradually increase speed as you get comfortable with how it handles. Hold the wood piece securely, whether it is mounted on a lathe or clamped in place, and bring the spinning mop into contact with the surface using light, even pressure. Let the tool do the work rather than pressing hard, since too much pressure can cause uneven wear on the flaps and inconsistent results on the wood.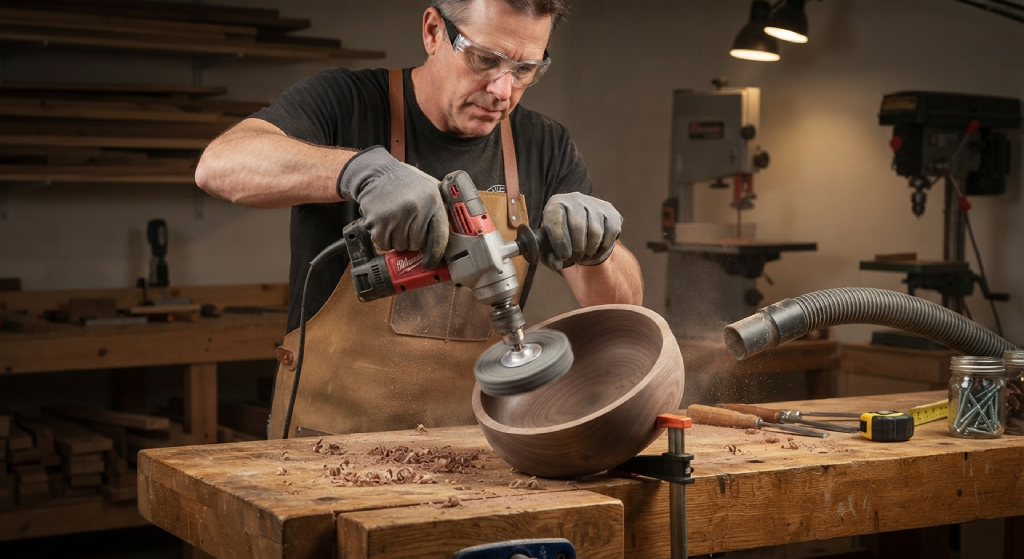
Move the mop steadily across the surface rather than holding it in one spot, which helps avoid creating low spots or burn marks. Work through your grit progression, starting coarse and finishing fine, checking the surface by hand between passes to feel for any rough spots that need extra attention. Once you reach the finer grits, a light touch is usually all that is needed to bring out a smooth, almost polished feel on the wood.
Sanding mops shine in a variety of woodworking applications, particularly anywhere curves, contours, or fine details are involved. Woodturners frequently use them on bowls, pens, and spindle work where a flat sander simply cannot reach every angle. Furniture restorers also find them useful for smoothing out old finishes on chair legs, table edges, and decorative trim without losing the original shape of the piece.
Carvers often use a sanding mop as the final step after roughing out a shape with chisels or power carving tools, since the flexible flaps can follow intricate details like feathers, fur textures, or floral patterns without flattening the design. Cabinet makers also use them on raised panel doors and decorative molding where the profile has multiple curves and angles that would be tedious to sand by hand.
Even hobbyists working on smaller projects like wooden bowls, ornaments, or handles for tools find that a sanding mop speeds up the finishing process significantly compared to sandpaper alone.
Musical instrument makers sometimes reach for a sanding mop when shaping the necks or bodies of guitars and violins, since these pieces often have subtle curves that need to feel smooth to the touch without losing their intended shape. Similarly, gunstock makers and archery bow builders use sanding mops to refine the contours of their pieces, where consistency matters just as much as smoothness. Anyone who works regularly with lathe-turned items, from chess pieces to decorative finials, will likely find this tool becomes part of their standard finishing routine rather than an occasional accessory.
Even though sanding mops are relatively easy to use, there are a few common mistakes that can affect your results or shorten the life of the tool. One frequent error is using too high a speed right away, which can cause the abrasive flaps to wear out faster and increases the risk of burning the wood, especially on softer species.
Another mistake is pressing too hard against the surface. Since the flaps are designed to flex and do the work naturally, excessive pressure defeats the purpose and can actually create uneven results rather than a smooth finish. Skipping grit stages is another common issue, jumping from a coarse grit straight to a fine one often leaves visible scratches that become obvious once a stain or finish is applied.
Neglecting to clean sawdust and debris off the mop during use is another oversight. Buildup can reduce the effectiveness of the abrasive and cause the tool to skip or catch on the wood surface. Lastly, many beginners forget to check that the mop is securely mounted before starting, which can lead to wobbling, uneven wear, or even damage to the workpiece if the mop comes loose mid use.
Like any power tool accessory, a sanding mop should be used with proper safety precautions in mind. Always wear safety glasses or a face shield to protect your eyes from flying dust and debris, and consider a dust mask or respirator since fine wood dust can be harmful to breathe in over time, especially during extended sanding sessions.
Secure your workpiece firmly before bringing the spinning mop into contact with it, whether that means clamping it down or mounting it properly on a lathe. Loose or unsecured pieces can shift unexpectedly and lead to injury or a ruined project. Keep loose clothing, hair, and jewelry away from the rotating mop, since the spinning flaps can catch on fabric or hair strands quickly.
It is also a good idea to work in a well-ventilated area or use a dust collection system, since sanding mops generate a fair amount of fine dust during use. Finally, always inspect the mop before each use for signs of damage, such as torn or missing flaps, and replace it if you notice significant wear, since a damaged mop can behave unpredictably at high speeds.
Unplugging or disconnecting the power source before changing or adjusting the mop is another habit worth building early on, since it removes the risk of the tool accidentally starting while your hands are near the abrasive flaps. If you are using a handheld drill rather than a stationary grinder, brace yourself and keep a firm two-handed grip where possible, since the torque from a spinning mop can catch you off guard if it grabs the wood unexpectedly. Taking these precautions seriously from the start will help you build good habits that carry over to every other power tool in your shop.
A sanding mop for wood is a simple but powerful addition to any woodworking shop, especially if you regularly work with curved, carved, or detailed pieces. It saves time, reduces the risk of gouging or burning compared to rigid sanders, and delivers a smooth, professional finish that is hard to match by hand.
Whether you are turning bowls on a lathe, restoring old furniture, or carving decorative pieces, taking the time to choose the right grit and size for your project will make a noticeable difference in your results. Start with a coarser grit to shape and smooth, then work your way up to a finer finish for that polished final look.
If you have not tried using a sanding mop yet, it is worth adding one to your toolkit for your next project. Once you feel how much easier it makes finishing curved and detailed wood surfaces, it will likely become a permanent part of your sanding routine.
1. Can a sanding mop be used on all types of wood? Yes, sanding mops work on most wood types, though softer woods like pine may need lower speeds and lighter pressure to avoid burning, while hardwoods can typically handle slightly higher speeds.
2. What tools can a sanding mop be attached to? Sanding mops can be mounted on a drill, angle grinder, bench grinder, or a lathe using the appropriate arbor or attachment, depending on the size and design of the mop.
3. How long does a sanding mop last? The lifespan depends on usage frequency and the material being sanded, but because the flaps wear down gradually, a good quality mop can last through many projects before needing replacement.
4. Is a sanding mop better than sandpaper for curved surfaces? For curved or detailed surfaces, a sanding mop is generally more efficient than flat sandpaper since the flexible flaps conform to the shape and reach areas that flat sanding tools cannot access easily.
5. What grit should I start with on rough wood? For rough or freshly carved wood, starting with a coarse grit between 40 and 80 helps remove material quickly before moving on to medium and fine grits for a smooth finish.
6. Can a sanding mop remove old paint or finish from wood? Yes, a coarser grit sanding mop can help remove old paint or finish, though for thick layers it is often best paired with a chemical stripper or scraper first to speed up the process.
7. Do I need special safety gear to use a sanding mop? At minimum, safety glasses and a dust mask are recommended, along with keeping loose clothing and hair away from the spinning tool to avoid accidents during use.