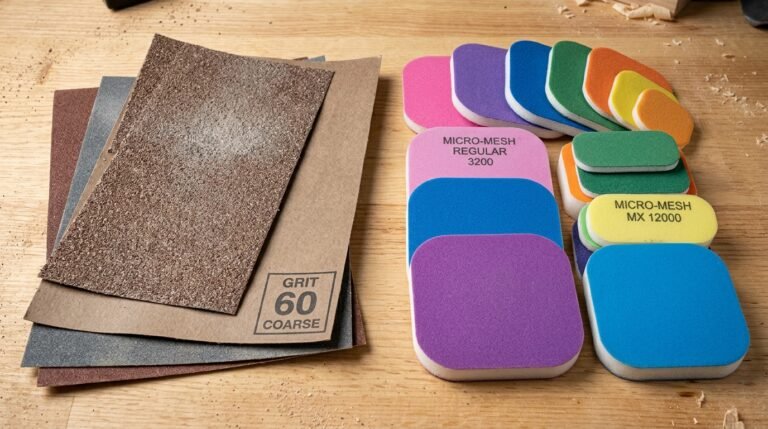
Physical Address
304 North Cardinal St.
Dorchester Center, MA 02124
Physical Address
304 North Cardinal St.
Dorchester Center, MA 02124


Most woodworkers reach for an orbital sander the moment a project calls for smoothing raw lumber. It’s fast, it’s efficient, and it covers ground quickly. But speed has a cost. Power tools like random orbital sanders can round crisp edges, burn through thin veneer layers, and leave swirl marks that only show up after the finish goes on. That’s where hand sanding earns its place in the workshop.
This guide is designed for beginners who want to understand manual surface preparation from the ground up, what tools to use, when to use them, and how to get consistently smooth results on everything from flat panels to intricate moldings. If you’re just getting started with abrasives in general, make sure to also check out our ultimate guide to woodworking sanding techniques, which covers the broader sanding process from coarse material removal all the way through to fine finishing.
Here, the focus is entirely on hand sanding tools: the mechanics behind them, the types available, how to select the right one for your surface, and the practical techniques that separate a scratched, uneven finish from a silky smooth one. Whether you’re working on a hardwood tabletop, detailed trim work, or a DIY project with tight curves and contours, there’s a hand sanding tool built for the job.
Hand sanding is the process of manually abrading a wood surface using sandpaper held against a backing tool, a block, pad, or sponge rather than a motor-driven sander. The abrasive does the same work as it would in an electric sander, but the woodworker controls every aspect of the stroke: direction, pressure, speed, and coverage area.
At its most basic, hand sanding involves wrapping a piece of sandpaper around a rigid or semi-rigid backing tool and moving it across the wood surface using long, deliberate strokes. The backing distributes pressure evenly across the abrasive, which prevents localized gouging and helps maintain a flat, consistent plane across the wood.
There are specific situations where a random orbital sander or belt sander simply cannot do what a hand sanding tool can. These include:
One underappreciated advantage of hand sanding is its ability to maintain a flat plane. When pressure is applied through a rigid sanding block rather than bare fingertips, the abrasive stays flat against the wood surface. Fingertip sanding applying sandpaper directly without a backing tool concentrates pressure at each fingertip, creating subtle high and low spots that become visible under a finish. A proper sanding block eliminates this problem, making it the preferred approach for flat surfaces like tabletops, cabinet doors, and shelving.

The most fundamental hand sanding tool is the sanding block, a rigid backing that holds a sheet of sandpaper flat and distributes pressure evenly across the abrasive surface. Traditional sanding blocks come in two main forms: shop-made wood blocks and commercial rubber blocks.
Wood blocks are typically cut from scrap lumber left over from a project. A piece of wood measuring around 3–4 inches long and 1.5–2 inches wide is ideal. The sandpaper wraps around the block and is held in place by hand pressure, a staple, or a small clamp. These shop remnants cost nothing and can be sized to fit any job.
Rubber blocks are commercial versions that offer a more secure grip and often include a clamping mechanism that locks standard sheets of sandpaper in place without tearing. Heavy-duty rubber blocks are particularly useful for coarse sanding on rough surfaces, where aggressive grits like 60 grit or 80 grit are needed to remove material quickly. Both wood and rubber blocks excel on flat surfaces where maintaining a consistent, even plane is the priority.
For longer sanding sessions, fatigue becomes a real issue. Ergonomic foam sanding blocks and grip pads address this by providing a cushioned, contoured surface that’s easier to hold over extended periods.
These tools typically use one of two fastening systems:
Foam pads work particularly well for fine sanding on flat to slightly curved surfaces. The slight give in the foam helps the abrasive conform to minor surface irregularities while still distributing pressure broadly enough to avoid uneven removal.
Where rigid blocks are ideal for flat panels, flexible sanding sponges are the right tool for curves, profiles, and anything that isn’t a straight plane. Sanding sponges consist of an open-cell foam core coated with abrasive typically aluminum oxide on one or both sides.
Their flexibility allows them to conform to concave and convex surfaces without rounding over the edges of a profile or leaving flat spots where a rigid block couldn’t make contact. A dual-sided sanding sponge with different grits on each face doubles as a quick grit-switching tool during contour sanding.
Flexible sanding sponges are also popular for wet sanding applications, particularly between coats of finish. The sponge can be dampened slightly, which reduces clogging and keeps the abrasive cutting cleanly on sealed surfaces. For woodworkers who need a full sanding sponge set covering coarse, medium, and fine grits, these tools offer an affordable and versatile option.
For detailed trim work, decorative moldings, and intricate woodworking profiles, standard blocks and flat sponges fall short. Contour sanding tools including oval sponge holders, touch-up pads, and profile-specific sanding grips are purpose-built for these situations.
These tools use shaped foam or rubber cores that match common molding profiles, allowing the abrasive to follow the exact contour of the wood surface without distorting the detail. A profile sander with the right contour insert can clean up a complex cove or bead molding in a fraction of the time it would take with a folded piece of sandpaper and no backing support. For fine detail work, these specialized tools are indispensable.
The most important variable in selecting a hand sanding tool is the geometry of the surface you’re working on.
Flat panels and large surfaces call for rigid backing. A wood block or heavy-duty rubber block will keep the sandpaper flat and prevent the dips and ridges that come from uneven pressure. For large flat surfaces like tabletops or cabinet sides a larger sanding block covers more ground per stroke and speeds up the process.
Curved and irregular surfaces require flexibility. Sanding sponges and soft foam pads conform to the wood rather than fighting against it. On concave curves, a flexible sponge wraps into the curve naturally; on convex curves, it bends over the profile without applying uneven edge pressure.
Fixing mechanisms matter more than most beginners expect. Hook-and-loop systems are ideal for projects that require frequent grit changes moving from 120-grit to 150 grit to 220 grit between sessions. PSA systems offer better abrasive stability for aggressive material removal but slow down grit swaps. For most DIY projects and occasional woodworking, hook-and-loop blocks offer the better balance of convenience and performance.
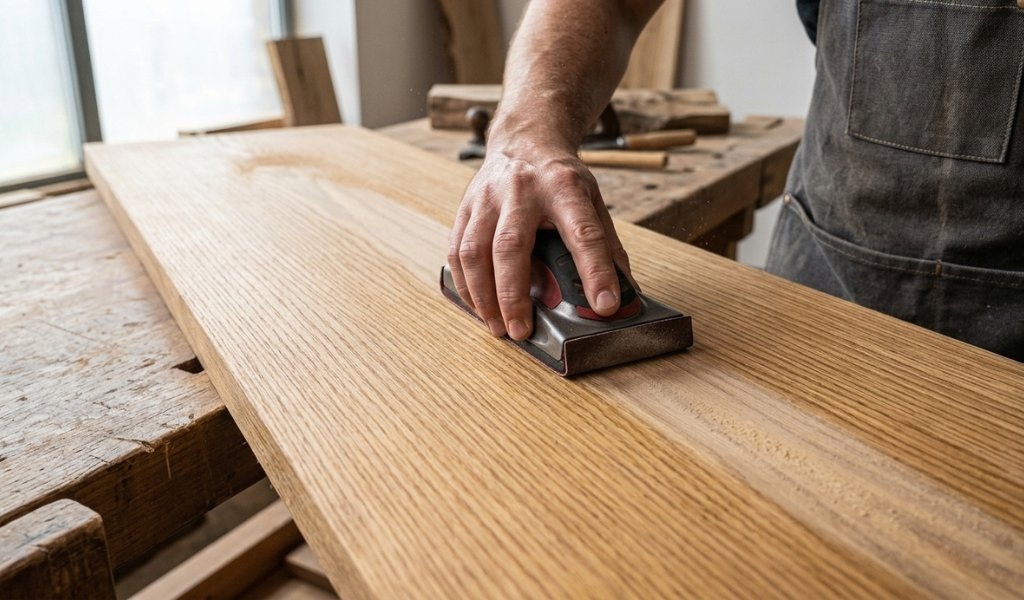
Sanding with the grain is the single most important rule in hand sanding. Pulling long strokes parallel to the wood grain direction prevents cross-grain scratches short, perpendicular marks that catch light and become visible under any finish. Cross-grain scratches require significant re-sanding to remove and often mean stepping back to a coarser grit. Always orient your strokes to run in the direction of the grain, not across it.
Applying heavy pressure with bare fingertips concentrates force at small contact points, creating uneven abrasion. The backing tool, whether a rigid block or foam pad, is designed to spread that force evenly across the full abrasive surface. Use moderate, consistent hand pressure and let the tool do the work. This produces a flatter, more even surface and extends the life of your sandpaper.
Progressive grit sorting means moving through coarse, medium, and fine paper stages in sequence rather than jumping directly from a coarse grit to a fine grit. Start with a coarse sandpaper (60 grit or 80 grit) for paint removal or leveling rough surfaces, step to a medium grit (120-grit or 150 grit) to remove the scratches left by the coarse paper, then finish with fine grit (220 grit) for a surface ready for stain or finish. Skipping grits leaves deep scratches from the previous stage that finer paper can’t efficiently remove.
Examine the wood surface under raking light a single light source held at a low angle to the surface after each grit stage. This reveals scratches, high spots, and any remaining roughness that needs addressing before moving to the next grit. Catching problems early saves time and prevents finishing over imperfections.
Clogged sandpaper loses its cutting ability and can leave burnished spots on the wood surface rather than abrading it cleanly. For resinous woods or softwoods prone to loading the abrasive, a sandpaper cleaning stick can restore cutting performance. For aluminum oxide sandpaper and silicon carbide sheets, replacement is often more efficient than cleaning once the abrasive becomes visibly dull.
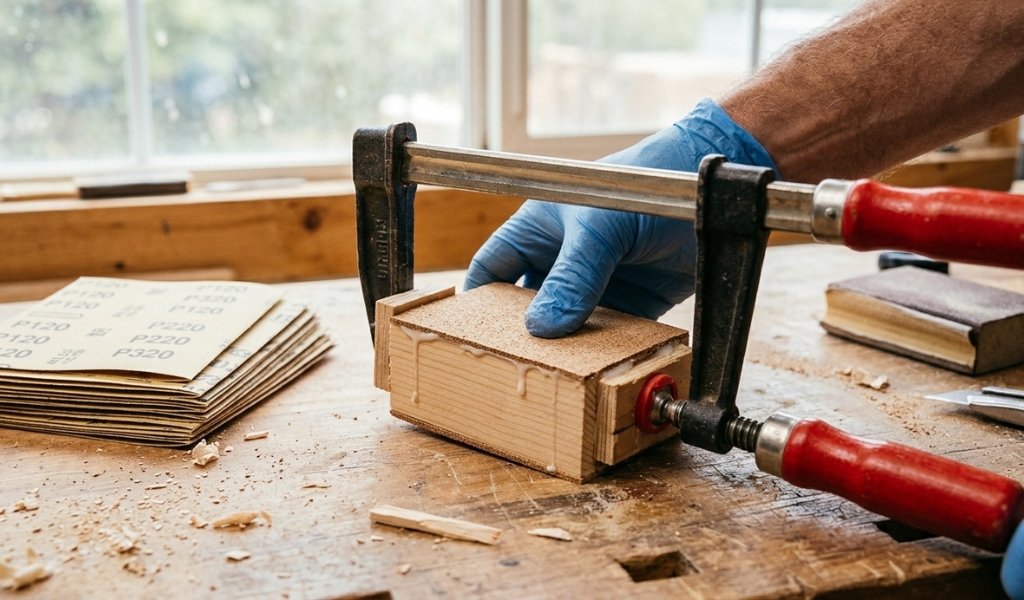
Commercial sanding blocks are affordable, but a set of custom DIY blocks tailored to your specific projects costs almost nothing if you keep your shop remnants.
Here’s how to build a basic set:
A set of four custom blocks 60 grit, 80 grit, 120 grit, and 220 grit covers the full range of wood sanding tasks and costs a fraction of commercial equivalents. For specialized profiles, the same approach works with shaped foam offcuts cut to match the contour of specific moldings.
The best hand sanding tool depends on the surface. For flat panels and broad surfaces, a rigid sanding block either a shop-made wood block or a commercial rubber block provides the most even pressure and surface flatness. For curved surfaces and profiles, a flexible sanding sponge or contour sanding grip conforms to the shape of the wood without distorting detail. For extended sanding sessions, an ergonomic foam block with hook-and-loop sandpaper reduces hand fatigue significantly.
Yes. Flexible sanding sponges are specifically designed for curved and irregular surfaces, conforming to both concave and convex profiles without flattening the detail. For tight spaces and intricate moldings, contour sanding tools and touch-up pads with shaped foam cores access areas that flat blocks and power tools cannot reach. Folded sheets of sandpaper can also work in very tight spots, though they offer less control than a purpose-built contour tool.
Hand sanding abrasives span a wide range of grits. Coarse grits 40 grit, 60 grit, and 80 grit handle paint removal, heavy material removal, and leveling rough surfaces. Medium grits 100 grit and 120-grit bridge the gap between coarse sanding and finish work. Fine grits 150 grit and 220 grit are used for final surface preparation before staining or applying a topcoat. For sanding between finish coats, extra-fine grits of 320 to 400 are common. Most aluminum oxide sandpaper and silicon carbide sheets are available across this full range.
Hand sanding is the better choice when control and precision matter more than speed. Specific situations include: sanding veneered surfaces where an electric sander would cut through the thin face layer; preserving sharp edges and defined corners that power tools would round over; performing a final pass before applying stain or finish to eliminate swirl marks left by random orbital sanders; and working on detailed trim or molding profiles where stationary belt sanders and orbital sanders physically cannot reach.
The most common mistakes in hand sanding include: sanding across the grain instead of parallel to it, which creates cross-grain scratches visible under finish; applying pressure with bare fingertips instead of a backing block, which creates uneven surfaces; skipping grit stages and jumping from a coarse grit to a fine grit too quickly, which leaves deep scratches the finer paper can’t remove; and continuing to use clogged or dull sandpaper, which burnishes wood surfaces rather than abrading them cleanly. Using the wrong tool for the surface geometry for example, applying a rigid block to a curved profile is another frequent error that leads to uneven results.