Physical Address
304 North Cardinal St.
Dorchester Center, MA 02124
Physical Address
304 North Cardinal St.
Dorchester Center, MA 02124


Few woodworking skills separate a polished, professional result from an amateur one quite like sanding. Get it right, and your stain absorbs evenly, your paint glides on smoothly, and the material feels like glass. Get it wrong—skip a grit, sand against the grain, or rush the process—and you’ll spend more time correcting mistakes than you did on the original project.
This guide breaks down everything a beginner needs to know about the smoothing process: the right tools, the correct sandpaper grits, the proper technique, and the critical mistakes to avoid. Before diving into the technical steps, you can check out our ultimate guide to woodworking sanding techniques to understand the core mechanics of surface prep. From there, this post will walk you through each stage of the sanding process in sequence, so you finish with a surface that’s genuinely ready for stain, paint, or a topcoat.
Whether you’re tackling old tables, raw wood panels, or a small DIY project, the fundamentals remain the same. Sanding isn’t just about making wood smooth it’s about controlling the surface at a microscopic level so that whatever goes on top adheres, absorbs, and looks exactly as intended.
Raw wood is rarely as flat or uniform as it appears. Mill marks, tear-out from cutting tools, and natural irregularities in wood fibers all sit on the surface of the wood, invisible until you apply a finish. Sanding serves a dual purpose here: it levels those high spots and opens the grain pores so finishes can penetrate properly.
When you smooth the lumber, you’re removing material through abrasion. Coarser grits cut aggressively into the lumber face, shearing off raised fibers and flattening ridges. Finer grits refine that surface progressively, leaving behind smaller and smaller surface marks until they’re too fine to affect the finish. This progressive scratch removal is the foundation of proper sanding.
Opening the grain matters enormously if you plan to stain wood. A closed or burnished surface caused by using only fine grit sandpaper without working through the grits will repel stain unevenly, creating blotchy patches that no amount of additional staining will fix.
Paint and stain need mechanical adhesion. On an unsanded surface, there’s nothing for the finish to grip. On a surface sanded with too fine an abrasive level, the pores are partially closed and the scratches are too shallow for the stain to lodge in consistently. The result is uneven color, poor penetration, and a finish that chips or peels prematurely.
The right approach is to make it a rule to sand before finishing, progress through the grits methodically, and finish at a grit appropriate for your chosen finish typically 150–180 grit before staining, and up to this final fine sandpaper before paint or a clear topcoat.

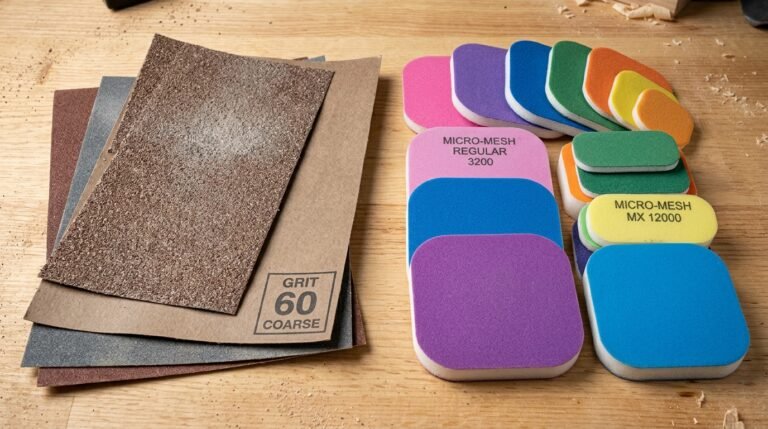
Hand sanding is slower than using a motorized tool, but it offers unmatched control—especially on curved surfaces, edges, and detailed woodworking. A sanding block is the most important manual tool in your kit. It keeps the sandpaper flat and distributes pressure evenly across the working area, preventing the uneven wear you’d get from sanding with bare fingers.
A sanding sponge is the flexible alternative. It conforms to contours and profiles that a rigid block can’t follow, making it ideal for routed edges or irregular shapes. For flat surfaces, always default to a sanding block to maintain a truly level plane and avoid rounding edges unintentionally.
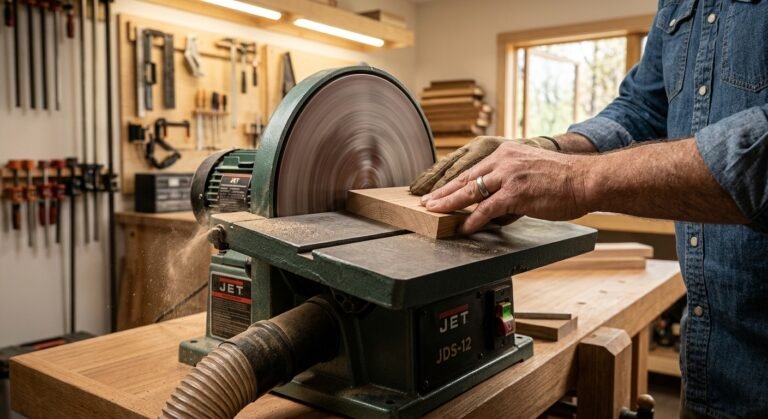
For larger wood projects or antique cabinet restoration, a sanding machine dramatically reduces the time and effort required.
For most beginners, a random orbital sander is the right starting point. It’s forgiving, effective across multiple grit ranges, and compatible with sanding discs in every grit from 40 to 320+.
Sanding dust is a serious health hazard. Wood dust especially from hardwoods, MDF, and treated lumber—is classified as a respiratory irritant and, in some cases, a carcinogen. Before you start sanding, gear up:
Aluminum oxide is the most widely used abrasive for sanding wood, and for good reason. It’s durable, self-sharpening (the abrasive fractures to expose fresh cutting edges as it wears), and works effectively across a wide range of wood types. You’ll find aluminum oxide in most general-purpose sandpaper for wood, including sanding discs for orbital sanders and sheets for hand sanding.
It performs well from coarse grit sandpaper all the way through fine grit sandpaper, making it the go-to choice for beginners working across different stages of the sanding process.
Silicon carbide is harder and sharper than aluminum oxide, making it particularly effective for wet sanding and sanding between coats of finish. It breaks down faster under heavy use but excels at the ultra-fine grits used in final sanding stages.
Garnet is a natural abrasive found in traditional woodworking sandpaper. It’s softer than synthetic options and wears more quickly, but it produces a very fine, consistent scratch pattern—which some woodworkers prefer for hand sanding raw wood before applying an oil finish. Garnet is rarely the best choice for power sanding, as it doesn’t hold up to the speed and heat generated by a random orbital sander or belt sander. When choosing the right sandpaper, processing a lot of wood surfaces requires a tactical plan. Switching to a higher grit sandpaper or utilizing specialized foam sanding pads during detailed contours will ensure a seamless workflow.
Coarse sandpaper in the 40–80 grit range is designed for aggressive material removal. Use 40 grit to flatten severely warped or uneven surfaces, remove old paint, or strip rough-sawn lumber. Use 80 grit sandpaper to follow up after 40 grit, or as your starting grit on wood that’s already relatively flat but has deep mill marks or scratches.
Starting sanding at too coarse a grit on smooth wood will create deep scratches that require significant work to remove. Always choose the coarsest option that’s appropriate for the condition of the wood—not the coarsest grade you own.
The 100–150 grit range is where the real surface preparation happens. After coarse sanding, this medium-grade sandpaper removes the deep scratches left behind and begins leveling the surface more finely. Moving to 150 mesh continues that refinement, producing a surface that’s approaching smoothness and is nearly ready for finishing.
Medium grit sandpaper is the most-used range for most woodworking and DIY projects. Many beginners start here when working with pre-surfaced lumber or wood furniture, skipping the coarse range entirely and saving significant time.
Fine grit sandpaper from 180 to the final finishing stage is used for finish sanding—the final sanding pass before applying stain, paint, or a clear coat. At this stage, you’re not removing material so much as refining the scratch pattern to a level where it won’t affect the appearance of the finish.
This ultra-fine sandpaper is the standard final stage before most finishes. For water-based finishes, which raise the wood fibers as they dry, you may want to sand with a matching paper after the first coat as well a process called sanding between coats before applying subsequent layers.
320 grit and above falls into the extra-fine category, used for wet sanding between coats of lacquer or polyurethane, or for achieving an ultra-smooth final surface on wood furniture and fine woodworking projects.
Before you start sanding, set up your workspace for dust control and safety. Clear the area of anything that could be damaged by fine wood particles. Connect your sanding equipment to a dust collection source, put on your respirator and safety glasses, and ensure the space is well ventilated.
Secure your workpiece so it won’t shift during sanding. For flat panels, a non-slip mat on a workbench works well. For smaller pieces of wood, clamps or a bench vise keep things stable and let you apply consistent pressure without chasing the material around the table. Knowing how to sand and sand the wood with the finer grit sandpaper is essential to sand wood properly.
This is the single most important rule in all of wood preparation: make sure to follow the grain. The natural grain pattern runs in a specific direction along the length of the piece of wood. Sanding across the grain or at an angle to it leaves visible cross-grain scratches that catch light at an angle and become highly visible once a finish is applied.
To identify the direction of the fibers, look for the linear pattern of the fibers running along the surface. On straight-grained wood, this is obvious. On figured or wavy grain, follow the dominant direction as closely as possible.
When using a random orbital sander, the random motion means you’re technically sanding in multiple directions simultaneously but at fine grits, this produces minimal visible scratching. However, on the final passes with 180–220 grit, many experienced woodworkers switch to hand sanding in the direction of the wood grain to ensure a perfectly clean surface.
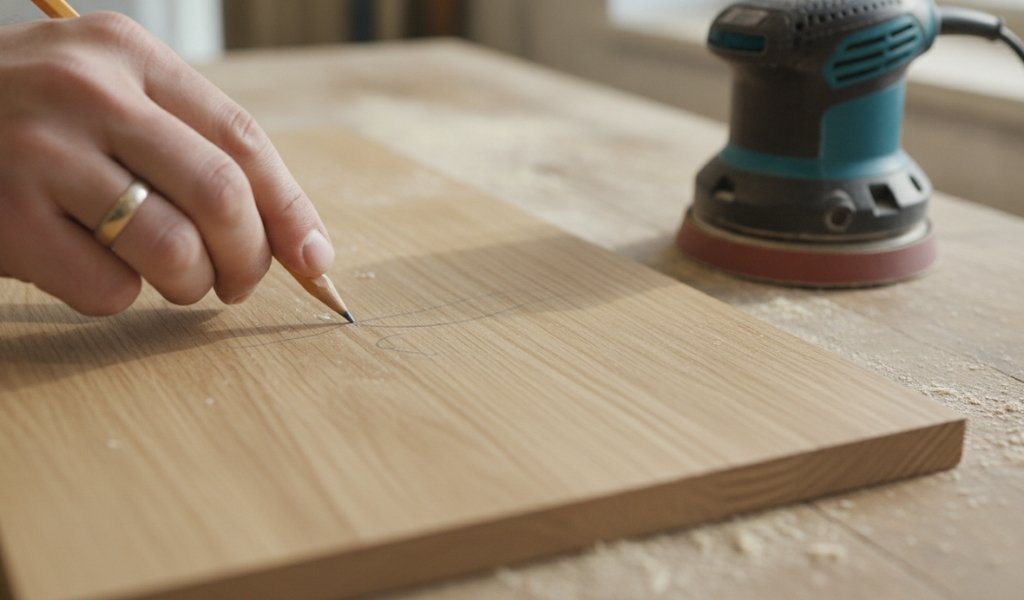
Here’s one of the most practical tips for sanding: before each pass, scribble a curvy pencil line across the entire surface of the wood. As you sand, the pencil mark will disappear section by section. When the entire pencil line is gone, you’ve covered the full surface evenly with that paper grade and you’re ready to move on.
This trick prevents the common beginner mistake of focusing too heavily on one area while under-sanding another. It also gives you a clear visual indicator of your progress, which is especially helpful when using an electric sander where it can be difficult to see exactly what you’ve covered.
Choose your starting grit based on the condition of the wood surface. From there, work up through the grits without skipping. A typical progression for sanding your projects might look like:
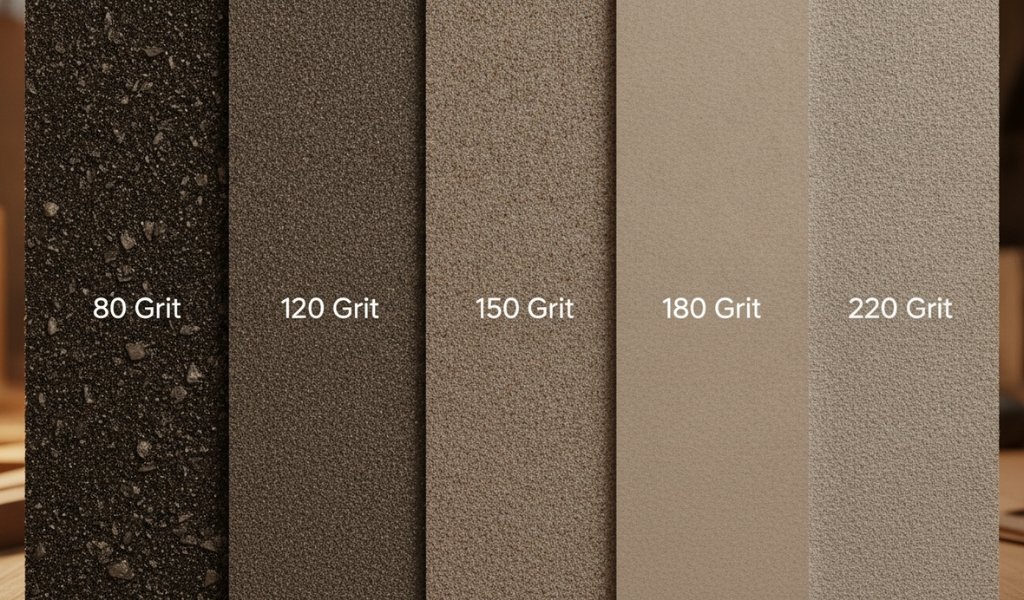
Each step removes the blemishes left by the previous, coarser one. Skipping grits—jumping from 80 directly to 220, for example leaves deep scratches from the 80 coat that the 220 cannot efficiently remove. You’ll end up with a surface that looks smooth but reveals deep scratches the moment you apply stain or a finish.
The general guidance is to never skip more than one grit increment. If you start at 80 grit, your next step should be 100 or 120, not 150 or 180.
Sanding dust contamination is a real problem that many beginners overlook. If you move from 80 grit to 120 grit without cleaning the surface, the coarser 80 grit particles that remain on the wood can scratch the surface as you sand with the finer grit undoing the work you’ve just done.
Between each grit change, use a vacuum or tack cloth to thoroughly remove all wood dust from the surface. A tack cloth is a slightly sticky cloth designed specifically for this purpose, picking up fine wood particles that a dry cloth would just redistribute. Always clean the workspace to prevent loose grit from getting trapped under your sanding pad, guaranteeing a perfectly smooth finish on the final surface.
Cross-grain scratches are extremely difficult to remove without going back to a coarser grit and starting over. It is crucial to glide in the direction of the grain direction, particularly during the finer grit stages of the sanding process. When hand sanding, keep your strokes long and parallel to the grain. When using a random orbital sander, let the tool’s motion do the work—don’t push it sideways across the grain.
Applying excessive downward pressure when using a sanding device is one of the most common beginner errors. More pressure doesn’t remove material faster it actually causes the spinning pad to spin less freely, which reduces cutting efficiency and creates uneven wear patterns. The weight of the sander itself provides enough downward force; your job is to guide it, not push it.
Similarly, moving a spinning pad too slowly in one spot generates heat, which can glaze the sandpaper, scorch the exposed grain, or burn softwoods. Keep the sander moving at a steady, consistent pace across the surface.
Both of these habits produce the same result: a surface that looks finished but isn’t. Skipping grits, as outlined above, leaves deep scratches that only reveal themselves under finish. Tilting a random orbital sander lifting one edge so the abrasive surface contacts the wood at an angle concentrates the abrasive action on a small area and creates visible circular gouges that are very difficult to sand out.
Keep your sanding base flat on the wood surface at all times. If you’re having trouble reaching an edge or corner, use a hand sanding block instead of tilting the machine.
“Dad sanding” is a colloquial term for the approach many beginners (and overconfident DIYers) take: grabbing a single sheet of sandpaper in whatever grit is on hand, rubbing it over the surface for a few minutes, and declaring the job done. No grit progression. No attention to grain direction. No dust removal between grits. Just a vague scuffing of the surface and a move straight to staining.
The result is predictable blotchy stain absorption, visible scratches in the finish, and a surface that looks clearly unfinished once a topcoat goes on. Proper sanding is methodical. It requires choosing the right starting grit, working through a deliberate grit sequence, sanding with the grain, and cleaning between stages. There are no shortcuts that produce a genuinely good result.
Be sure to stroke with the grain of the wood. Sanding across or against the direction of the wood grain creates cross-grain scratches that are highly visible under any finish stain, paint, or topcoat. This applies whether you’re hand sanding or using a power sander. On the final grit passes, many woodworkers switch from a random orbital sander to hand sanding to ensure the scratch pattern runs cleanly in the direction of the grain.
For most woodworking applications, particularly raw wood preparation before staining or painting dry sanding is the standard approach. Wet sanding is typically used between coats of finish (lacquer, polyurethane, or varnish) to level the dried surface without generating airborne dust. Silicon carbide sandpaper in fine grits (400–600+) is the typical choice for wet sanding between coats. Using water or mineral spirits as a lubricant reduces clogging and prolongs the life of the sandpaper, while producing a slurry that fills minor surface imperfections before the next coat is applied.
Swirl marks from a random orbital sander are almost always caused by one of three things: moving the sander too quickly across the surface (not allowing the random orbit pattern to fully process the wood), using worn-out or clogged sanding options, or lifting the sander off the surface while it’s still spinning. To minimize swirl marks, move the sander at a slow, steady pace, replace sanding discs before they’re completely spent, and always stop the sander before lifting it from the work surface. Following up with a final hand-sanding pass in the direction of the grain will eliminate any residual swirl marks before you apply a finish.
Use the pencil trick: scribble a line across the surface before each grit and sand until it completely disappears. At a macro level, you’ve sanded enough when the surface feels uniformly smooth, shows no visible scratches from the previous grit, and has no remaining mill marks, tool marks, or surface irregularities. Before applying stain, wet a small area with mineral spirits this simulates how the wood will look under a finish and will reveal any scratches or uneven areas that dry sanding obscures. If you see problems, address them before proceeding.
“Dad sanding” refers to the informal, haphazard approach to sanding where a single grit of sandpaper is used briefly on the surface without any systematic progression, attention to grain direction, or dust removal between grits. The name reflects the kind of well-intentioned but imprecise technique that produces a surface that feels slightly smoother but is entirely unprepared for a quality finish. Avoiding it means following a deliberate grit sequence, always sanding with the grain, removing dust between stages, and finishing at the correct grit for your chosen finish.
Yes, but only with proper dust control and ventilation. Wood dust especially from hardwoods, MDF, and exotic species is a respiratory irritant and a potential carcinogen with long-term exposure. Always wear an N95 respirator or better, connect your sander to a dust collection system or shop vacuum, and work in a space with adequate air circulation. Close off HVAC vents to prevent fine wood particles from spreading through the building, and clean the workspace thoroughly after sanding. For large sanding projects involving significant material removal, outdoor sanding is strongly preferred.
Each grit of sandpaper leaves scratches of a specific depth and size. A coarser grit leaves deeper, more visible scratches; a finer grit leaves shallower ones. When you move up through the grits sequentially, each stage removes the scratches left by the previous one, progressively refining the surface. If you skip grits jumping from 80 grit directly to a fine abrasive, for example the higher number is not aggressive enough to efficiently remove the deep scratches left by the 80 grit. Those scratches remain hidden in dry wood but become visible the moment a finish is applied, often requiring you to strip the finish and restart the sanding process from a coarser grit.