Physical Address
304 North Cardinal St.
Dorchester Center, MA 02124
Physical Address
304 North Cardinal St.
Dorchester Center, MA 02124

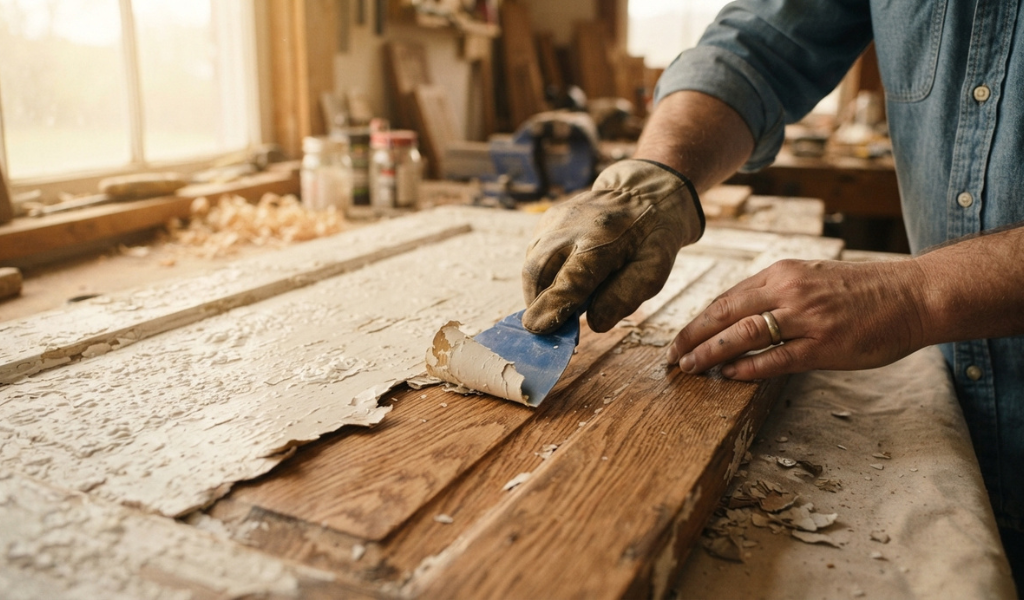
Stripping old paint off a wooden surface can feel like a small nightmare, especially if you have tried scraping or sanding without much luck. That is exactly where a good paint stripper for wood comes in. Whether you are restoring an old dresser, refinishing a door, or bringing a wooden staircase back to life, choosing the right stripping product can save you hours of frustration and protect the wood underneath from damage.
In this guide, we will walk through everything you need to know about wood paint strippers, how they work, when to use them, and how to apply them safely and correctly. We will also touch on What is Sanding? A Beginner’s Guide, since sanding often plays a role either before or after the stripping process, and understanding both techniques will help you get a cleaner, more professional finish.
By the end of this article, you will know exactly how to pick the right product, what tools to gather, and how to avoid the common mistakes that ruin so many DIY refinishing projects.
A paint stripper is a product designed to break down the bond between old paint and the surface it is sitting on, usually wood, metal, or plaster. Instead of scraping dry paint off with brute force, which often leaves scratches or gouges, a stripper softens the layer so it can be lifted away cleanly.
Most wood paint removers come in gel, liquid, or paste form. Gels and pastes tend to be popular for vertical surfaces such as doors and cabinets because they cling to the wood rather than dripping off. Liquids work well on flat horizontal pieces like tabletops or floorboards.
The science behind paint strippers is fairly straightforward. The active ingredients penetrate the paint film and attack the chemical bonds holding it together. Once those bonds break down, the paint loses its grip on the wood and begins to bubble, wrinkle, or soften.
Solvent-based strippers dissolve the paint’s resin structure, while caustic strippers use alkaline chemicals to break the paint apart. Some newer formulas use natural solvents like citrus extracts, which are gentler but may need more time to work. Regardless of the type, the goal is the same: loosen the paint enough that it can be scraped off without damaging the wood grain underneath.
A common question people ask is whether they should just sand the paint off instead of using a chemical remover. To answer that properly, it helps to understand What is Sanding? A Beginner’s Guide covers: sanding is the process of using abrasive paper or a powered sander to wear down a surface layer by layer until it is smooth.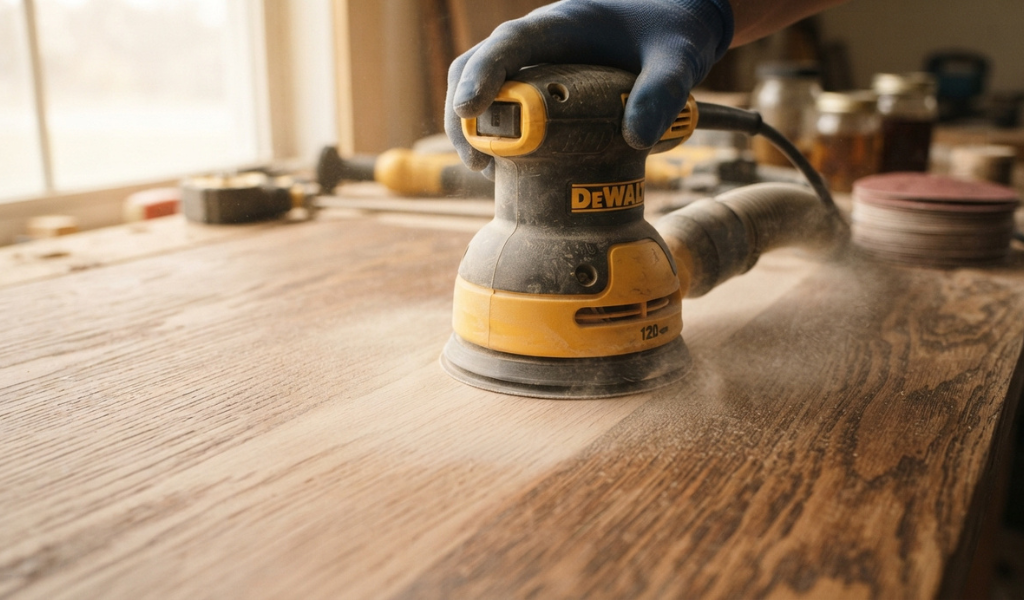
Sanding works well for thin coats of paint or for smoothing wood after stripping, but it struggles with thick, old, or multiple layers of paint. It also creates a lot of dust, which can be a health concern if the paint contains lead, common in homes built before 1978.
Paint stripper, on the other hand, softens paint chemically so it can be scraped off in sheets. This method is faster for heavy paint buildup and produces less airborne dust, though it does require careful handling of chemicals. Many professionals actually combine both methods, stripping first to remove the bulk of the paint, then sanding lightly to smooth the surface.
Paint stripper makes the most sense when you are dealing with multiple layers of old paint, intricate wood carvings or moldings where sanding is impractical, or surfaces where you want to preserve fine details like trim work or furniture legs. It is also a smart choice when the existing paint might contain lead, since stripping produces far less dust than sanding.
If you are only removing a thin, single coat of paint from a flat surface, sanding alone might be quicker. But for anything thicker or more detailed, a stripper will save you time and protect the wood grain.
Not all paint removers perform the same way, and picking a quality product makes a real difference in how smooth your project goes.
A good stripper should break down paint quickly without needing multiple applications. Look for products that can handle several layers of paint at once, since re-coating repeatedly wastes time and increases chemical exposure. Reading reviews or checking the product label for the number of paint layers it can tackle is a smart first step.
Beyond effectiveness, ease of application matters just as much. Thick gel formulas that do not drip are easier to control on vertical surfaces, while low-odor or water-based options are more pleasant to work with indoors. A stripper that rinses away with water rather than requiring mineral spirits also simplifies cleanup significantly.
Choosing the right product depends on a few key factors: the type of wood you are working with, how many layers of paint need to be removed, whether you are working indoors or outdoors, and how much time you want to spend on the project.
For delicate or antique furniture, a slower-acting, gentler formula reduces the risk of damaging fine wood grain. For heavy-duty jobs like stripping a deck or old exterior trim, a stronger industrial-grade stripper will cut through layers faster. Always check the label to confirm the product is safe for wood specifically, since some strippers are formulated mainly for metal or masonry.
Chemical strippers, including solvent-based and caustic formulas, tend to work faster and are effective on thick or old paint. However, they often come with strong fumes and require good ventilation, gloves, and eye protection.
Non-chemical options include heat guns, which soften paint using heat so it can be scraped off, and mechanical methods like sanding or scraping. There are also newer “green” or bio-based strippers made from soy or citrus solvents that are less harsh on the lungs and skin, though they usually take longer to soften paint fully. If you are stripping paint indoors or have sensitivities to strong odors, a non-chemical or bio-based option is worth considering, even if it means a bit more patience.
Different wood surfaces call for different approaches. Softwoods like pine absorb chemicals more readily, so a milder stripper with shorter contact time helps avoid raising the grain or leaving the wood fuzzy. Hardwoods such as oak or maple can typically handle stronger formulas and longer dwell times without much risk.
Veneer surfaces need extra caution since the wood layer is thin and can be damaged by aggressive scraping or overly harsh chemicals. For outdoor wood surfaces like decks or fences, look for a weather-resistant formula designed to handle exterior-grade paints and stains, which are often more durable than interior paint.
Most wood paint strippers can remove latex paint, oil-based paint, enamel, and varnish. Some heavy-duty formulas are also effective on polyurethane finishes and old shellac coatings. Lead-based paint, common in older homes, can also be removed with a stripper, though extra safety precautions such as respirators and proper disposal are essential in that case.
If you are unsure what type of paint or finish you are dealing with, testing a small hidden area first can help you gauge how the stripper reacts before committing to the whole piece.
Having the right tools on hand before you start makes the entire process smoother and safer.
You will need a putty knife or plastic scraper, a natural bristle brush for applying the stripper, a container for the product, and some old rags or drop cloths to protect your work surface. A wire brush can help with detailed carvings or corners where a flat scraper cannot reach.
Along with the actual stripping tools, protective gear is just as important. Chemical-resistant gloves, safety goggles, and a respirator mask rated for organic vapors will keep you protected from fumes and splashes. Good ventilation, whether that means open windows or a fan, is non-negotiable when working with chemical strippers indoors.
Start by clearing the workspace and laying down drop cloths to catch drips and scraped paint. Remove any hardware like handles or hinges if possible, and make sure the area is well ventilated. If you are working outdoors, choose a day without wind so debris does not scatter everywhere.
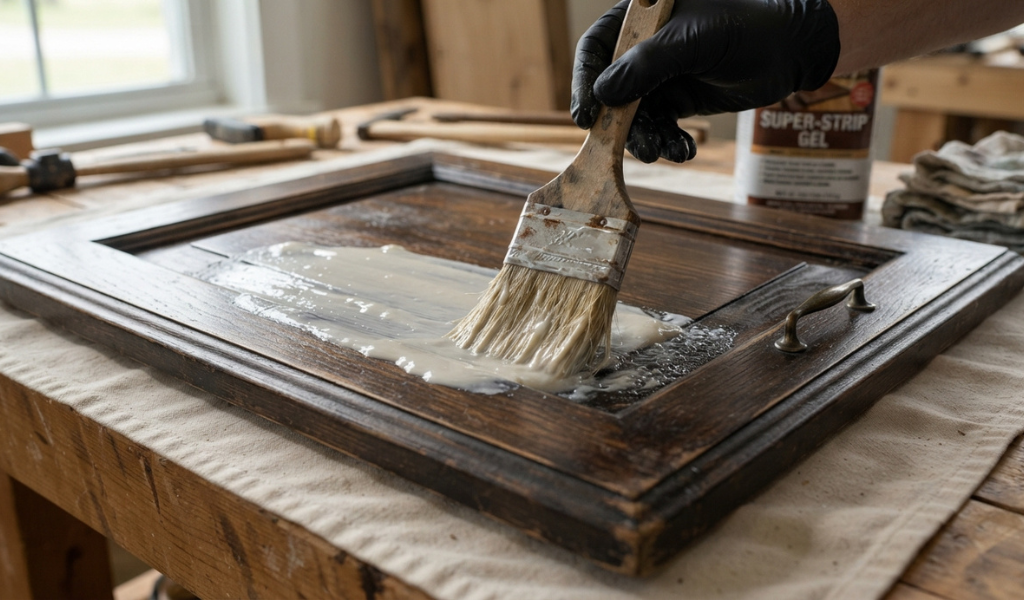
Using your brush, apply a thick, even coat of stripper across the surface. Do not spread it too thin, since a generous layer works faster and more evenly. Work in manageable sections rather than covering the entire piece at once, especially on larger furniture or doors.
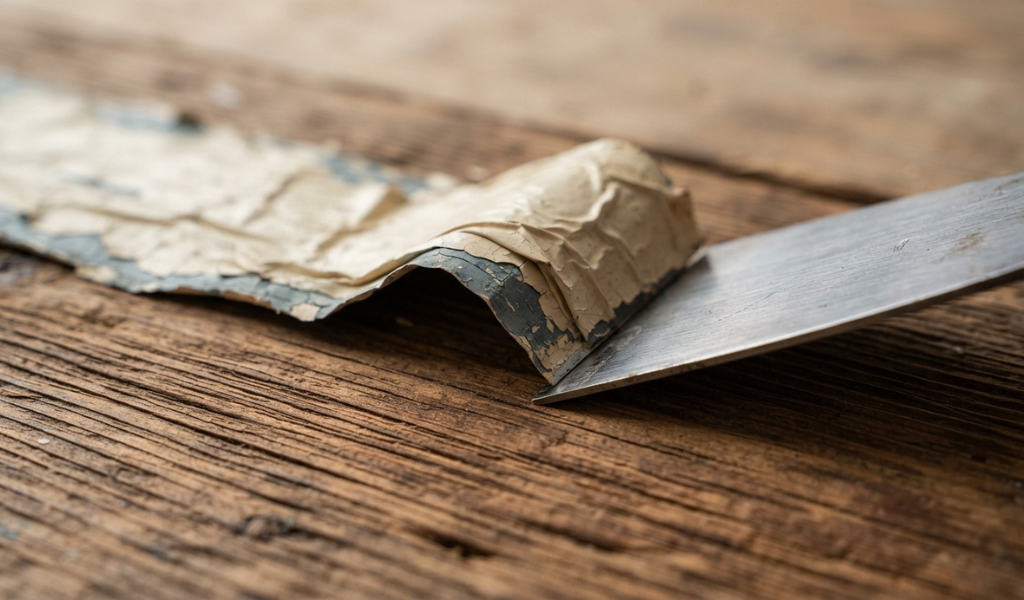
Once the paint has bubbled or wrinkled, use your putty knife or scraper to gently lift it away. Work with the grain of the wood to avoid gouging the surface. For carved details, a wire brush or toothbrush can help clear paint from grooves and corners.
Dwell time varies by product, but most strippers need anywhere from 15 minutes to a few hours to fully soften paint. Thicker or older layers of paint may require longer contact time, sometimes even an overnight application for stubborn cases. Always check the manufacturer’s instructions, since leaving a stripper on too long can dry out and become harder to remove, while too short a time will leave paint that is not fully softened.
After scraping away the bulk of the paint, wipe the surface down with a rag dampened in water or mineral spirits, depending on the type of stripper used. This step removes any leftover residue that could interfere with staining or painting later. Let the wood dry completely, which can take anywhere from a few hours to a full day depending on humidity, before moving on to sanding or refinishing.
Small furniture pieces generally do well with gel strippers since they are easy to control and do not require large quantities. Larger surfaces like floors, decks, or doors often benefit from liquid strippers that can be applied over bigger areas more efficiently. Detailed or carved wood pieces call for a slower-acting formula that gives you time to work carefully without the product drying out before you finish scraping.
Matching your stripper choice to the scale and detail of your project prevents wasted product and reduces the chances of needing a second round of stripping.
Even after a thorough stripping job, some paint residue and rough patches usually remain, which is where sanding comes back into play.
Start with a medium grit, around 100 to 120, to remove any leftover stripper residue and smooth out rough spots. Follow up with a finer grit, such as 180 to 220, to prepare the surface for staining or painting. Going straight to a fine grit without the medium step often leaves the surface uneven.
Sand in the direction of the wood grain, applying light, even pressure. Wipe away dust with a tack cloth between grit changes so you can clearly see your progress. A smooth, dust-free surface is essential for paint or stain to adhere evenly and look professional once finished.
Working with paint removers safely protects both your health and the quality of your finished project.
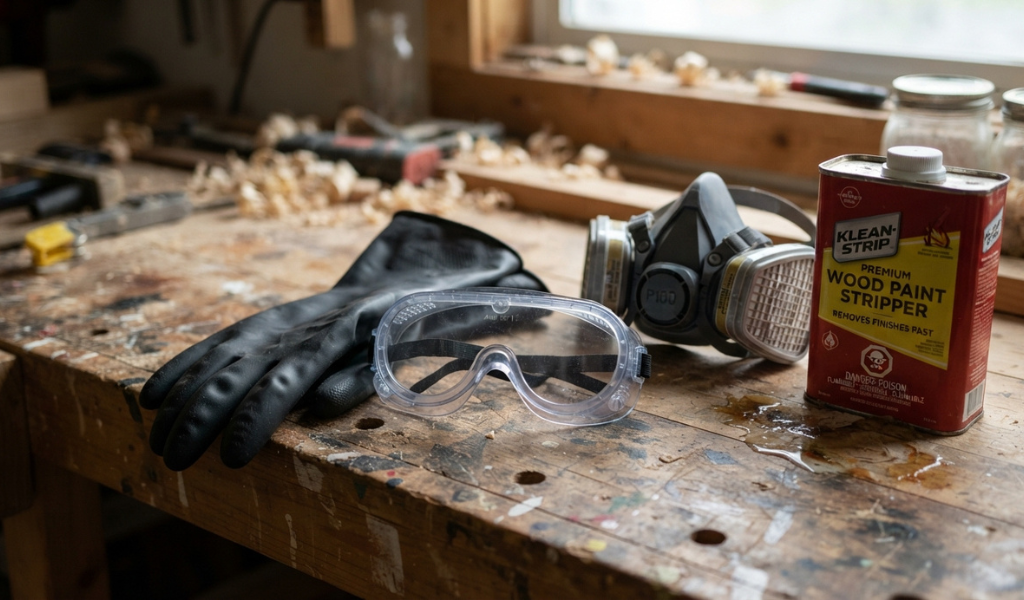
Always wear chemical-resistant gloves and safety goggles when applying or scraping stripper. Even mild formulas can irritate skin on contact, so avoid direct exposure whenever possible.
Open windows, use fans, or work outdoors whenever you can. Fumes from chemical strippers can build up quickly in enclosed spaces and cause headaches or respiratory irritation.
Never pour used stripper or scraped paint chips down the drain. Check your local regulations for hazardous waste disposal, especially if you suspect the paint contains lead. Store leftover stripper in its original container, tightly sealed, away from heat sources.
Even experienced DIYers can run into trouble if they rush through the process or skip important steps.
Letting the product sit past its recommended time can cause it to dry out and re-harden, making it much harder to scrape off. Stick to the timeframe on the label and check progress periodically.
Pressing too hard with a metal scraper can gouge or scratch the wood, leaving marks that are difficult to sand out later. Use gentle, controlled strokes and let the chemical do most of the work.
Failing to clean or prep the wood before applying stripper can lead to uneven results. Dust, grease, or old wax on the surface can prevent the stripper from making full contact with the paint layer.
Removing old paint from wood does not have to be a stressful or damaging process. With the right paint stripper for wood, the proper tools, and a bit of patience, you can uncover beautiful wood grain hiding under layers of old paint. Remember to match your product to your project, follow safety precautions, and finish with proper sanding for a smooth, refinishing-ready surface. Once you get the hang of it, stripping and restoring wood furniture or trim becomes a satisfying and rewarding project rather than a chore.
If you are planning your next refinishing project, take some time to test a small area first, gather the right protective gear, and choose a stripper suited to your wood type. A little preparation goes a long way toward a smooth, professional-looking result.
Is paint stripper safe to use on all types of wood?
Most strippers are safe for common woods like pine, oak, and maple, but softer woods and thin veneers need gentler formulas and shorter contact times to avoid damage.
Can I use a paint stripper indoors?
Yes, but only with proper ventilation. Open windows, use fans, and consider a low-odor or water-based formula if you are working in an enclosed space.
How many coats of paint can a stripper remove at once?
This depends on the product, but many strippers can handle multiple layers in a single application, especially gel formulas designed for heavy buildup. Check the label for specifics.
Do I need to sand after using a paint stripper?
In most cases, yes. Light sanding after stripping removes leftover residue and smooths the wood surface before staining or repainting.
What is the difference between chemical and non-chemical paint strippers?
Chemical strippers use solvents or caustic agents to dissolve paint quickly but often produce strong fumes. Non-chemical methods like heat guns or sanding avoid fumes but may take more time and effort.
Can paint strippers remove lead-based paint safely?
Yes, stripping is actually a safer method than sanding for lead paint since it creates less dust. Still, wear a respirator and gloves, and dispose of waste according to local hazardous material guidelines.
How long does it take for a paint stripper to work?
Most products take between 15 minutes and a few hours, depending on the paint thickness and the stripper’s strength. Some tough jobs may require an overnight application.