Physical Address
304 North Cardinal St.
Dorchester Center, MA 02124
Physical Address
304 North Cardinal St.
Dorchester Center, MA 02124


Installing wood molding is one of the easiest ways to transform a plain room into something that looks custom-built and finished. Whether you’re adding baseboard along the floor, crown molding where the wall meets the ceiling, or trim around a door, this type of project doesn’t require years of carpentry experience. With the right tools, a little patience, and some step-by-step instructions, almost anyone can learn how to install molding like a pro.
This guide walks you through everything from choosing the right molding profile to cutting miter joints and finishing the job with paint. By the end, you’ll understand exactly how installing trim can upgrade the look of your home without hiring a general contractor.
Wood molding is a decorative strip of wood used to cover gaps, hide seams, and add visual interest to a room. It’s commonly installed where two surfaces meet, such as where the wall meets the floor or where drywall meets the ceiling. Builders have used molding for centuries, originally to hide construction flaws in older homes, but today it’s just as popular for its style as its function.
You’ll find molding made from solid wood, MDF (medium-density fiberboard), and even polyurethane. Solid wood offers a classic look and holds up well over time, while MDF is more affordable and easier to cut, making it a popular choice for budget-friendly DIY projects. Whichever material you choose, the installation process is largely the same.
Not all molding serves the same purpose. Knowing the differences will help you choose the right type for your project before you even pick up a saw.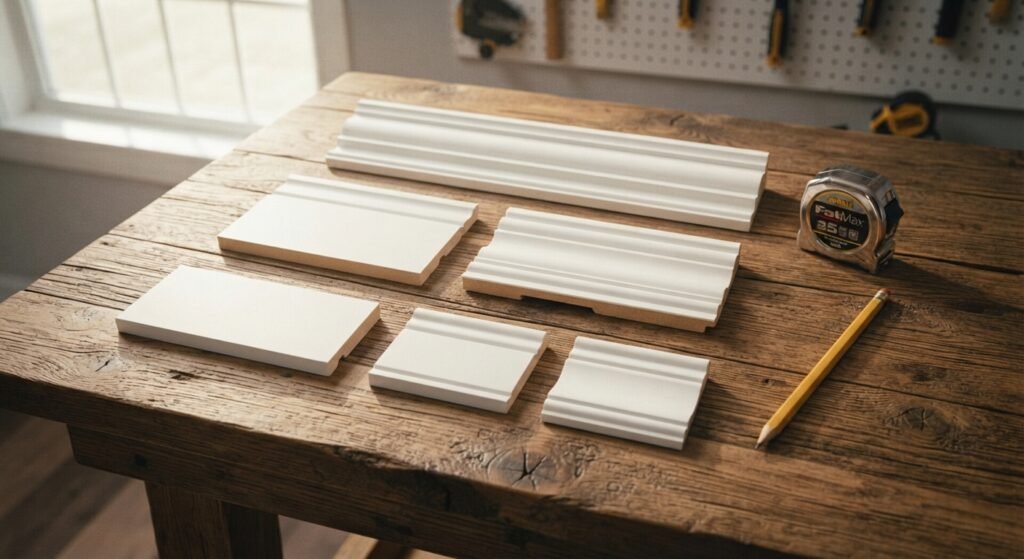
Baseboard trim runs along the bottom of the wall where it meets the floor. It protects the wall from scuffs, covers the gap left by flooring installation, and gives a room a finished appearance. Baseboard heights vary, but most homes use boards between three and six inches tall, depending on the ceiling height and the style of the home.
Crown molding, on the other hand, sits at the top of the wall where it meets the ceiling. Installing crown molding is a bit trickier than installing baseboard because the angles are measured differently, and the piece sits at a slant rather than flat against the wall. Still, many homeowners find that installing crown molding adds a touch of elegance that baseboard alone can’t achieve. Some people also add shoe molding, a thin strip installed along the bottom of the baseboard, for an extra polished look.
Door trim and window trim, sometimes called casing, frame the edges of doors and windows to cover the gap between the frame and the wall. Door casing typically runs vertically along both sides of the door and horizontally across the top, while window trim wraps around all four sides of the window.
Chair rail is another type of trim worth mentioning. It’s installed partway up the wall, usually around 32 to 36 inches from the floor, and was traditionally used to protect walls from chair backs. Today, it’s mostly used as a decorative accent, often paired with wainscot paneling below it.
Before you start installing molding, gather the right tools and materials. Having everything on hand before you begin will save you multiple trips to the local lumber yard.
Here’s what you’ll need:
As for materials, you’ll need enough molding to cover the length of your project, plus a little extra for mistakes. Most lumber stores sell molding in 8, 10, 12, and 16-foot lengths, so plan your cuts to minimize waste and avoid unnecessary seams.
Accurate measurements are the foundation of a clean installation. Start by measuring each wall where you plan to install molding, recording the length in inches. For baseboard, measure along the floor from corner to corner. For crown molding, measure along the top of the wall instead, since the molding sits at an angle.
When you’re ready to cut trim, most inside corners require a 45-degree angle cut on each piece so they fit together into a 90-degree corner. Outside corners also use 45-degree angles, but the direction of the cut is reversed. This is where a miter saw becomes essential, since it allows you to set the exact angle and get a clean, consistent cut every time.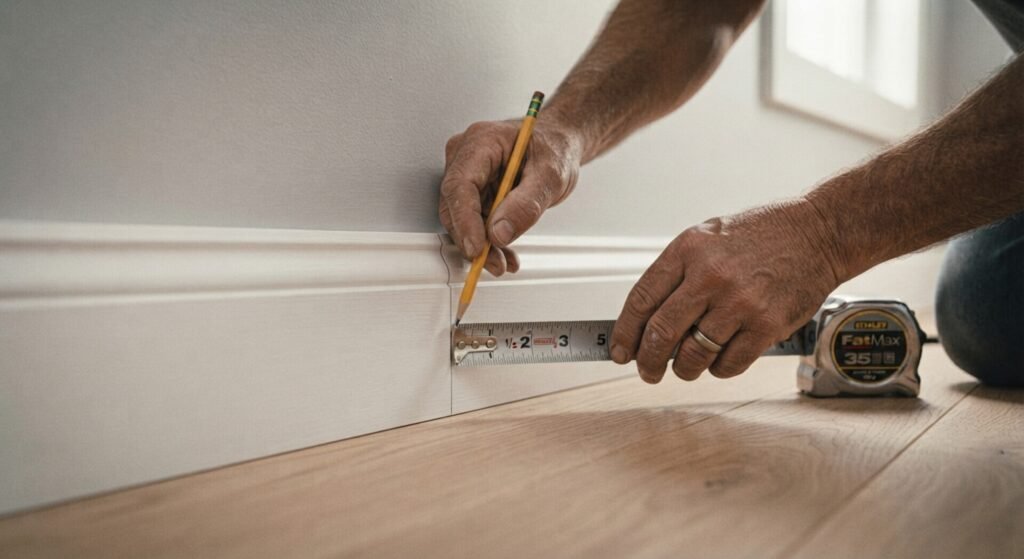
If a wall is longer than the piece of molding you have, you’ll need to make a scarf joint, which is a diagonal cut that allows two pieces to overlap slightly and blend together almost seamlessly. This technique is far less noticeable than a simple butt joint, especially once the trim is painted.
A quick tip: always cut trim a little longer than you think you need. It’s much easier to trim off an extra fraction of an inch than to start over with a new piece because you cut too short.
Once your pieces are measured and cut, it’s time to install wood molding onto the wall.
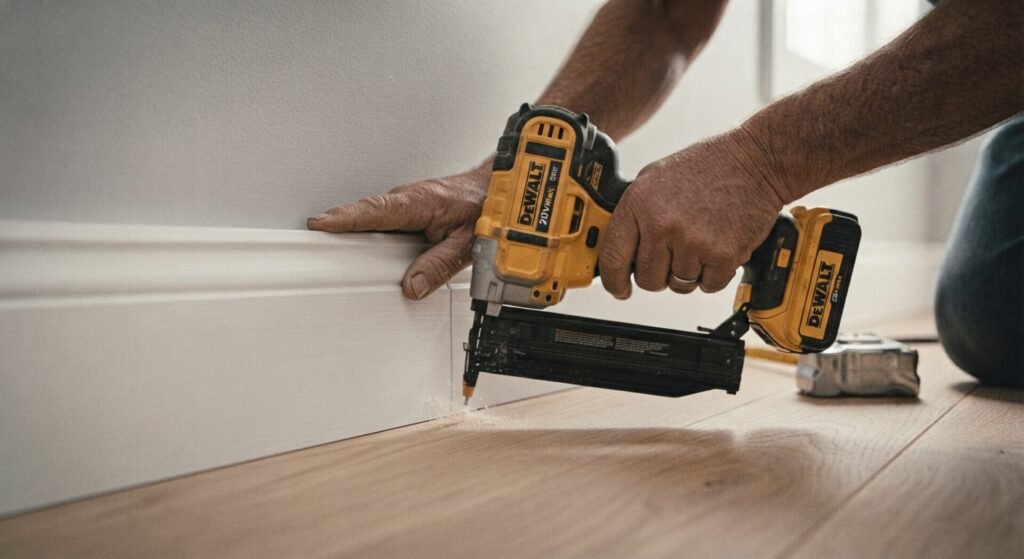
Taking your time during this stage pays off. Rushing through installing trim often leads to visible gaps or crooked corners that are harder to fix later.
After the molding is nailed in place, it’s time to smooth out the rough edges. Sand any uneven spots, especially at the joints, using fine-grit sandpaper until the surface feels smooth to the touch.
Next, apply caulk along the top and bottom edges of the molding where it meets the wall, as well as at any seams between pieces. Caulk fills small gaps and creates a seamless look between the trim and the wall, which is especially important if your walls aren’t perfectly straight. Run a wet finger or a damp cloth along the caulk line to smooth it out before it dries.
Once the caulk has cured, you’re ready to paint. Most homeowners paint trim a crisp white or a color that complements the walls, but the choice is entirely up to personal taste.
Nail holes are unavoidable when installing molding, but they’re easy to hide. Use a small amount of wood filler or putty to fill each nail hole, pressing it in with your finger or a putty knife. Let the filler dry completely, which usually takes about 15 to 30 minutes depending on the product, then sand it smooth so it’s flush with the surface of the trim.
If you’re working with stained wood rather than painted trim, look for a wood filler that matches the stain color, since standard putty can stand out against natural wood tones. For mitered returns or any small decorative cuts, double-check that the filler blends in before moving on to the final finishing step.
A good finish can make the difference between trim that looks professionally installed and trim that looks like a weekend project gone wrong. Here are a few tips to help you get the best results:
Taking the extra time here really does elevate the whole project, giving it that seamless look that makes trim work stand out in a good way.
Even simple DIY projects like installing molding come with a few common pitfalls. Here are mistakes to watch out for:
Cutting miter joints incorrectly. Corners aren’t always a perfect 90 degrees, especially in older homes. Use a protractor to check the actual angle before cutting, rather than assuming every corner is square.
Skipping the dry fit. Nailing a piece into place before confirming it fits correctly can lead to wasted material and visible gaps.
Using the wrong nail length. Nails that are too short won’t hold the trim securely, while nails that are too long can poke through the other side of thin walls.
Forgetting to caulk. Skipping this step leaves visible gaps between the trim and the wall, which stands out once the paint dries.
Not accounting for uneven floors or walls. Many floors slope slightly, especially in older homes, so it’s worth checking with a level before assuming every wall is perfectly straight.
Avoiding these mistakes will save you time, material, and frustration, and it will help your finished trim work look far more professional.
Installing wood molding doesn’t have to feel intimidating once you break it down into manageable steps. From choosing between baseboard, crown molding, and door trim, to measuring, cutting, and finishing the final product, each stage builds on the last to create a polished result. With the right tools, a bit of patience, and these step-by-step instructions, you can tackle this project with confidence and add real value and character to your home.
If this is your first attempt, start with a smaller room or a single wall before moving on to a full house. Once you get comfortable cutting miter joints and nailing trim into place, you’ll find that installing crown molding and baseboard throughout your home becomes much faster and easier with each piece.
Do I need a miter saw to install wood molding?
A miter saw makes the job much easier and more precise, but it’s not strictly required. A miter box paired with a hand saw can work for smaller projects, though it will take more time and effort to get clean angles.
What’s the best material for wood molding?
Solid wood offers durability and a classic appearance, while MDF is more affordable and easier to cut, making it a popular choice for painted trim. The best option depends on your budget and whether you plan to paint or stain the finished product.
How do I cut inside and outside corners for molding?
Inside corners typically require two pieces cut at 45-degree angles that fit together to form a 90-degree corner. Outside corners use the same angle but in the opposite direction. A protractor can help you confirm the exact angle before cutting, especially in older homes where corners aren’t always perfectly square.
Can I install crown molding without a nail gun?
Yes, though a nailer or nail gun speeds up the process significantly. A hammer and finish nails can also get the job done, but it will take more time and precision to avoid damaging the trim.
How do I fix gaps between molding and the wall?
Caulk is the easiest solution for small gaps, giving the trim a seamless look once it’s painted over. For larger gaps caused by uneven walls, you may need to use wood filler or adjust the molding slightly before securing it in place.
Should I paint molding before or after installation?
Many people prime the trim beforehand to save time, then apply a final coat after installation to cover nail holes and caulk lines. This approach usually produces the smoothest, most professional-looking finish.
How long does it take to install baseboard or crown molding in a room?
For a beginner, installing baseboard in an average-sized room can take a few hours, while crown molding may take a full day due to the more complex angles involved. Experienced DIYers or a general contractor can usually complete the same job much faster.