Physical Address
304 North Cardinal St.
Dorchester Center, MA 02124
Physical Address
304 North Cardinal St.
Dorchester Center, MA 02124

Every woodworker has a moment when a joint almost fits but not quite. The corner is a hair off, the edge is slightly crooked, and hand sanding would take half an hour. This is the moment a disc sander earns its place in the shop. It is a simple machine with one big spinning disc and a flat table, and it can fix tiny mistakes in seconds. Once you learn to use it well, you will wonder how you got by without one.
Many people already know handheld tools and want to take the next step. If you are working on that skill, you may also like our guide on how to master the sheet sander, which pairs nicely with this one. A handheld sander is great for large flat surfaces, but a stationary machine shines when you need precise edges, clean angles, and repeat cuts. This guide explains how the tool works, what to look for when you buy one, how to use it safely, and how to keep it running well.
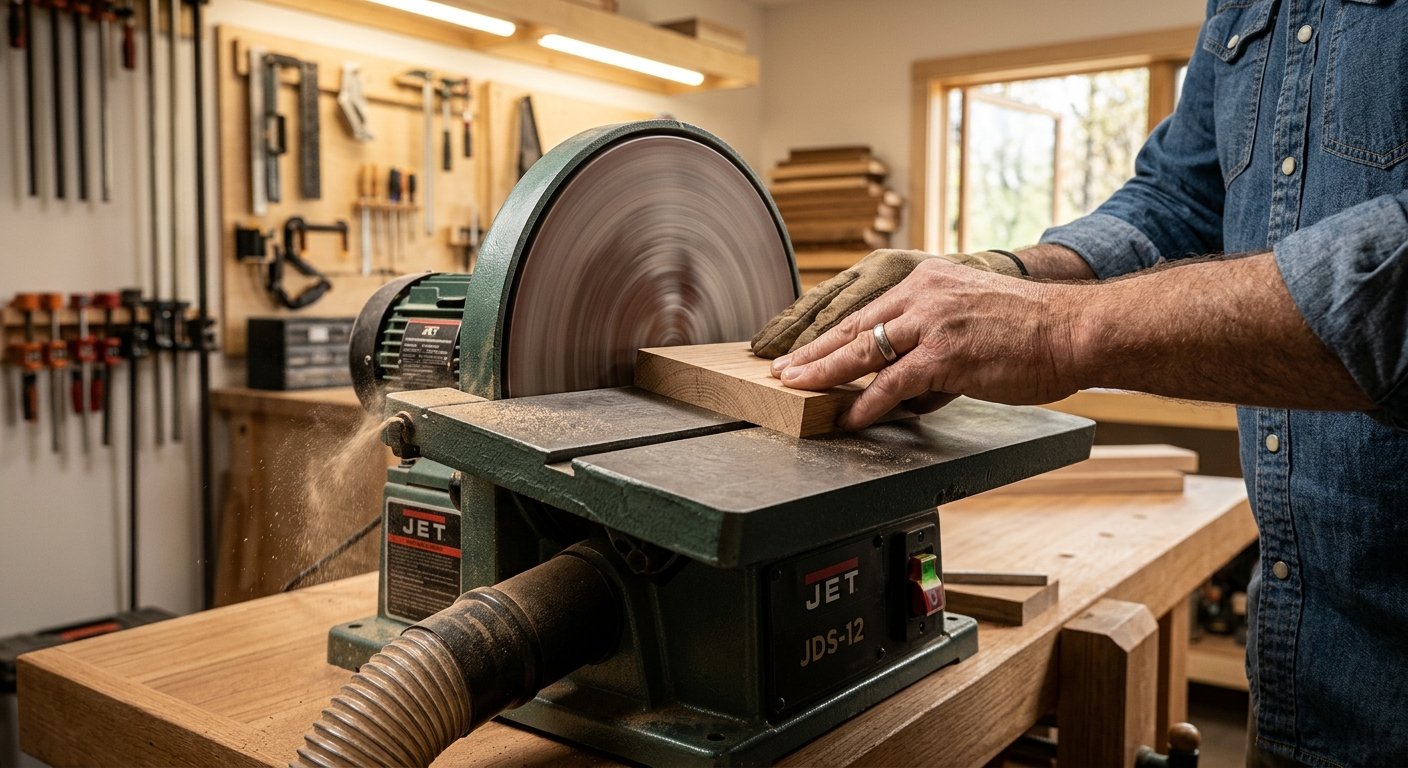
A disc sander is a stationary power tool built around a round, flat plate that spins at high speed. A sheet of sandpaper is stuck to the face of the plate, and a flat metal table sits in front of it. You hold your workpiece on the table and push it gently against the spinning paper. The paper wears away a little bit of wood each time, which lets you shape, straighten, and smooth the part with great control.
You will find these machines in cabinet shops, boat builders yards, model makers corners, and many home garages. They come as small benchtop units, as bigger floor models, and as combination machines that pair a disc with a belt sander on the same base. Because the machine stays put and you move the wood, it is much easier to hold an exact angle than with a handheld tool.
The disc spins in one direction, driven by an electric motor. The outer edge of the disc travels much faster than the middle. That is basic geometry. A point near the rim covers a longer circle in the same time as a point near the center, so the rim cuts faster and removes more material. This matters in real use. If you press a part near the outer edge, you will take off wood quickly. Near the center, the cut is slow and gentle.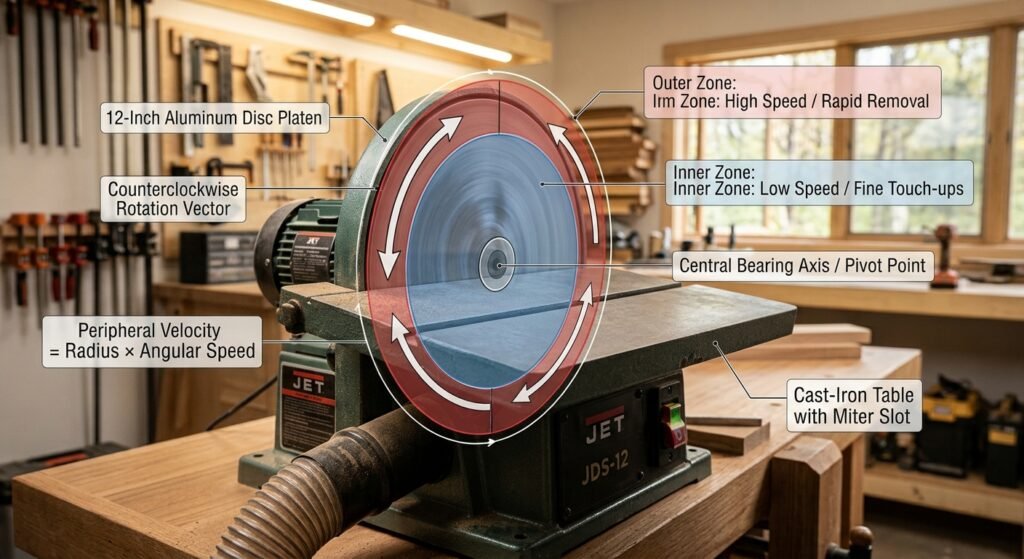
This speed difference gives you a built in way to control your work. Use the outer area for rough shaping and quick trimming. Move toward the middle for fine touch ups and light smoothing. A coarse grit such as 60 or 80 removes a lot of wood fast, while 150 or 220 leaves a smooth surface that is ready for finish.
Keep in mind that more speed also means more heat. If you push too hard or hold a piece in one spot, the wood can burn and leave dark marks, and the paper can clog with sticky dust. Light pressure and steady movement work far better than force.
These three tools often get mixed up, but each has its own strength. A belt sander uses a long loop of sandpaper running over rollers. It is strong and fast, and it is great for flattening wide boards, removing old finish, and shaping long edges. It can be handheld or stationary. Its weakness is that it is harder to make small, exact cuts at precise angles.
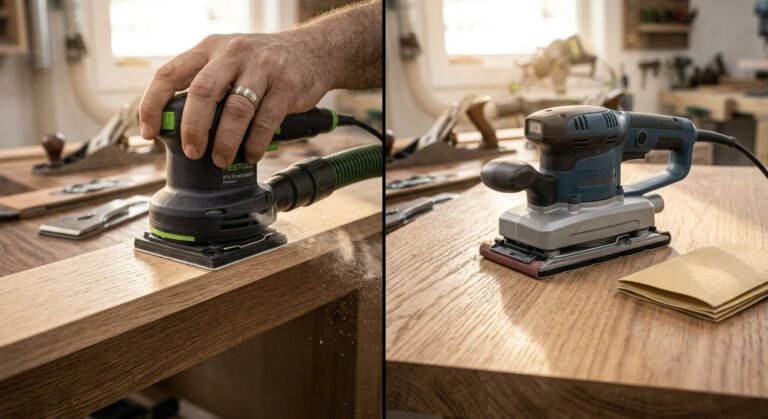
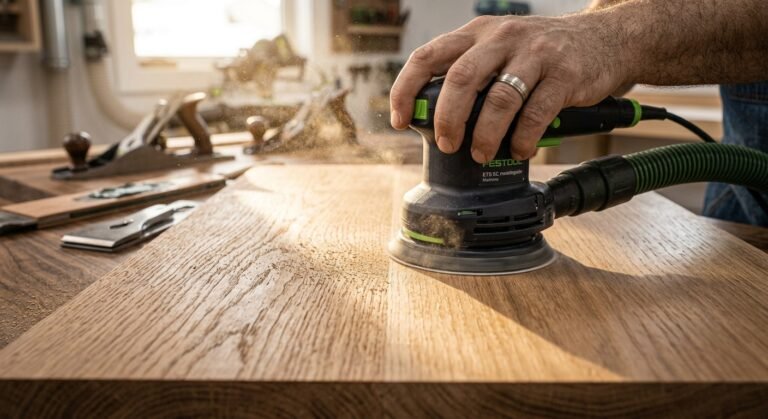
A random orbital sander is a handheld tool that spins a round pad while also moving it in tiny ovals. It leaves a smooth surface with few visible scratches, which is why people love it for final sanding on flat panels, tabletops, and furniture. It is not the best choice for squaring a corner or trimming a part to an exact line.
The disc sander sits in the middle. It cuts fast, it holds angles well, and it gives you an easy way to sneak up on a line. It is the tool for squaring up the end of a board, trimming a miter joint, rounding a corner, or matching two parts so they are exactly the same size. If you work with small pieces like drawer fronts, box sides, or toy parts, the disc is often the most useful of the three. Many shops keep all three tools, because each one solves a different problem.
Shopping for a stationary sander can feel confusing because many models look alike. A few key points make the choice much easier. Think about the kind of work you do, how often you will use the machine, and how much room you have. Then match those needs against the features below.
The motor is the heart of the machine. Power is shown in horsepower, often written as HP, or in amps. For a small benchtop model, a motor of about one third to one half horsepower is common and works well for light and medium hobby jobs. Larger machines with three quarters to one horsepower or more can handle thick hardwood and long sessions without bogging down.
A good rule is to buy a bit more power than you think you need. A weak motor slows down when you press hard, and that wastes time and can burn the wood. A motor with some extra strength keeps its speed steady under load. On a standard household outlet in the United States, many benchtop units draw between two and six amps, so check that your circuit can handle it.
Disc speed is measured in revolutions per minute, or RPM. Many machines run between about 1,700 and 3,450 RPM. Faster is not always better. Higher speed cuts quickly but also makes more heat. For general woodworking, a mid range speed is a happy middle. If you plan to sand plastics, resin, or soft materials, a slower speed or variable speed model helps keep them from melting or gumming up the paper.
The size of the disc decides how big a part you can work on and how much area is available for sanding. Here is how the common sizes compare in real use.
A six inch disc is compact and light. It fits on a small bench and suits model makers, hobbyists, and anyone working on tiny parts. The small surface wears out paper faster and limits how large a piece you can hold against it, but it is cheap and easy to store.
A nine inch disc is a popular choice for general home shops. It gives more cutting area, handles medium sized boards, and costs less than a large unit. Many people find that nine inches covers most of what they need.
A twelve inch disc is the choice for serious work. Cabinetmakers and furniture builders like it because the larger face handles wide panels and long edges, and the paper lasts longer since the wear is spread over a bigger surface. The downside is price, weight, and shop space.
A simple example comes from a friend who builds wooden toys in his garage. He started with a six inch model and quickly outgrew it when he began making larger puzzle boards. He moved up to nine inches, and it has served him well for years. If you are not sure, nine inches is a safe starting point.
The table is the part you will touch the most, so it matters. Cast iron tables are heavy, flat, and stable. They soak up vibration and stay true over time. Cheaper models use thin stamped steel or aluminum, which can flex and may not stay perfectly flat. If you want accurate work, a solid cast iron table is worth the extra money.
Look for a table that tilts so you can sand at an angle. Most good machines tilt from zero to forty five degrees, and some tilt a bit past that. A clear angle scale and a strong lock knob let you set the angle and trust it. Check that the table sits square to the disc at zero degrees. Place a small engineer’s square against the disc and the table, and if there is a gap, adjust the stop.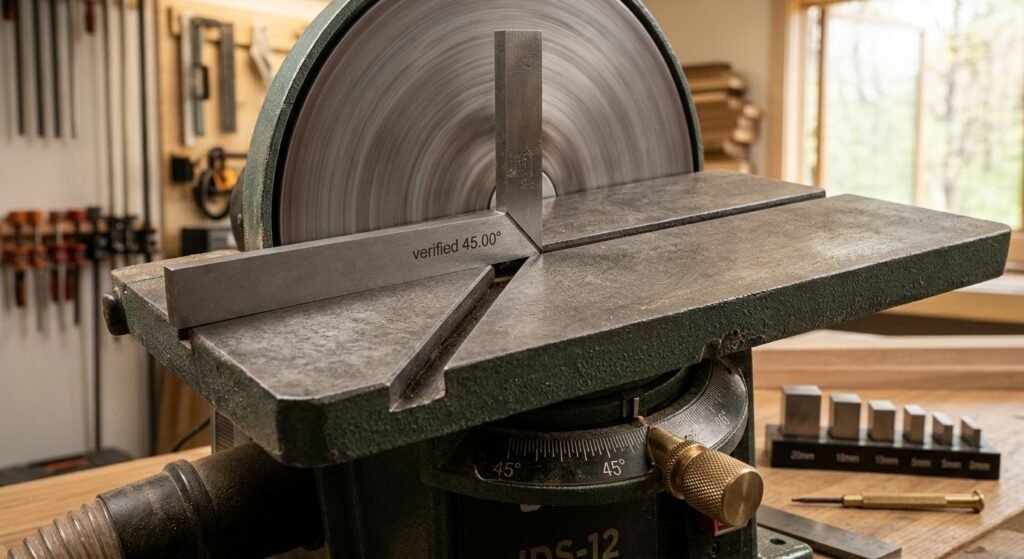
A miter gauge slot is another great feature. It is a groove cut into the table that guides a miter gauge, which is a small fence that slides along the slot. The gauge holds your workpiece at a set angle, like ninety degrees or forty five degrees, as you feed it into the disc. This makes it easy to trim miter joints and square up ends. Some machines include the gauge. If not, many standard gauges from table saws fit the slot.
Safe habits matter more here than with many other tools. The disc is spinning fast, and the paper is rough enough to take skin off in a flash. Take a minute before every session to set up properly. Wear safety glasses and a dust mask or respirator, since fine wood dust is bad for your lungs. Tie back long hair, roll up loose sleeves, and take off rings and watches. Avoid gloves, because they can catch and pull your hand toward the disc.
Set the table gap before turning on the machine. The space between the table edge and the disc should be about one sixteenth of an inch. A larger gap lets a thin piece slip down and jam, which is dangerous. Make sure the disc is mounted flat and the paper is smooth with no wrinkles. Then turn on the sander, wait for it to reach full speed, and begin.
This is the most important rule of all. The disc spins in one direction, so one half of the face moves up and the other half moves down. You should only sand on the half that moves down toward the table. On most machines that spin counterclockwise when viewed from the front, this is the left half. Check the arrow on your machine, or turn it on and watch the direction for a moment.
Why does this matter? When the paper moves down into the table, it presses your workpiece against the table surface, so the wood stays steady and supported. If you sand on the upward moving half, the paper tries to lift your piece and throw it up and away, which can snap it out of your hands or pull your fingers into the disc. 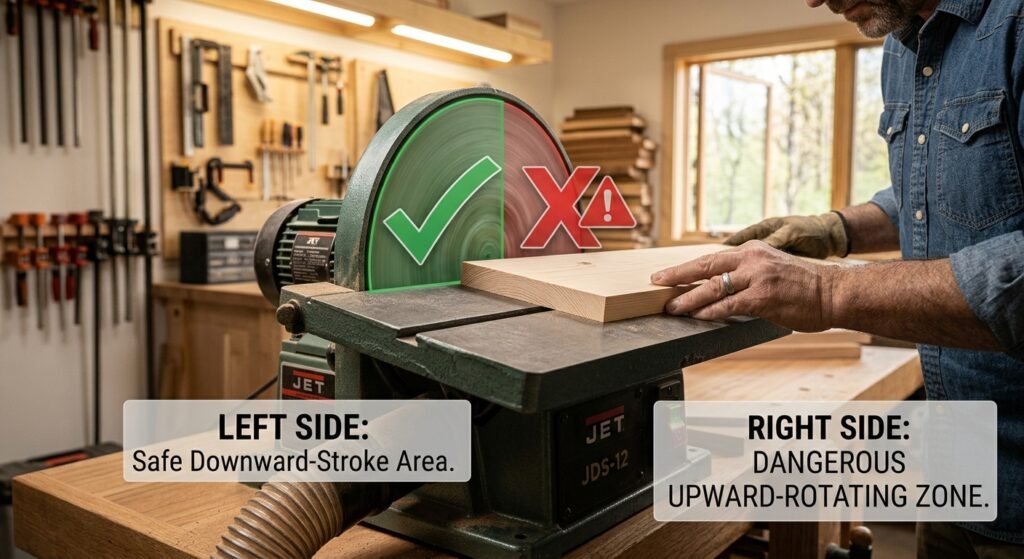 Kickback of this type happens fast and hurts.
Get into the habit of positioning your workpiece on the correct half before it touches the disc. Hold the piece firmly with both hands and keep your fingers well clear of the paper. Feed the wood slowly with light pressure. Let the machine do the cutting. If a piece is very small, hold it with a clamp, a push block, or a hand screw instead of your bare fingers. Move the piece gently from side to side across the downward moving area. This spreads wear evenly across the paper and keeps it cutting longer.
Two jobs show off the strengths of this machine. The first is squaring up an edge or an end. Set the miter gauge in the slot at ninety degrees and check it with a reliable square. Place the board against the gauge, slide it forward, and lightly touch the end to the disc. Remove a tiny amount, pull back, and check the result. Repeat in small steps until the edge is square. This slow approach beats trying to take off a lot at once. It is also how you can trim two matching parts to the exact same length, which makes box joints and frames fit tightly.
The second job is chamfering end grain. A chamfer is a small slanted edge that softens a sharp corner. End grain, the cut end of a board, is tough and tends to splinter, so a sander gives a cleaner result than a hand plane. Tilt the table to forty five degrees, hold the piece against the table, and lightly pass the corner across the downward half of the disc. Keep the part moving to avoid burn marks. For a very small chamfer, one or two light passes are enough. On end grain use a slightly finer grit, around 120, to reduce burning and tear out.
As a final tip, always test your setup on a scrap piece first. A few seconds of testing can save an expensive board.
A stationary sander makes a lot of fine dust, and that dust is bad for your lungs and your shop. It also builds up on the table, clogs the paper, and can even be a fire risk if left to pile up near motors and switches. Good dust control is not an extra. It is part of using the machine well.
Most disc sanders have a dust port on the back or underneath, often sized at two and a half or four inches. Connect it to a shop vacuum or a dust collector with the right hose adapter. A hose that fits snugly gives the best pull. Some machines have a hood around the disc that catches dust right where it is made, and that design works much better than an open table. In addition to a hose, wear a well fitting mask rated for fine dust, such as an N95 or a half face respirator with filters, especially if you sand for long periods. Sweep or vacuum your table often, and empty the collection bin before it overfills.
Paper replacement is the other regular chore. Most modern machines use adhesive backed discs, often called PSA discs, where the sticky back sticks right on the metal plate. When the paper is worn, clogged, or torn, it is time to change it. A dull disc cuts slowly, burns wood, and makes you push harder, which is a safety risk.
To remove the old disc, unplug the machine first. Peel up an edge with a plastic scraper or your fingernail and pull the paper off slowly. If it is stubborn, warm it with a hair dryer or heat gun on low for a few seconds to soften the glue. Then clean off any leftover sticky residue with a rag and a little mineral spirits or adhesive remover. Wipe the plate dry so the new paper sticks well.
Line up the new disc carefully before pressing it down. Start at one edge and smooth it outward, pushing out air bubbles as you go. A crooked or bubbly disc will wobble and give uneven results. Let it sit a few minutes before use so the adhesive can set. Keep a few extra discs on hand in 80 and 120 grit so you are never stuck in the middle of a job. You can also clean a clogged disc by rubbing it with a rubber cleaning stick, which can extend its life.
A disc sander is one of the most useful and least scary machines you can add to a shop. It trims joints, squares ends, and shapes curves with a level of control that handheld tools cannot easily match. Choose a model with enough motor power, a size that matches your projects, and a solid cast iron table with a good miter slot. Use it safely by sanding on the downward moving half, keeping the table gap small, and wearing eye and lung protection. Take care of the machine by managing dust and changing worn paper before it causes trouble.
Now it is your turn. Look at the projects on your to do list and think about which ones would be easier with a stationary sander. Grab a piece of scrap wood and practice squaring an edge in small steps. If you found this guide useful, share it with a friend who loves woodworking, and tell us in the comments which model you are thinking about buying.
What is a disc sander used for?
It is used to shape, trim, and smooth wood and other materials with great control. Common jobs include squaring ends, trimming miter joints, rounding corners, sanding small parts, and chamfering edges. It is especially handy for matching parts to the same size.
Is a disc sander better than a belt sander?
Neither is better in every case. A disc sander is better for precise angles and small parts. A belt sander is better for flattening wide boards and sanding long edges. Many shops use both for different jobs.
What size disc sander should I buy?
For most home shops, a nine inch model is a good balance of cost, size, and power. A six inch model suits tiny parts and small benches. A twelve inch model is best for larger panels and heavy use.
Which side of the disc should I use?
Always use the half that moves downward toward the table. On many machines that spin counterclockwise from the front, this is the left side. Sanding on the upward moving half can throw your workpiece and cause injury.
What grit sandpaper is best for a disc sander?
An 80 grit disc is a good all around choice for shaping and trimming. Use 60 grit for fast removal, and 120 to 220 grit for smoothing and fine touch ups. Use a finer grit on end grain to reduce burn marks.
How do I stop wood from burning on a disc sander?
Use light pressure, keep the piece moving, and replace dull or clogged paper. A coarser, sharp disc cuts cooler than a worn one. Avoid holding the wood still against the disc for more than a moment.
How do I remove an old sanding disc that is stuck?
Unplug the machine first. Peel up one edge and pull slowly. If the glue is stubborn, warm the disc with a hair dryer for a few seconds, then clean any leftover residue with a rag and a little mineral spirits.