Physical Address
304 North Cardinal St.
Dorchester Center, MA 02124
Physical Address
304 North Cardinal St.
Dorchester Center, MA 02124

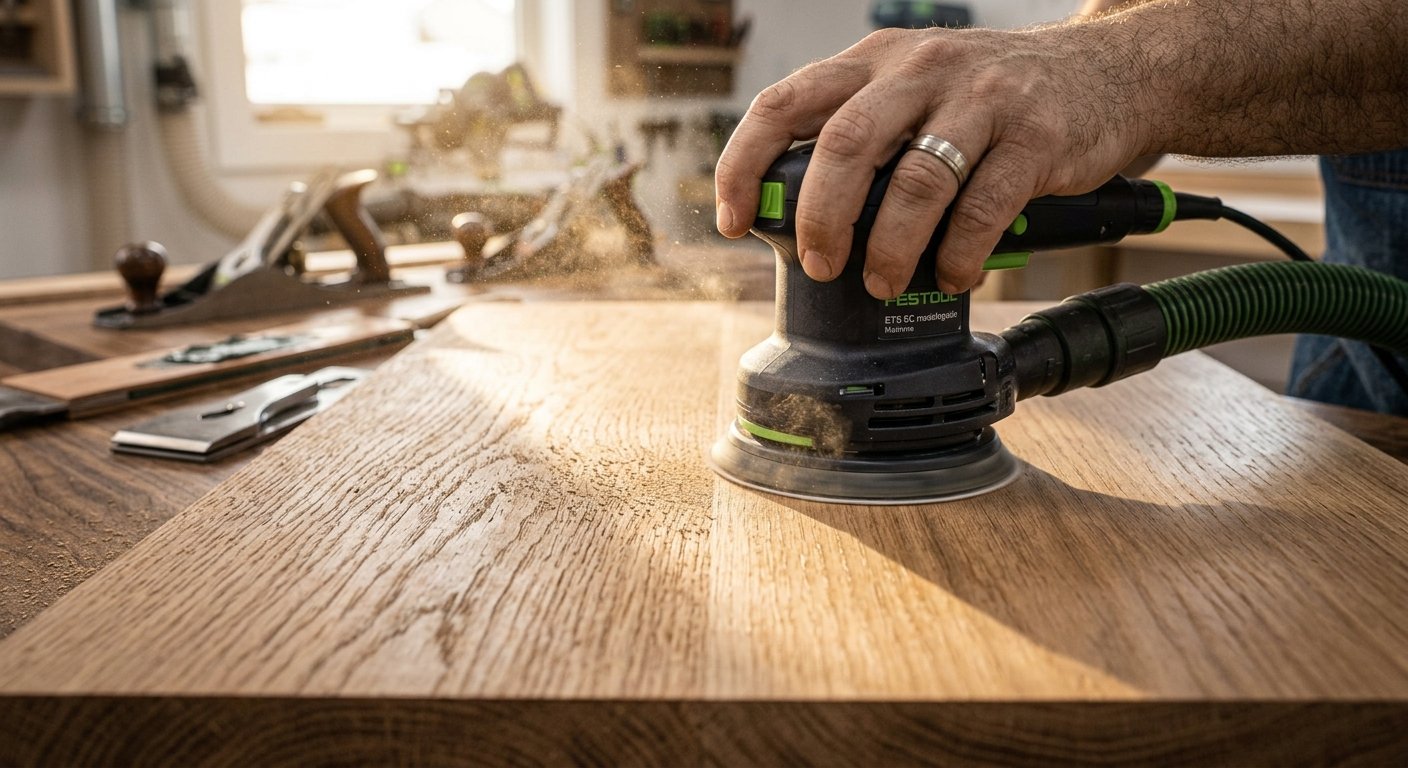
A good sheet sander can turn a rough, scratchy board into a smooth surface in minutes. It fits in one hand, it costs less than most power tools, and it works on everything from a bookshelf to an old dresser. That is why it sits in almost every DIY workspace.
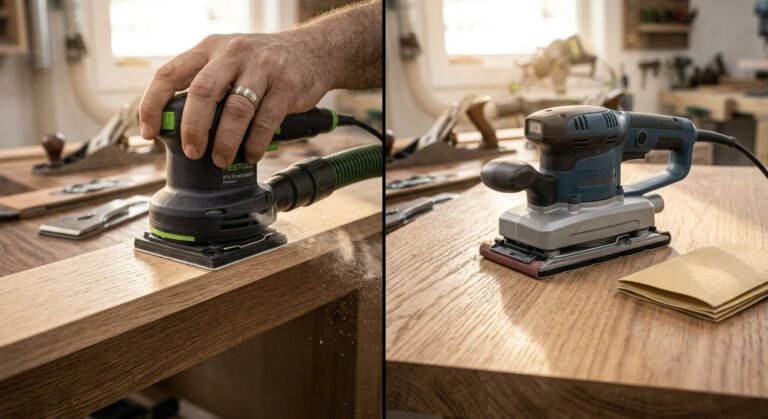
Still, the shopping part gets confusing fast. Some models run on a cord and some run on a battery. Some use a square pad and some use a round disc. If you have ever searched for Orbital Sander vs. Palm Sander: Differences, Pros, and Cons, you probably noticed that people use these names in different ways. In this guide I will clear that up in plain words, show you what to look for before you buy, and walk you through the whole sanding process from cutting paper to the final wipe down.
Whether you want to refinish a table or just smooth a few boards for a weekend project, you will find something useful here.
A sheet sander is a handheld power tool that holds a flat piece of sandpaper on a rectangular pad. The motor spins a small weight under the pad, and that makes the pad shake in tiny circles or ovals. The paper rubs the wood fast, so you remove material without all the arm work of hand sanding.
You will hear many names for the same tool. Palm sander, finishing sander, electric sheet sander, and even orbital sander all get used, and most of the time people mean the same thing. The word palm comes from the shape. The body is small enough to sit in the palm of your hand, so you can steer it with a light touch. Because it is meant for finishing work and not heavy stock removal, many shops call it a finishing sander.
One quick note on power. Corded electric models usually list their strength in amps, like 2 amp, or in watts, like 350W. Cordless models list battery voltage instead, such as 20V. We will get to that in the features section.
The size of the pad decides what the tool does best, so this is the first choice you should make.
A quarter sheet sander is the one most people buy. It takes a quarter of a standard 9 by 11 inch sheet of sandpaper, which makes the pad about the size of your palm. It is light, easy to control with one hand, and good for cabinet doors, small tabletops, trim, and furniture parts. If you only plan to own one sander for home improvement jobs, this is the safe pick. Many brands sell a 2 amp corded version at a friendly price, including Maxxt style budget models, and cordless versions such as a DeWalt 20V or a Craftsman V20.
A half sheet sander uses half of a standard sheet, so the pad is about twice as big. You need two hands to hold it, but it covers a lot more area per pass. Think large tabletops, long shelves, doors, and floors of plywood. It also stays flatter over a wide surface, which helps when you want even sanding across a big panel. The trade off is weight and noise. It can feel heavy after twenty minutes, and it costs more.
A detail sander has a pointed or triangular pad. That shape slips into corners, tight edges, and the small gaps between slats where a rectangle cannot go. It is not a main tool. Think of it as a helper you add later for chairs, window frames, and carved parts.
A simple way to choose: pick the quarter sheet for general use, a half sheet if you mostly work on big flat panels, and a detail sander only when corners are the problem.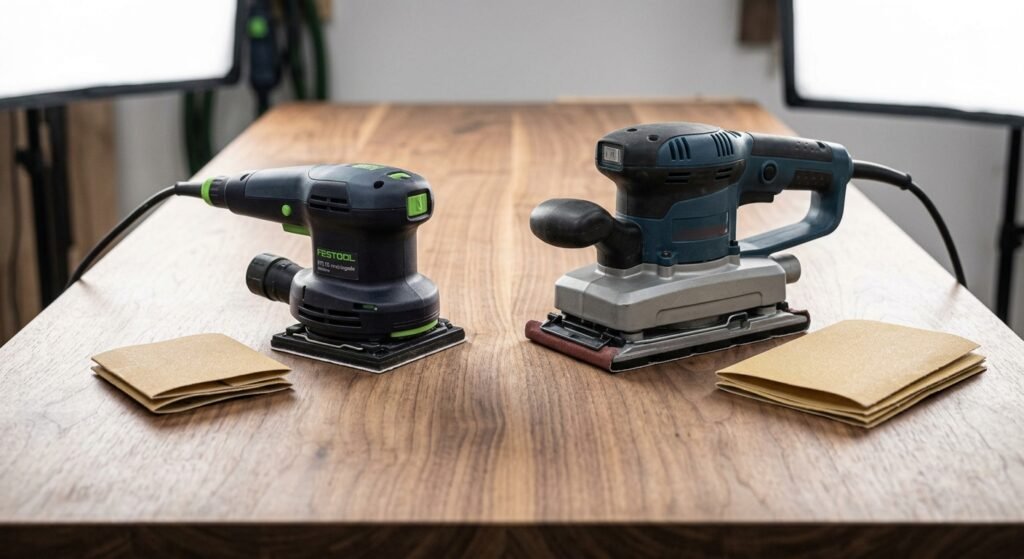
The secret is the way the pad moves. Inside the sander sits an eccentric weight, which is just a small off center piece on the motor shaft. When the motor spins it, the pad draws a tiny circle or ellipse, usually about 1/16 of an inch wide. This is called orbital motion, and it happens up to 14,000 times every minute on many models.
Because the strokes are so small and so fast, no single scratch is deep or long. The marks overlap in many directions, so your eyes see a smooth, even surface. Compare that to a linear sanding motion, where the paper goes straight back and forth. Straight scratches show up clearly under stain, especially if they cut across the wood grain.
Here is a key difference people mix up. A sheet sander moves the pad in a fixed orbit. A random orbital sander does that and also lets the round disc spin freely, so the path never repeats. That is why the random orbit type removes wood faster and leaves fewer swirl marks. It is also the answer to the common orbital sander vs palm question. A random orbital sander uses a round disc and works well for both fast removal and finishing. A palm sheet sander uses a rectangular pad, so it gets into square corners and sits flat on edges, but it takes off material more slowly. Neither one is better in every case. It depends on your task.
Price tags can look similar on very different tools. Before you pay, check the details below. They explain why one sander feels smooth in your hand and another buzzes your wrist numb.
For a corded electric sheet sander, 2 amp is a solid number for a quarter sheet model. A half sheet often goes higher, and some brands advertise watts instead, with 350W as a common mid range figure. More power helps the tool keep its speed when you press a little harder or sand a hard wood like oak.
Cordless models change the picture. Platforms such as DeWalt 20V, Milwaukee M18, and Craftsman V20 let you share batteries with your drill, so you skip the cord and move around freely. A brushless sheet design is worth a look here. Brushless motors run cooler, last longer, and waste less battery. The same idea shows up in the term power sheet, which many brands use for stronger, battery driven models. The downside is cost and a little extra weight from the pack.
Now the second number, OPM, which stands for orbits per minute. Higher OPM means faster cutting. Lower OPM gives you a gentler touch. A variable speed dial lets you switch between them. Use the high setting to knock down old paint or rough spots, and drop to a low setting for polishing a clear coat or sanding soft pine without gouging it. Variable speed is one of those features you will use more than you expect.
This part sounds boring, but it affects how much you enjoy the tool.
A clamp system holds a plain sheet of paper at both ends of the pad. It is cheap to run because you cut regular sandpaper into quarter pieces. The problem is that paper can loosen and slide, and the clamp areas make it hard to sand right up to an edge. Pull the paper tight and check it often.
A hook and loop pad works like a strip of Velcro. You press a sheet with a fuzzy back onto the pad and it sticks. Swapping grits takes a few seconds, and the paper stays flat. Many people also like that these sheets often come with holes already punched for dust collection. The cost is that these sheets are more expensive than plain paper, and the pad itself wears out over time.
Some sanders offer both, which is handy. If you do a lot of work and change grits often, go with hook and loop. If you are on a budget and sand once in a while, a clamp model is fine.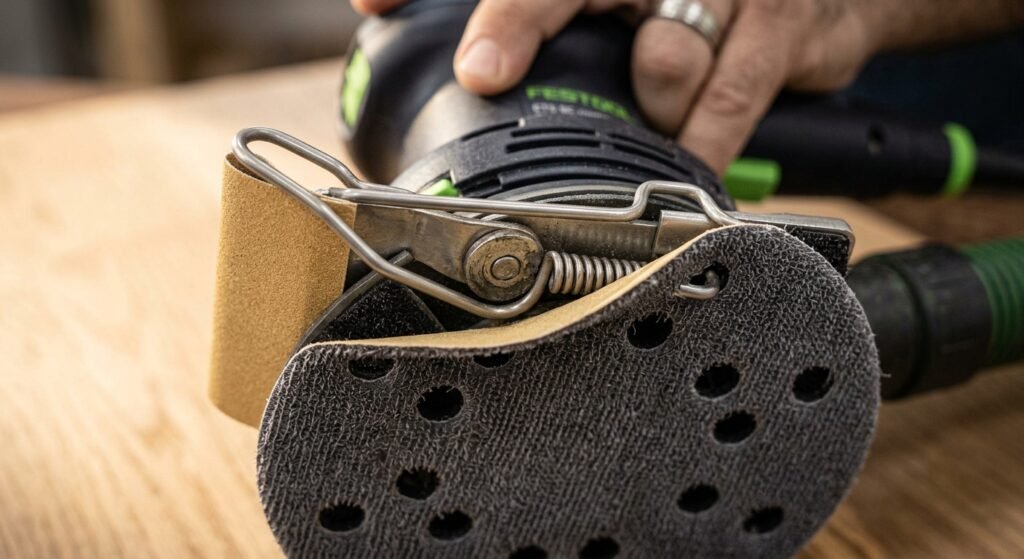
One more feature to look at is the pad itself. A softer foam pad follows a gentle curve, which helps on rounded edges. A harder pad stays flat and cuts straighter. Also check for vibration control. Better sanders use balanced weights and rubber grips to cut down shaking, which matters more than you think after an hour of work.
Sanding makes a surprising amount of fine dust, and that dust is not good to breathe. It also clogs the paper, which makes it wear out faster and leave worse scratches.
Most quarter sheet models come with a built in dust bag. It catches a decent share of the dust and keeps your workspace cleaner for small jobs. Empty it when it is about half full, because a packed bag stops pulling air. The bag is fine for a bookshelf. For a big project or work indoors, it is not enough.
A better setup is a vacuum adapter port. Many sanders have a small port on the back where you can connect a shop vacuum hose. This pulls dust through the holes in the pad and the paper, and the sanding stays much cleaner. Pair it with a dust mask or respirator anyway. Real world example: when I sanded drywall patches in a small bedroom, the bag alone left a white film on everything. With a vacuum hooked up, the room needed only a quick wipe.
Speaking of drywall, a sheet sander is fine for tiny patches and touch ups, but for whole walls most people use a pole sander or a dedicated drywall tool. Keep the palm sander for wood and small repairs.
Buying sandpaper in full sheets is the cheapest way to run a sander. A pack of 9 by 11 inch sheets costs far less than pre cut ones, and you get more control over grit choice. Cutting them is easy once you know the trick.
Start by folding a full sheet in half with the rough side facing out, and crease it well. Open it, flip it over, and fold the other way to make quarters. Tear or cut along the creases with a sharp utility knife and a straight edge. Do not use your good scissors. Sandpaper dulls them in no time. You will end up with four pieces that are close to the right size for a quarter sheet pad.
To install a piece on a clamp sander, lift one clamp lever and slide an end of the paper under it. Wrap the paper snugly across the pad, then lock the other end. The paper should be tight and flat with no bubbles. If you can push it up with a finger, it is too loose and it will tear fast. Trim any extra that hangs over the sides.
For hook and loop sheets, just line up the edges with the pad and press it down. Make sure the holes match the dust ports.
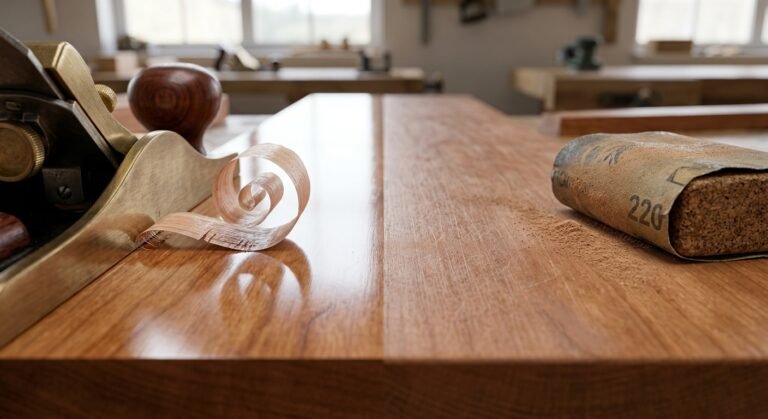
A quick tip on grit. For raw wood, many people start at 80 or 100 grit to remove marks, move to 120, and finish at 180 or 220. Do not jump more than one step at a time. If you skip from 80 straight to 220, the fine paper will not remove the deep scratches left by the coarse one, and you will find them later under the stain.
Here is a problem you may not expect. If you cut your own paper from plain sheets, there are no holes in it. That means the vacuum port does nothing, because the air has nowhere to flow.
The fix is a sandpaper punch plate. It is a small metal or plastic template with holes in the same pattern as your sander pad. You lay the paper on a piece of scrap wood, set the plate on top, and tap through each hole with a hole punch or a hammer and a punch tool. Some people simply use the sander pad itself as a guide and mark the spots with a pen.
Align the holes carefully. If they sit off by even a few millimeters, the dust will not flow well and you will lose most of the benefit. Punch a stack of several sheets at once so you have extras ready. It takes about ten minutes, and it gives you cheap, vacuum ready paper for a long time.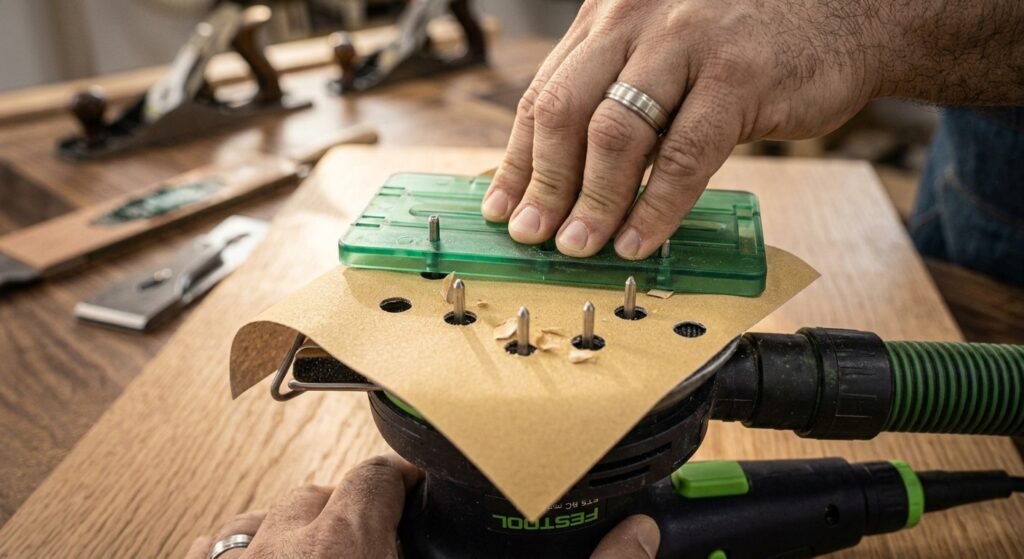
If that sounds like too much work, a middle option is to buy pre punched hook and loop sheets for the final grits and use homemade paper for early rough work.
Swirl marks are the most common complaint with any sander, and they usually come from technique, not from a bad tool. Follow these steps and you will get a clean surface that is ready for stain or paint.
First, prepare the wood. Clamp the board down so it cannot move, or place it on a non slip mat. Check for nails, staples, and old screws. Hitting metal will tear the paper and may damage the pad. Fill any dents or cracks with wood filler, let it dry fully, and then sand it flush later.
Second, choose your starting grit based on the job. For removing old finish, 80 grit works well. For new wood that is already pretty smooth, begin at 120. Attach the paper, connect your vacuum if you have one, and make sure the pad is clean.
Third, set the sander flat on the wood before you turn it on. Never start it in the air and lower it down, because that digs in and can leave a gouge. Turn it on, let it reach full speed, and let the weight of the tool do the work. This is the pressure control rule. Pushing down hard does not make it faster. It slows the motor, clogs the paper, and creates deep marks. Use just enough force to keep the pad flat.
Fourth, move slowly with the wood grain. Slide the sander in overlapping lines, with each pass covering about half of the last one. A steady pace of about one inch per second is a good guide. 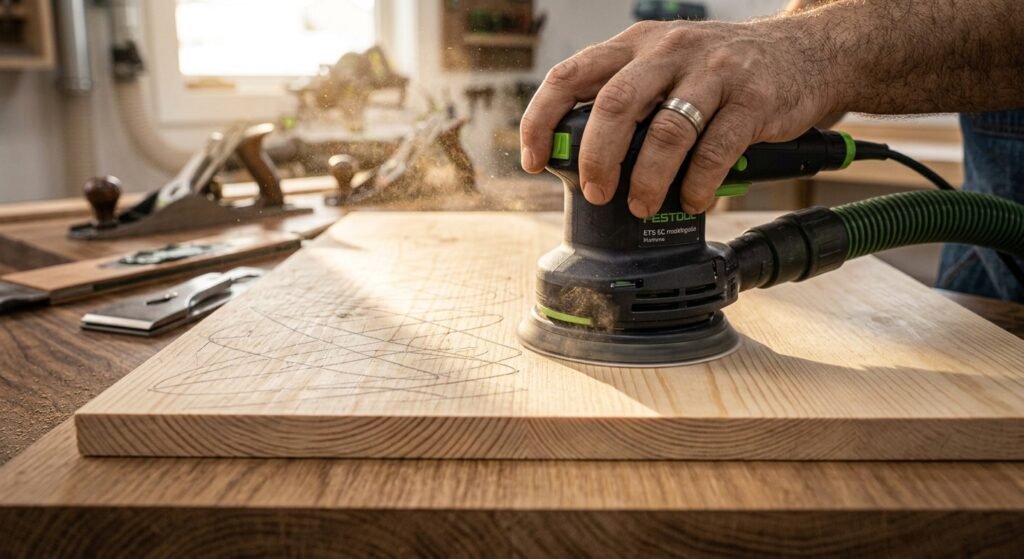 Keep the pad fully on the board. If it hangs over the edge, it tips and rounds the corner.
Fifth, stop and check. Wipe away the dust and look at the surface with a light held at a low angle. This shows scratches you cannot see from above. If you find marks, keep going with the same grit until they are gone. Then move up to the next grit and repeat. Sand with the grain at every stage, and change paper before it looks worn out. A dull sheet only polishes the dust and wastes your time.
Last, clean the board well. Use a vacuum, then a tack cloth or a slightly damp rag. Leftover dust from a coarse grit can get dragged around by the fine paper and scratch the wood. When you are done, run your hand over the surface with your eyes closed. If it feels smooth, it is ready.
A small example from my own shop: I once rushed a cherry tabletop and skipped from 100 to 220 grit. After the first coat of stain, faint curved lines showed up everywhere. I had to start over. Taking the extra ten minutes for 150 grit would have saved me an afternoon.
A sheet sander is one of those essential tools that quietly makes every project better. A quarter sheet size suits most DIY jobs, a half sheet works for big panels, and a detail sander picks up the corners. Look for a motor that fits your needs, whether that means a 2 amp corded model or a brushless cordless one from a brand like DeWalt, Milwaukee, or Craftsman. Choose a paper system you will actually enjoy using, and hook up some kind of dust collection.
Most of all, remember that great results come from slow, even passes and a steady grit order, not from pushing hard. Get these habits right and even a budget sander can give you consistent results.
Ready to try it? Pick a scrap board, grab a few grits, and practice the steps above before you move on to your real project. You will see the difference on the very first try.
In everyday talk, the two names often mean the same tool. Strictly speaking, a palm sander is a small, one handed sander with a square pad that moves in tiny circles. A random orbital sander uses a round disc that also spins freely, so it removes material faster and leaves fewer swirl marks. The palm style is better for corners and flat finishing, while the random orbit type is better for speed.
Yes, but it is slower than a random orbital sander. Use 60 to 80 grit paper, keep the sander moving, and change the sheet often because old paint clogs it quickly. For thick layers, a scraper or chemical stripper first will save time and paper.
For most home projects, yes. Modern battery models from DeWalt, Milwaukee, and Craftsman run long enough for furniture and trim. Corded models still win on steady power for long sessions and usually cost less. If you already own batteries from a brand, a cordless tool is a smart buy.
For raw wood, start with 80 or 100 grit, move to 120 or 150, and finish with 180 or 220. For painted pieces, 220 is often enough. Going finer than 220 on bare wood can close the pores and keep stain from soaking in evenly.
The usual causes are too much pressure, skipping grits, worn out paper, or dust trapped under the pad. Press lightly, move with the grain, change paper often, and clean the surface between grits. A tool that vibrates heavily can also cause marks, so check that the pad is flat and the paper is tight.
It is fine for small patches and joint touch ups, but it is not ideal for whole walls. The pad is small, so the work goes slowly. A pole sander or a drywall sander with a vacuum is a better choice for large areas.
You do not need one, but it is strongly recommended. The built in dust bag is enough for quick jobs, while a shop vacuum on the vacuum port keeps the air cleaner, extends paper life, and gives a better finish. Always wear a mask when you sand.