Physical Address
304 North Cardinal St.
Dorchester Center, MA 02124
Physical Address
304 North Cardinal St.
Dorchester Center, MA 02124
Wondering how to clean wagner paint sprayer like a pro? You’re in for a treat! This quick guide spills the beans on the art of sprayer maintenance, making it a breeze for even the DIY newbie. We’ve got the hacks, the shortcuts, and the must-knows to keep that Wagner sprayer singing.
No jargon, just straightforward tips that’ll turn cleanup from a chore to a cinch. Ready to say goodbye to paint mishaps and hello to a smoothly operating sprayer? Let’s dive in and make your painting projects even more satisfying!
Key Summary: How to Clean Wagner Paint Sprayer?
Clean a Wagner paint sprayer safely by disconnecting the power, emptying the reservoir, and using a suitable solvent. Disassemble, scrub parts with a brush, and allow them to air dry. Wear protective gear, work in a well-ventilated area, and complete the process in 15-30 minutes.
The Wagner paint sprayer is a versatile tool that empowers DIY enthusiasts and professionals alike to bring their projects to life with efficiency and precision. Understanding the key components of this innovative device is crucial for maximizing its performance and ensuring long-term durability.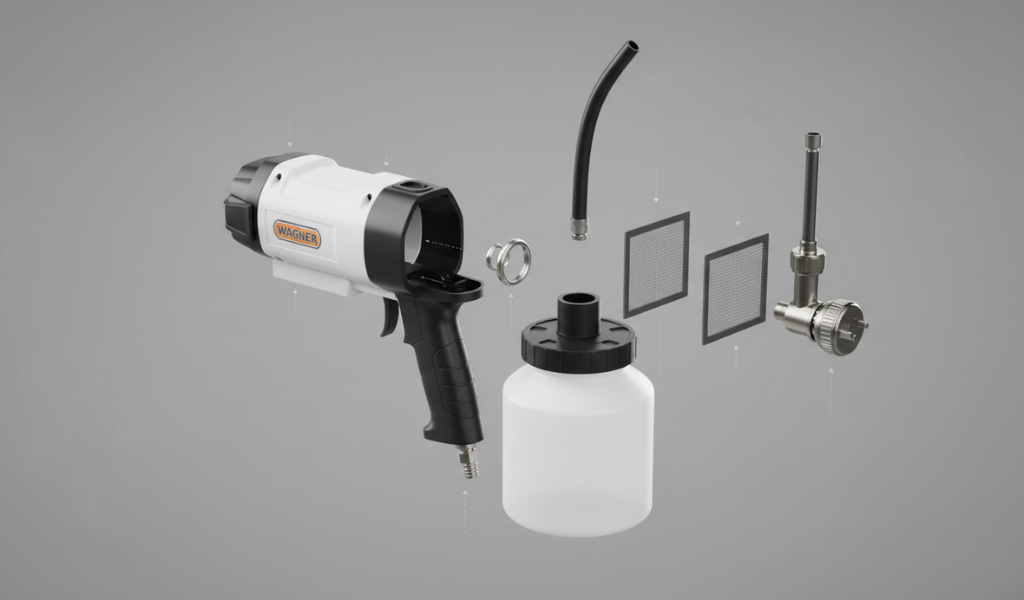
At the heart of every Wagner paint sprayer lies a robust motor and pump system. These components work in tandem to pressurize the paint, allowing for a smooth and consistent application. The power source is the driving force behind the sprayer’s ability to deliver a fine, even coat of paint on various surfaces.
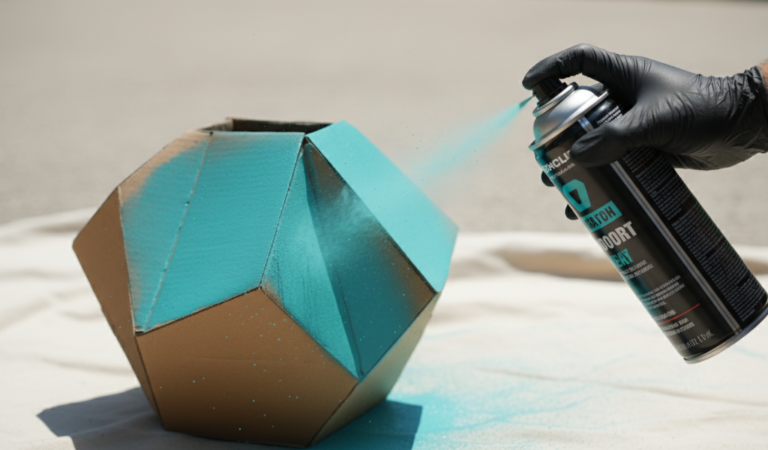
The nozzle and spray tip are pivotal components that determine the spray pattern and paint flow. Wagner paint sprayers typically come with interchangeable nozzles and tips, allowing users to customize their application for different projects. Understanding how to select and utilize these components ensures precise coverage and professional-quality results.
Equipped with a paint container or hopper, Wagner sprayers offer convenience and flexibility in handling various paint volumes. The container holds the paint, feeding it to the pump for pressurization. This feature enables users to tackle projects of different sizes without constant refilling, enhancing efficiency and workflow.
Filters and strainers play a crucial role in maintaining the integrity of your paint sprayer. Positioned within the system, they prevent debris and impurities from reaching the nozzle, reducing the risk of clogs and ensuring a consistent spray pattern. Regularly cleaning and replacing these components is essential for optimal performance.
Wagner paint sprayers are designed with user-friendly controls for adjusting spray intensity, pattern width, and paint flow. Familiarizing yourself with these controls allows for greater precision and customization, ensuring your sprayer accommodates the unique requirements of each project.
In mastering the art of using a Wagner paint sprayer, a solid understanding of its components is indispensable. From the power-packed motor to the intricacies of the nozzle, each part plays a vital role in delivering a flawless finish. Armed with this knowledge, users can confidently navigate the intricacies of their Wagner paint sprayer, unlocking its full potential for creativity and efficiency.
A Wagner paint sprayer is a versatile tool that empowers users to tackle a myriad of painting projects with efficiency and precision. However, to ensure the longevity and consistent performance of this invaluable device, regular cleaning is not just a recommendation—it’s a necessity. Let’s delve into the compelling reasons why regular cleaning is paramount for your Wagner paint sprayer.
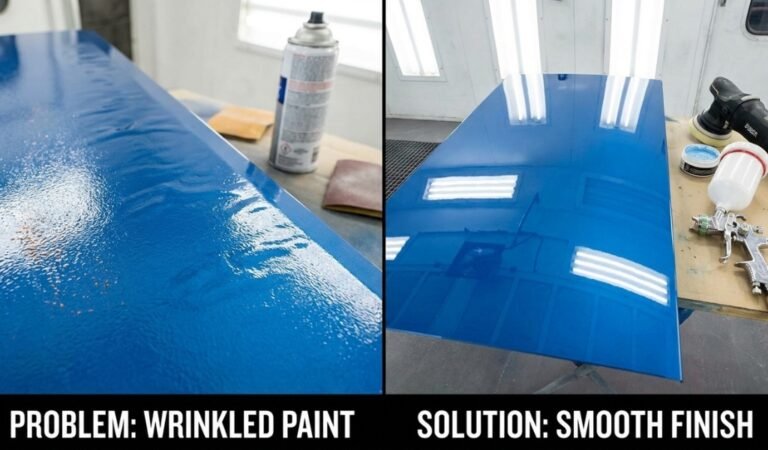
Like any well-crafted machine, a Wagner paint sprayer operates at its best when free from accumulated residues and dried paint. Regular cleaning ensures that the components, including the nozzle, pump, and filters, are free from obstructions, allowing for optimal paint flow and even application. This, in turn, guarantees a flawless finish on every project.
Over time, paint particles can accumulate in various parts of the sprayer, leading to clogs and uneven spray patterns. Regular cleaning mitigates this risk by removing any residual paint or debris, preventing the development of blockages that can compromise the sprayer’s functionality. This proactive approach saves time and frustration during projects.
A Wagner paint sprayer is an investment in quality and efficiency. Regular cleaning serves as a form of preventive maintenance, preserving the longevity of the device. By keeping components free from corrosive elements and ensuring smooth operation, you contribute to the extended lifespan of your Wagner paint sprayer.
Consistency is key in achieving professional-looking results in painting projects. Regular cleaning of the sprayer components, such as the nozzle and filters, maintains a uniform paint flow. This consistency is especially crucial for intricate projects where achieving a smooth and even finish is imperative.
Paint contamination is a common issue that can arise when using a sprayer without proper cleaning. Residual colors or debris from previous projects may mix with new paint, resulting in unintended hues and compromised project outcomes. Regular cleaning eliminates the risk of contamination, ensuring the purity of each paint application.
While it may seem time-consuming to clean your Wagner paint sprayer after each use, the investment in cleaning pays off in the long run. Regular maintenance prevents the need for extensive repairs or replacements, saving both time and money. A well-maintained sprayer is also less prone to unexpected breakdowns during critical projects.
For those conscious of their environmental impact, regular cleaning promotes responsible use of resources. By preventing premature disposal of the sprayer due to neglect or damage, you contribute to reducing electronic waste and minimizing your ecological footprint.
The importance of regular cleaning for your Wagner paint sprayer cannot be overstated. It’s a practice that goes beyond preserving the device; it’s about ensuring consistent, high-quality results, extending the life of your equipment, and embracing a responsible approach to maintenance. Embrace the habit of regular cleaning, and your Wagner paint sprayer will continue to be a reliable partner in bringing your creative visions to life.
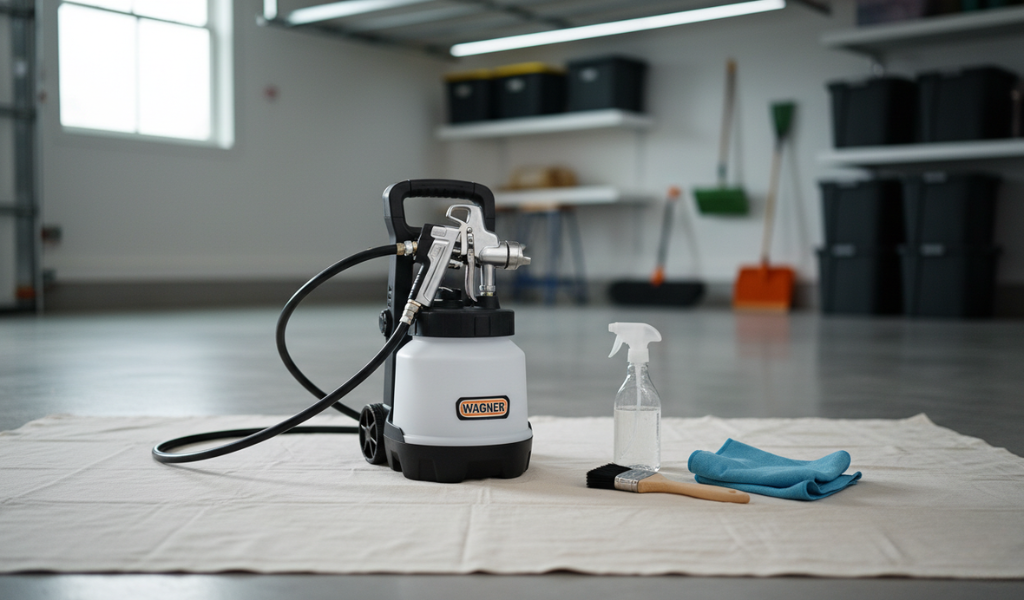
Keeping your Wagner paint sprayer in top-notch condition is essential for achieving consistent, professional results in your painting projects. Follow this step-by-step guide to ensure a thorough and effective cleaning process for your Wagner paint sprayer.
Before diving into the cleaning process, assemble the necessary supplies:
Ensure a safe cleaning environment. Work in a well-ventilated area, and use protective gear to shield yourself from cleaning solvents. Disconnect the sprayer from the power source to prevent any accidental start-ups during the cleaning process.
Pour any remaining paint back into its original container. Wipe out the reservoir with a clean cloth to remove residual paint. For water-based paints, rinse the reservoir with clean water.
Carefully dismantle the components, such as the nozzle, spray gun, and filters. Refer to your Wagner paint sprayer manual for guidance on proper disassembly. Lay out the parts in an organized manner to facilitate easy reassembly.
Using a soft brush or appropriate cleaning tool, gently scrub the nozzle to remove any dried or hardened paint. Pay attention to the filters as well, ensuring they are free from debris. Soak these components in an appropriate cleaning solution for a thorough cleanse.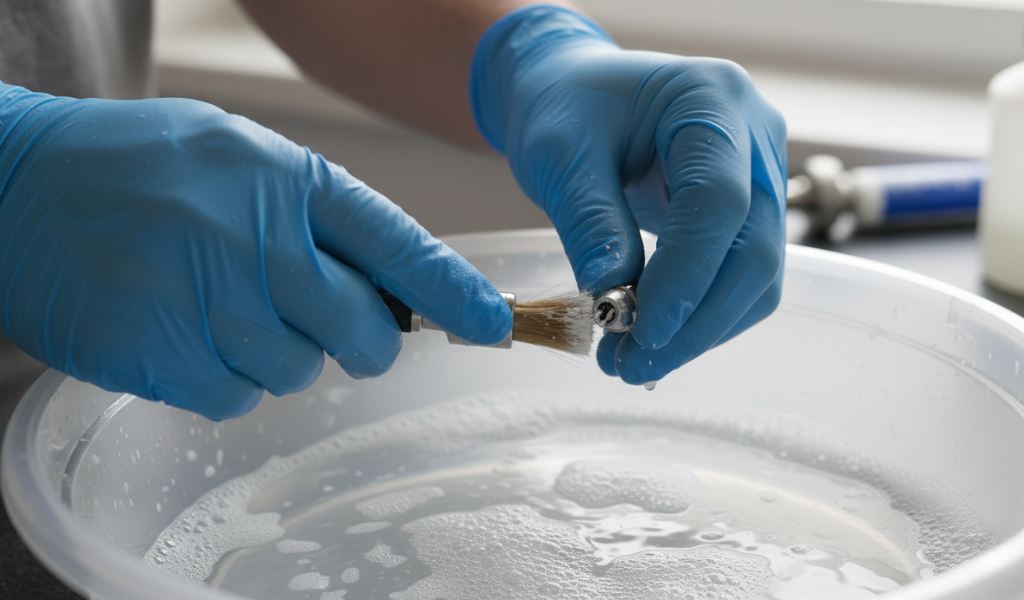
Flush out the hose with the recommended cleaning solution. Ensure there are no obstructions or leftover paint residues. If the hose is detachable, consider soaking it in the cleaning solution for a more comprehensive cleaning.
Clean the exterior surfaces of the paint sprayer using a damp cloth. Remove any dust, paint splatters, or residue that may have accumulated during previous projects. Pay attention to vents and openings to maintain optimal airflow.
While cleaning, inspect each component for signs of wear and tear. Check for cracks, loose connections, or any visible damage. Address any issues promptly to prevent further damage during operation.
Once all components are thoroughly cleaned and inspected, carefully reassemble the Wagner paint sprayer. Follow the reverse order of disassembly, ensuring each part fits securely in place.
Before storing or using the paint sprayer for your next project, perform a test spray with water to ensure that all components are functioning correctly. This step allows you to identify any issues and make adjustments before applying paint.
By following this step-by-step guide, you’ll maintain the longevity and efficiency of your Wagner paint sprayer, ensuring it remains a reliable tool for achieving professional-quality finishes in your painting endeavors. Regular cleaning not only preserves the sprayer’s performance but also contributes to a safer and more satisfying painting experience.
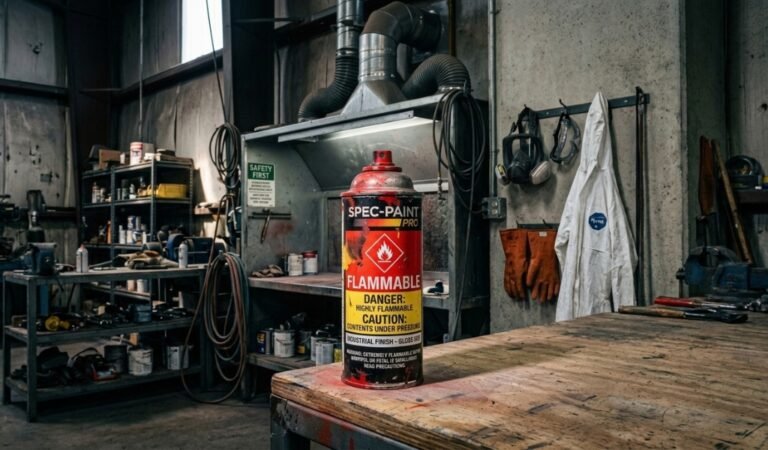
Cleaning your Wagner paint sprayer is a crucial step in maintaining its performance and longevity. However, it’s equally important to prioritize safety during the cleaning process. Here’s a comprehensive guide to safety precautions that will protect both you and your Wagner paint sprayer.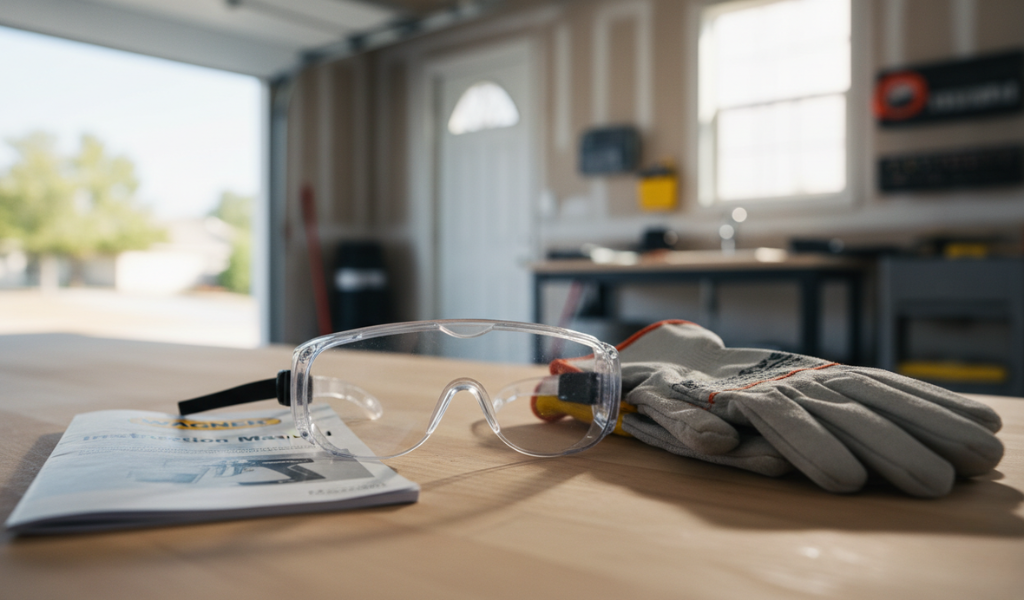
Before embarking on the cleaning journey, disconnect the Wagner paint sprayer from its power source. Unplug it from electrical outlets or remove any batteries to eliminate the risk of accidental activation during the cleaning process.
Prioritize personal protection by wearing the appropriate gear. Gloves safeguard your hands from cleaning solvents, while safety goggles shield your eyes from potential splatters or fumes. A mask may also be necessary to protect against inhaling vapors.
Choose a workspace with proper ventilation to disperse any fumes generated during the cleaning process. If possible, conduct the cleaning outdoors or in an area with good airflow to minimize inhalation risks.
Familiarize yourself with the safety guidelines outlined in your Wagner paint sprayer manual. The manual provides model-specific information on potential risks and precautions, ensuring you adhere to manufacturer recommendations.
Before starting the cleaning process, ensure the paint reservoir is empty. Pour any remaining paint back into its original container, and clean out the reservoir with a cloth to avoid accidental spills.
Select cleaning solutions recommended by Wagner or those explicitly stated as safe for your paint sprayer model. Avoid using harsh chemicals that could damage components or pose health risks.
If you’re using cleaning solvents, store them in sealed containers away from heat sources or open flames. Follow proper handling procedures and read the solvent’s safety data sheet for guidance on storage and usage.
During disassembly and cleaning, be cautious of sharp edges or components. Wear appropriate clothing to protect against cuts, and handle disassembled parts with care to prevent injuries.
Inspect components for signs of wear and tear during the cleaning process. If you identify any damaged parts, address them promptly. Damaged components can compromise the safety and functionality of your Wagner paint sprayer.
Dispose of used cleaning materials, such as cloths or disposable gloves, in accordance with local regulations. If you’ve used any hazardous materials, follow proper disposal guidelines to minimize environmental impact.
Have a basic first aid kit nearby in case of minor injuries. Familiarize yourself with the location of emergency exits and equipment in your workspace. Being prepared ensures a quick response in case of unforeseen circumstances.
When reassembling your Wagner paint sprayer, follow the manufacturer’s guidelines precisely. Incorrect reassembly can lead to malfunctions or safety hazards. Use labeled parts and reference photos if needed.
By adhering to these safety precautions, you can confidently and securely clean your Wagner paint sprayer, maintaining its efficiency while safeguarding your well-being. A commitment to safety ensures that each painting project is not only successful but also a secure and satisfying experience.
Preserving the performance and longevity of your Wagner paint sprayer involves more than just a thorough cleaning process. Proper maintenance and storage practices play a pivotal role in ensuring that your trusted tool is always ready for the next painting project. Here are essential tips to maintain a clean Wagner paint sprayer and ensure its longevity through proper storage.
After completing a painting project, make it a habit to clean your Wagner paint sprayer immediately. Empty the paint reservoir, disassemble the components, and follow the manufacturer’s cleaning guidelines. This prevents paint residues from drying and ensures a smoother cleaning process.
Opt for cleaning solutions recommended by Wagner or those specified in the user manual. Using the right cleaning agents prevents damage to sensitive components and maintains the sprayer’s efficiency over time.
Disassemble the sprayer to clean each component thoroughly. Pay close attention to the nozzle, filters, and hose. Remove any dried or hardened paint to prevent clogs and maintain optimal spray patterns.
Regularly inspect the components for signs of wear and tear. Replace any damaged or worn parts promptly to prevent potential malfunctions. Addressing issues early ensures consistent performance and prevents costly repairs down the line.
Apply lubricant to moving parts, such as the trigger and pivot points, as recommended in the user manual. Lubrication minimizes friction, ensuring smooth operation and preventing premature wear of essential components.
Choose a controlled environment for storing your Wagner paint sprayer. Extreme temperatures, humidity, and direct sunlight can affect the sprayer’s performance. A cool, dry place is ideal for maintaining the integrity of its components.
Cover your Wagner paint sprayer with a clean, dry cloth or use a protective storage case to shield it from dust and debris. Keeping the sprayer covered prevents contaminants from entering sensitive areas, ensuring a clean start for each project.
If you’ve disassembled the components for cleaning, store them securely in labeled containers. This organization not only facilitates easy reassembly but also protects the parts from damage during storage.
Store your Wagner paint sprayer in an upright position to prevent paint or cleaning solvents from settling in the internal components. This minimizes the risk of blockages and ensures a smooth start when you’re ready to use it again.
In addition to immediate post-use cleaning, incorporate a periodic maintenance routine into your schedule. Even if the sprayer hasn’t been used recently, periodic checks and cleaning prevent potential issues caused by prolonged inactivity.
Always refer to the user manual for specific maintenance and storage recommendations provided by Wagner. The manual offers valuable insights into the manufacturer’s guidelines, ensuring you follow the best practices for your specific model.
Before starting a new project, perform a test spray with water to ensure that all components are functioning correctly. This pre-use check allows you to identify and address any issues before applying paint.
By incorporating these tips into your routine, you’ll not only maintain a clean Wagner paint sprayer but also ensure its longevity through proper storage practices. A well-maintained paint sprayer guarantees consistent performance, allowing you to tackle your painting projects with confidence and efficiency.
Embarking on painting projects with your Wagner paint sprayer is a rewarding experience, but occasional hiccups in the cleaning and operation process are not uncommon. Here’s a concise guide to troubleshoot and conquer common challenges, ensuring your Wagner paint sprayer stays in top-notch condition.
By navigating these troubleshooting tales with patience and precision, you’ll conquer challenges, keeping your Wagner paint sprayer ready for any painting endeavor. Consistent maintenance and adherence to manufacturer guidelines ensure a reliable and efficient tool for all your projects. If persistent issues arise, consult the user manual or seek assistance from Wagner customer support.
In mastering the art of cleaning your Wagner paint sprayer, diligence and adherence to proper techniques are paramount. By following the outlined steps and troubleshooting tips, you not only ensure the longevity and optimal performance of your sprayer but also guarantee a smooth and efficient painting experience. Remember, a well-maintained Wagner paint sprayer is not just a tool; it’s a reliable companion for every stroke of creativity. Happy painting!
To clean your Wagner paint sprayer, start by emptying the reservoir, disassembling components, and using a recommended cleaning solution. Scrub off any residue, ensure thorough drying, and follow the user manual for specific instructions.
The best cleaning solution for a Wagner paint sprayer is one recommended by Wagner or specified in the user manual. Typically, a mixture of water and mild dish soap works well. Avoid harsh chemicals that may damage components.
Cleaning the Wagner paint sprayer nozzle involves removing it and soaking it in a cleaning solution. Use a soft brush to dislodge any dried paint, ensuring a clear passage for paint flow. Thoroughly rinse and dry the nozzle before reassembly.
It’s best to use a cleaning solution recommended by Wagner or specified in the user manual. Typically, a mixture of water and mild dish soap works well, avoiding harsh chemicals.
While water can be used, it’s advisable to use a cleaning solution for effective removal of paint residues. Water alone may not be sufficient, especially for dried or stubborn paint.
Regular cleaning is essential for maintaining optimal performance. Clean the sprayer after each use to prevent paint residue buildup and ensure smooth operation for future projects.