Physical Address
304 North Cardinal St.
Dorchester Center, MA 02124
Physical Address
304 North Cardinal St.
Dorchester Center, MA 02124


If you’ve ever run your hand across a freshly sanded panel and noticed small circular scratches catching the light, you’ve met pigtails. These tiny swirl marks show up on furniture, cabinets, and woodworking projects more often than most people expect, and they can ruin an otherwise smooth finish in seconds. The good news is that pigtails are almost always preventable once you understand what causes them.
This guide walks through everything you need to know about how to stop pigtails when sanding ,sanding swirls: what they look like, why they form, and the exact techniques that stop them before they start. Whether you’re working on a dining table, a cabinet door, or a full furniture restoration, these tips will help you get a surface that’s smooth, even, and ready for stain or finish.
Pigtails are small, curly swirl marks that appear on a sanded surface, usually left behind by an orbital sander. They get their name because the scratch pattern looks like a tiny curled pig’s tail, a series of looping scratches rather than straight lines. Unlike normal sanding scratches that follow the grain, pigtail marks run across the surface in random swirls, which makes them stand out once you apply stain or a clear finish.
Pigtails aren’t a sign of bad wood or a faulty sander. They’re a direct result of how the sander interacts with the surface, and nearly every woodworker runs into them at some point. The difference between an amateur result and a professional one usually comes down to recognizing pigtails early and knowing how to stop them.
Pigtail marks usually show up as faint, circular scratches that are hard to spot on raw wood but become obvious the moment you apply stain, oil, or varnish. That’s because finish sits differently in the scratched wood fibers than it does on the surrounding surface, highlighting every swirl like a spotlight.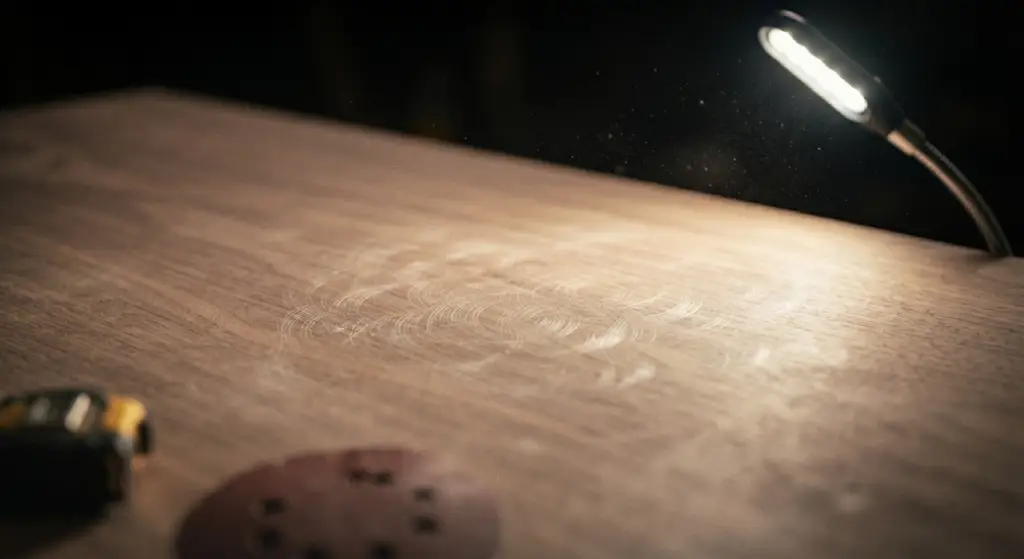
You’ll often notice pigtails most on softer woods like pine, and on surfaces finished with darker stains, since dark pigments pool in the tiny grooves left by the sander’s pad. Oak and other open-grain woods can hide minor swirls better, but deep scratches will still show up under a clear finish like varnish or hard wax.
Pigtails might seem like a cosmetic issue, but they can derail an entire project. A panel that felt smooth to the touch during final sanding can look rough and unfinished once stain or oil brings out every swirl mark. At that point, you’re often stuck sanding the whole surface again, which means more time, more dust, and more sandpaper.
For furniture makers and woodworking professionals, pigtail marks can mean the difference between a piece that sells and one that gets sent back. For DIYers, they’re the kind of mistake that turns a weekend project into a two-week headache. Either way, catching the problem early and understanding its root cause will save you from redoing work you thought was finished.
Pigtails don’t appear randomly. They’re caused by a handful of specific mistakes, most of which are easy to fix once you know what to look for.
One of the most common causes of sanding swirls is jumping to a grit that’s too fine, too fast. If you skip from 80 grit straight to 220 grit without working through the grit progression, the coarser scratches left behind won’t fully disappear, and the sander will struggle to level the surface evenly. This uneven leveling often creates swirl marks because the abrasive is cutting inconsistently across the wood fibers.
Using worn-out sandpaper causes a similar issue. As sandpaper loses its sharp abrasive particles, it stops cutting cleanly and instead drags across the surface, creating those telltale circular scratches.
Pressing down hard on your sander feels like it should speed things up, but it almost always backfires. Extra pressure forces the sanding pad to dig into the wood instead of gliding across it, which is one of the fastest ways to create pigtail marks. The sander’s motor and weight are already designed to apply the right amount of pressure, so pushing down just overworks the abrasive and leaves deep scratches that are hard to remove later.
The fix here is simple: let the sander do the work. Guide it across the surface with a light touch and let the weight of the tool and the spin of the disc do the cutting.
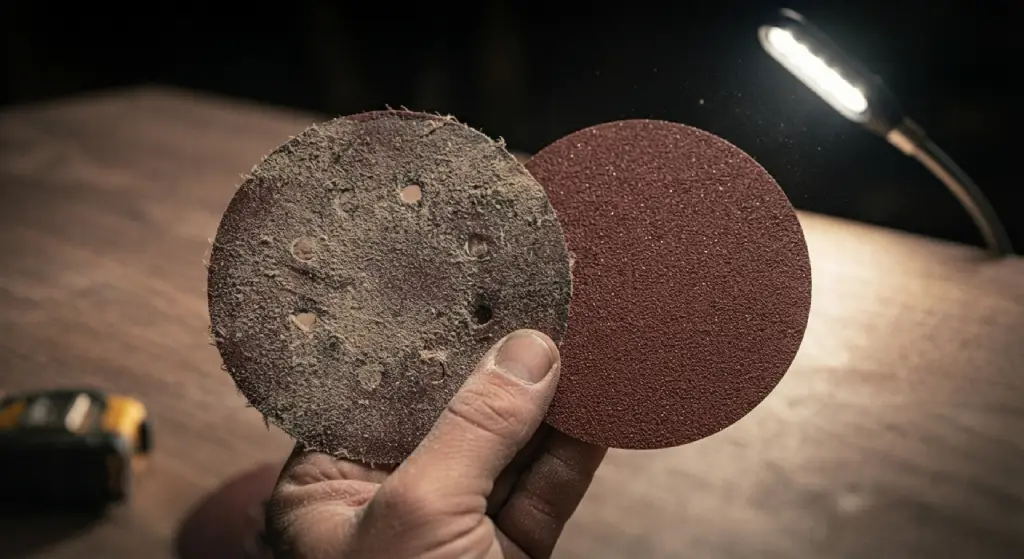
A sanding disc loaded with dust and wood particles can’t cut evenly, and that unevenness often shows up as swirl marks. Dust that builds up on the disc acts like an uneven layer between the abrasive and the wood, causing the sander to skip and catch instead of moving smoothly.
Worn discs are just as problematic. Once the abrasive particles dull down, the disc stops shaving the wood and starts scraping it, which creates inconsistent scratch patterns. Regularly checking your sanding discs for wear and dust buildup is a small habit that prevents a lot of rework.
Technique plays just as big a role in preventing pigtails as equipment does. Even with the right grit and a clean disc, poor handling can still leave swirl marks across your surface.
Always keep the sander’s pad flat against the surface you’re working on. When the pad sits flush, the abrasive contacts the wood evenly across its entire surface, which produces consistent, grain-matching scratches instead of random swirls. The moment the pad lifts even slightly on one edge, the sander starts cutting unevenly, and that’s when pigtails start to form.
This matters most near edges and corners, where it’s tempting to angle the sander to reach tight spots. Instead, try to keep the sander flat for as long as possible and use hand sanding for areas that are hard to reach.
Tilting the sander, even slightly, concentrates pressure on one small part of the pad rather than spreading it evenly across the disc. That concentrated pressure is a direct path to deep scratches and swirl marks, especially on softer woods. Keep your wrists relaxed and your grip light, and resist the urge to angle the tool as you move across the surface. A flat, steady pass will always outperform a tilted, aggressive one.
Once you understand the causes, preventing pigtails comes down to a few consistent habits. These are the core techniques every woodworker should build into their sanding routine.
Start with a grit that matches the condition of your wood. Rough, raw wood with visible mill marks or old finish usually needs 80 grit to start, while a surface that’s already fairly smooth can start around 120 grit. From there, move through the grit progression in steps, typically 80 grit, then 120 grit, then 150 grit, and finishing around 220 grit for a surface that feels like glass.
Skipping grits is one of the fastest ways to leave pigtails behind, because each grit is responsible for removing the scratch pattern left by the one before it. Jumping too far ahead leaves those earlier scratches in place, and the finer grit can’t cut deep enough to correct them.
A stationary sander, even for a second or two, will dig into one spot and leave a visible mark. Keep the sander moving in slow, overlapping passes across the surface, following the grain as closely as possible. Moving at a steady, even pace gives the abrasive time to cut consistently without concentrating wear on any single area.
This is especially important near panel edges, where it’s easy to pause while repositioning your hands. Make a habit of keeping the tool in motion from the moment it touches the wood until you lift it away.
Let the sander’s own weight do most of the work. Applying light, even pressure across the entire pass keeps the abrasive cutting consistently, rather than digging in at certain points and gliding over others. If you find yourself gripping the sander tightly or leaning into it, that’s usually a sign you’re applying too much force.
Some woodworkers find it helpful to imagine they’re polishing the surface rather than grinding it down. That mental shift alone often results in lighter, more even pressure and a noticeably smoother finish.
Prevention is always easier than correction, and a few simple habits will keep sanding swirls from showing up in the first place. Always inspect your sandpaper and sanding discs before starting a project, and swap out anything that looks worn, loaded with dust, or glazed over. Use dust control during sanding, whether that’s a shop vacuum connected to your sander or a dust extractor with strong suction, since built-up dust is one of the sneakiest causes of swirl marks.
Work in good lighting, ideally raking light from an angle, so you can spot scratches and uneven spots before you move to the next grit. Many professionals keep a pencil nearby and lightly scribble across the surface before sanding each grit; once the pencil marks disappear evenly, they know that grit has done its job. This small trick helps you catch pigtails and other imperfections early, long before they show up under a coat of stain or finish.
Finally, always sand with the grain during your final sanding pass, even if you used an orbital sander in circular motions for earlier grits. A quick hand sanding pass along the grain at 220 grit removes any remaining swirl marks and leaves the wood fibers aligned for a smoother, more even finish.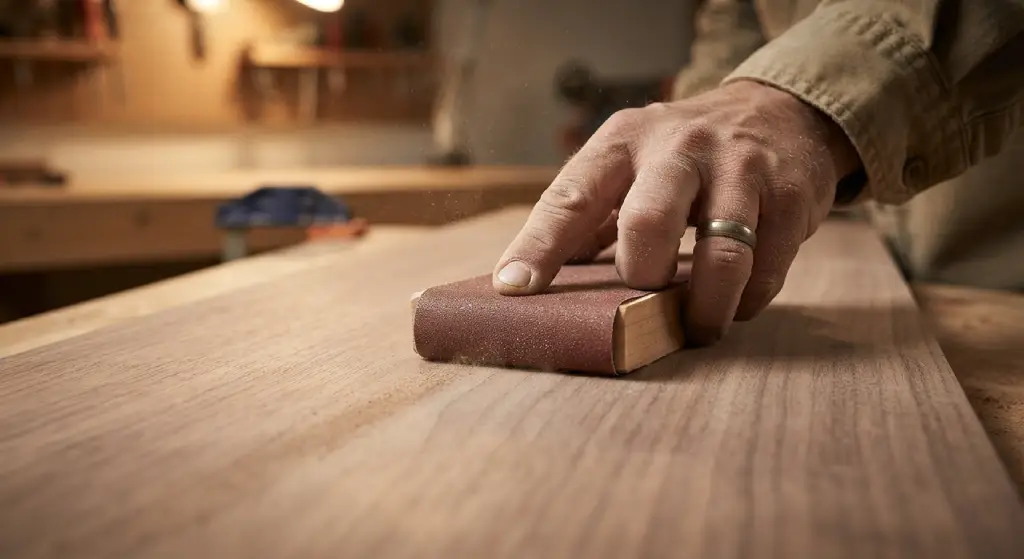
Knowing when to switch out a sanding disc is just as important as using the right grit. A disc that’s visibly caked with dust, shiny in spots, or missing abrasive particles has lost its ability to cut cleanly and should be replaced right away. Continuing to use a worn disc won’t just slow down your work, it actively increases the risk of pigtails.
As a general rule, replace your disc more often on hardwoods like oak, since dense wood fibers wear down abrasive faster than softer species. If you’re working through multiple grits on a large panel or piece of furniture, it’s worth having a few backup discs of each grit on hand so you’re never tempted to push a worn one past its limit.
Brands like Mirka Abranet and other mesh-style abrasives are worth considering if you’re doing frequent woodworking projects, since their open mesh design improves dust extraction and tends to last longer before clogging.
If pigtails have already shown up, don’t panic. In most cases, they can be sanded out with the right approach. Start by inspecting the surface in raking light to identify exactly where the swirl marks are deepest. Then sand that area with a grit one step below the scratch depth, often 120 grit works well for minor swirls, while deeper scratches may need 80 grit to fully level.
Keep the sander flat, use light pressure, and work in overlapping passes until the marks are gone, then move back through the grit progression (120, 150, 180, up to 220 grit) to restore a smooth, even surface. Always finish with a hand sanding pass along the grain to catch any lingering scratches the orbital sander might have left behind.
For finished pieces where the pigtails only became visible after staining or applying a clear finish, you may need to strip the finish first using mineral spirits or a chemical stripper, depending on the coating. Once the wood is bare again, repeat the sanding process from a grit suited to the depth of the marks, then reapply your stain, oil, or varnish for a clean, swirl-free result.
Pigtails are frustrating, but they’re rarely a sign of bad technique or bad luck. More often, they come down to a worn sanding disc, a skipped grit, or a bit too much pressure on the sander. Once you build the habit of checking your abrasives, letting the sander do the work, and sanding with the grain during your final pass, swirl marks become far less common.
Take your time with each grit, inspect your work under good lighting, and don’t rush the grit progression. A little patience during sanding saves hours of rework later, and it’s the difference between a finish that looks professional and one that shows every scratch once the stain goes on.
What grit sandpaper is best for preventing pigtails?
Starting with the correct grit for your wood’s condition, usually 80 grit for rough surfaces and 120 grit for smoother ones, then working steadily up to 220 grit, helps prevent pigtails. Skipping grits is a common cause of swirl marks, so moving through each step in order matters more than any single grit choice.
Can pigtail marks be removed after staining?
Yes, but it usually requires stripping the existing finish first. Once the surface is bare again, you can sand out the swirl marks starting with an appropriate grit and working back up through finer grits before reapplying stain or finish.
Do all orbital sanders cause pigtails?
No. Pigtails are caused by technique and equipment condition, not the sander itself. Keeping the pad flat, using light pressure, and maintaining clean, sharp sanding discs will prevent swirl marks regardless of the sander brand.
Why do pigtails show up more with dark stains?
Dark stains pool in tiny scratches and grooves left by swirl marks, making them far more visible than they would be on raw wood. Lighter stains or clear finishes can sometimes hide minor pigtails, but deep scratches will show through any finish.
How often should I replace my sanding disc?
Replace a sanding disc as soon as it looks worn, feels smooth instead of gritty, or shows a buildup of dust that won’t brush off. Hardwoods wear down discs faster than softwoods, so frequent replacement is often needed during larger furniture projects.
Is hand sanding necessary if I use an orbital sander?
A final hand sanding pass along the grain is one of the best ways to catch any leftover swirl marks from an orbital sander. It only takes a few minutes and often makes the difference between a good finish and a great one.
What causes swirl marks even after using the correct grit?
Even with the right grit, swirl marks can appear if too much pressure is applied, the sander pad isn’t kept flat, or the disc is dirty or worn. Technique and equipment condition matter just as much as grit selection.