Physical Address
304 North Cardinal St.
Dorchester Center, MA 02124
Physical Address
304 North Cardinal St.
Dorchester Center, MA 02124

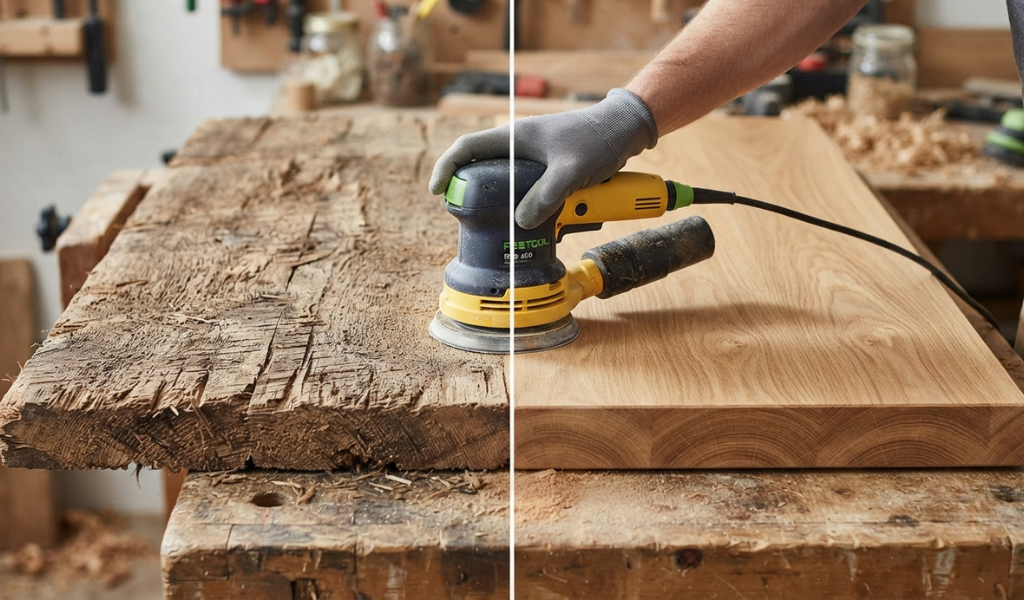
Rough sawn timber has a raw, honest quality that makes it popular for furniture, shelving, decking, and all kinds of DIY woodworking projects. But that rustic surface full of saw marks, splinters, and uneven patches rarely works well as a finished product straight off the mill. Sanding rough sawn timber is the process that bridges the gap between raw lumber and a surface ready for staining, painting, or sealing.
This guide walks you through everything you need to know: the right tools, the correct grit sequence, step-by-step sanding techniques, and the most common mistakes to avoid you can also follow our complete guide to sanding for better performance. Whether you’re smoothing rough pine boards for a cabinet, preparing cedar planks for an outdoor project, or finishing a tabletop from raw timber, this is the resource to bookmark.
Rough sawn timber is lumber that has been cut at the sawmill but not yet planed or smoothed. The surface is typically coarse, with visible blade marks, slight ridges, and an uneven texture across the wood’s surface. This is raw wood in its most natural state affordable, widely available, and full of character.
You’ll find rough sawn timber used in structural applications, rustic furniture builds, barn-style shelving, and decorative wall paneling. Species like pine and cedar are among the most common, though hardwoods like oak and ash also come in rough sawn form. The natural beauty of the wood grain is visible beneath the surface, but it takes some preparation to reveal it properly.
The rough surface of unsanded timber creates several practical problems. Finishes like stain, lacquer, or polyurethane don’t adhere evenly to uneven wood. High spots catch more finish while low spots absorb too much, leading to a blotchy result. Splinters are another issue especially on surfaces that will be handled regularly, like a tabletop or cabinet door.
Sanding brings the surface level, opens up the wood grain evenly, and gives any finish a consistent base to bond with. It also removes surface contamination sawdust, mill grease, or oxidation that can interfere with adhesion. Preparation is key, and sanding is the foundation of that preparation.
Rough sawn wood presents a few specific challenges that smoother lumber does not. Deep saw marks can be labor intensive to remove if you start with too fine a grit. Uneven surfaces, where one section is noticeably rougher than another, require careful attention to avoid over-sanding flat areas while working down high spots. Softwoods like pine are prone to over-sanding, while dense hardwoods can blunt abrasive material quickly. Knowing these challenges before you start saves time and sandpaper.
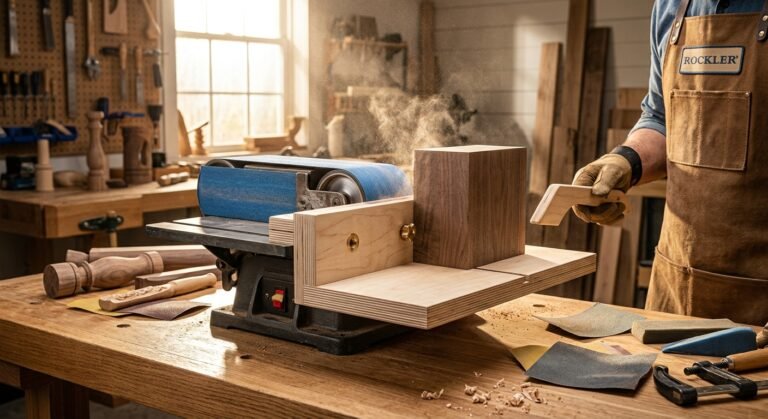
The right sander depends on the size and nature of your project. For large, flat surfaces like a tabletop or panel, a belt sander is the most effective tool for removing material quickly. A belt sander uses a continuous loop of abrasive material and removes rough saw marks efficiently, making it ideal for the first stages of smoothing rough sawn timber.
A random orbital sander is the go-to choice for the middle and final stages. The random orbital motion reduces swirl marks and leaves a cleaner surface than a standard orbital sander. It works well with sanding discs from medium through fine grits, and it’s the sander most DIY woodworkers reach for regularly.
For tight areas, edges, or detailed work, hand sanding with a sanding block gives you the most control. It’s slower but more precise. In some cases, a hand plane or cabinet scraper is useful for leveling high spots before sanding begins especially on particularly rougher boards.
Grit selection is one of the most important decisions in the sanding process. Starting with too fine a grit on rough sawn timber means you’ll spend hours trying to remove deep scratches and saw marks. Starting too coarse on a nearly smooth surface risks removing too much material.
For most rough sawn timber, the recommended grit sequence looks like this:
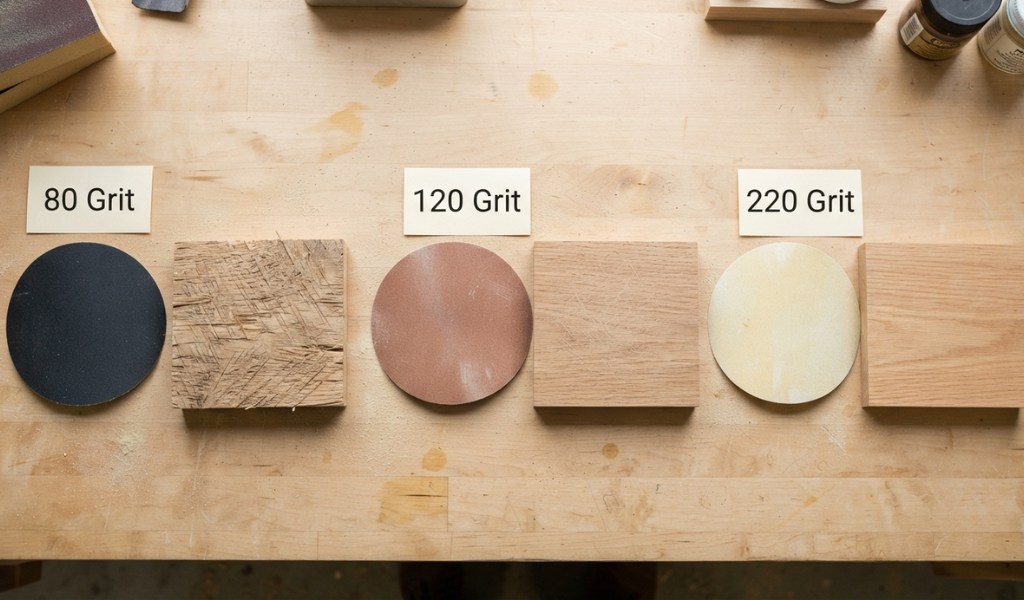
Not every project needs every grit. A rougher board might start at 40 to 60 grit, while a less damaged piece might begin at 80 grit and move to 120 and then 220.
Sanding produces a large volume of fine dust, particularly from softwoods like pine and cedar. At a minimum, wear a dust mask rated for fine particles P2 or N95 standard. Safety glasses protect your eyes from flying debris, especially when using a belt sander. If you’re working in an enclosed space, consider a dust extraction system connected to your sander. Many modern orbital sanders have built-in dust ports designed for this purpose. Hearing protection is also worth using when running power tools for extended periods.
Before you pick up a sander, look over the timber carefully. Check for embedded nails, screws, or metal fragments these will tear through sandpaper immediately and can damage power tools. Run a metal detector over reclaimed timber if you’re unsure.
Look for large knots, deep splits, or cracks. Fill significant imperfections with a suitable wood filler and allow it to cure fully before sanding. This is also the stage to decide whether a hand plane or scraper is needed to knock down any extreme high spots before the sander touches the surface.
Start with 80 grit sandpaper for most rough sawn boards, or drop to 40 to 60 grit for timber with very deep scratches left by the saw blade. If you’re using a belt sander, work along the wood grain in long, steady strokes. Keep the sander moving at all times pausing in one spot creates dips and gouges that are difficult to fix later.
Apply even pressure across the full width of the board. For wide panels, work in overlapping passes to cover the surface consistently. The goal at this stage is to remove those saw marks and bring the surface to a rough-but-even level. Don’t rush to move on until the coarse marks are gone.
Once the initial saw marks are gone, switch to 120 grit. This medium-grit sandpaper smooths out the scratches left by the coarser abrasive. At this point, a random orbital sander is often the best choice because it creates fewer linear scratches and leaves a more consistent texture.
Work through each grit in sequence 120, then 150 or 180, and finally 220 for the smoothest finish. Each step removes the scratches from the previous grit, refining the surface progressively. Skipping grits is a common mistake that leads to a finish that looks rough once the stain or paint is applied.
Between each grit stage, stop and clean the surface. Use a vacuum with a brush attachment to remove loose dust, then wipe the timber with a clean, dry cloth or a tack cloth. This step matters more than most beginners realize. Sanding dust left on the surface acts as a fine abrasive under the next sheet of sandpaper, creating micro-scratches that show up under a finish.
Dust extraction during sanding, using a sander with a connected vacuum or dust bag, keeps the surface cleaner throughout the process and reduces how much cleanup is needed between stages.
Always sand in the direction of the wood grain, not across it. Cross-grain sanding leaves scratches that run perpendicular to the grain lines. These scratches are nearly invisible in raw wood but become obvious once stain or finish is applied. When using a random orbital sander, the circular motion naturally minimizes cross-grain marks, but hand sanding strokes should always follow the grain direction precisely.
Uneven pressure is one of the main causes of an inconsistent surface after sanding. Press too hard in one area and you create a dip; too light and the surface stays rougher than the surrounding wood. Let the weight of the sander do most of the work, especially with a belt sander. Guide it rather than force it.
On a tabletop or large panel, work in sections, overlapping each pass by about a third of the sander’s width. This technique prevents uneven patches and gives the whole surface a uniform finish.
Swirl marks are the most common finish problem when using a random orbital sander. They usually appear when the sander is moved too quickly or when the sandpaper is worn out and dragging rather than cutting cleanly. Change sanding discs regularly once they stop cutting efficiently, they create more problems than they solve.
Gouges typically come from pausing the sander in one spot or from pressing down too hard at the edge of the timber. Keep the sander flat on the surface and avoid tilting it, particularly at board edges. For hand sanding around edges and corners, use light, controlled strokes rather than heavy pressure.
It’s tempting to jump from 80 grit straight to 220 grit to save time, but this shortcut produces poor results. Each grit in the sequence removes the scratches left by the previous, coarser grit. Skip a step, and those deeper scratches remain in the wood invisible in raw form but highly visible under a stain or clear finish.
Move through the full grit range, from coarse to fine. The extra time spent in the middle grits produces a dramatically better final result.
Softwoods like pine and cedar are easy to over-sand, particularly with aggressive power tools. Too much material removed in one area creates a surface that’s visibly lower than the surrounding wood something that’s very difficult to fix after the fact. With softwoods, use lighter pressure and keep the sander moving at all times.
Hardwoods are more forgiving of pressure but can blunt abrasive material quickly. Check your sandpaper regularly and replace it when it stops cutting efficiently. Worn abrasive causes heat buildup and can scorch the wood’s surface, particularly on dense timbers.
Applying a finish over a dusty surface is one of the most common DIY finishing mistakes. Dust particles trapped under stain, lacquer, or polyurethane create a gritty texture that’s frustrating to fix once the finish has cured. Before applying any finish, vacuum the surface thoroughly, wipe it with a tack cloth, and allow the timber to sit for a few minutes in a dust-free environment.
If you’re working in a garage or workshop, wait for any airborne dust to settle before opening your finish can.
The right final grit depends on the finish you’re applying. For stain, finish at 150 to 180 grit going finer can close the wood’s grain and reduce how well the stain absorbs. For paint or a water-based primer, 180 to 220 grit gives the paint enough surface texture to adhere properly. For clear finishes like lacquer or polyurethane, 220 grit produces the smoothest result.
A common technique before applying the first coat of a water-based finish is to lightly wet the timber with water, allow it to dry, and then do a final light hand sanding at 220 grit. This process raises the wood grain deliberately so the first coat of finish doesn’t do it for you, leaving a rough surface after drying.
Run your hand across the entire surface once sanding is complete. You’re feeling for rough patches, ridges, or areas that still have texture. In good raking light a lamp held at a low angle across the surface imperfections show up clearly as shadows.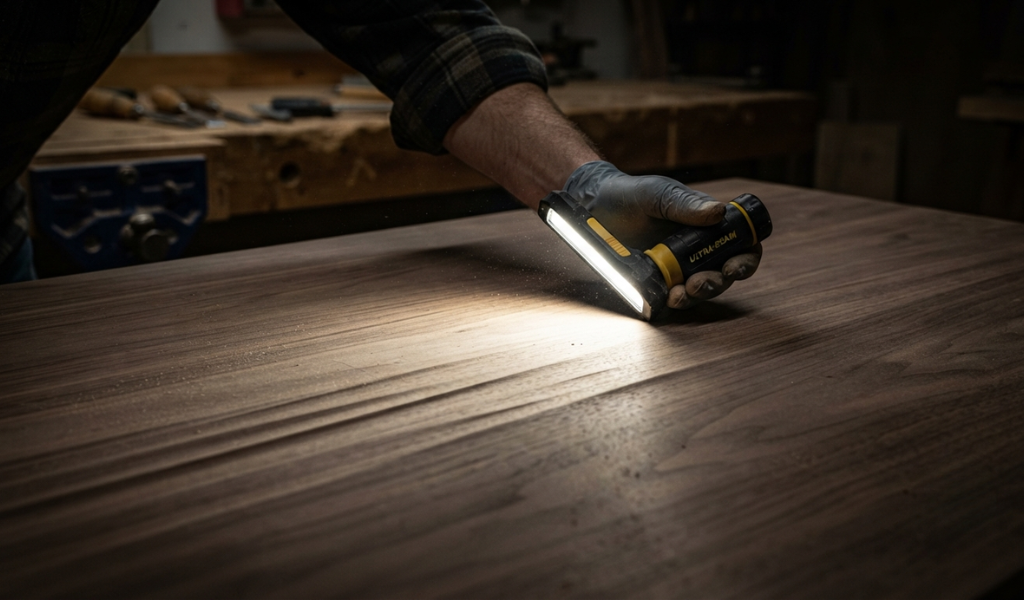
Address any remaining rough spots with a final light hand sanding pass before moving on. Then clean the surface thoroughly: vacuum first, then wipe with a tack cloth in the direction of the grain.
The finish you choose affects both the appearance and durability of the timber. Polyurethane is a popular choice for high-traffic surfaces like tabletops and floors it’s durable, water-resistant, and available in matte, satin, and gloss sheens. Lacquer dries fast and gives a hard, clear finish, but it requires good ventilation and is less forgiving to apply.
For outdoor projects using cedar or pine, a penetrating oil or exterior wood sealer protects against moisture without forming a brittle surface film. If you’re staining, apply a wood conditioner first on softwoods to prevent blotchy absorption. For a painted finish, a primer and paint system gives the best adhesion and coverage.
Getting a smooth, professional finish from rough sawn timber comes down to a few core principles: start with the right grit, work through each stage without skipping, keep the surface clean between passes, and always sand with the grain. The process takes patience, but the results are worth it.
Raw timber that looks unpromising straight from the mill can be transformed into a beautiful, finished surface with the right approach. Whether you’re working with pine, cedar, or hardwood, the sanding process is what unlocks the natural character of the wood beneath.
Take your time with preparation. Sand methodically. Clean thoroughly before finishing. The quality of the final finish is almost always a direct reflection of the quality of the sanding work underneath it.
Yes, but it’s labor intensive, particularly at the coarse grit stages. Hand sanding works well for final passes at 180 or 220 grit, for detail areas that power tools can’t reach, and for raising the grain before the first coat of finish. For the bulk of material removal on rough sawn timber, a belt sander or random orbital sander will save significant time and effort.
For most rough sawn timber, 80 grit is the standard starting point. If the timber has very deep saw marks or is exceptionally rough, start at 40 to 60 grit. Only move to a finer grit once the coarser grit has done its job and the surface is consistently level. Starting too fine on rough wood means spending far more time to achieve the same result.
The time varies depending on the timber’s condition, the tools you’re using, and the final finish required. A single rough sawn board sanded from 80 grit through to 220 grit might take 20 to 40 minutes with a random orbital sander. A large tabletop or a batch of cabinet panels could take several hours. Working through the full grit range without rushing is more important than finishing quickly.
A random orbital sander is excellent for the middle and final sanding stages, but it lacks the cutting power to tackle the roughest surfaces efficiently. For the first pass on heavily rough wood, a belt sander removes material much faster. Once the surface is relatively level and the coarse saw marks are gone, switch to a random orbital for cleaner, more controlled results through the finer grits.
Wetting the wood before final sanding sometimes called “raising the grain” is a useful technique, particularly before water-based finishes. When water hits raw timber, the wood fibers swell and stand up, creating a slightly rough texture. By raising the grain intentionally before finishing and then sanding lightly at 220 grit once dry, you prevent the first coat of finish from creating that rough texture after it’s applied.
You can apply stain to unsanded timber, but the results are unpredictable. Rough surfaces absorb stain unevenly, and saw marks become more visible under a colored finish rather than less. If you want a consistent, attractive result, sanding is necessary. For a very rustic look where texture is intentional, a diluted stain or an oil finish might work acceptably, but proper sanding still produces a far better outcome.