Physical Address
304 North Cardinal St.
Dorchester Center, MA 02124
Physical Address
304 North Cardinal St.
Dorchester Center, MA 02124

Every woodworker has been there. You’re midway through a project, the grain is opening up beautifully, and then you reach for the sandpaper only to find you’ve used the last sheet. Or maybe sandpaper simply isn’t the right tool for the job. Tight carvings, intricate curved profiles, and ultra-fine finish work often call for a different approach altogether.
The good news? Generations of craftsmen smoothed wood to perfection long before sandpaper existed and those methods still work brilliantly today. Whether you’re a beginner tackling your first piece of reclaimed furniture or an experienced maker finishing a fine hardwood tabletop, understanding these alternatives can make wood smoothing easier and produce results that are genuinely superior in the right context.
Before diving into the specific techniques, it’s worth familiarizing yourself with our ultimate guide to woodworking sanding techniques, which covers everything from grit selection to final finishing passes. That broader foundation will help you understand where these alternatives fit into a complete workflow and when to reach for them instead of traditional abrasives.
From card scrapers to pumice stone, steel wool to dried horsetail plants, this post covers seven proven alternatives, complete with practical guidance on how and when to use each one. You’ll also find a historical perspective on pre-sandpaper woodworking, common myths debunked, and a clear comparison between physical smoothing and chemical stripping approaches.
Sandpaper is a remarkable tool, but it’s not without limitations. When finishing wood projects without sandpaper, Understanding those limitations is what separates a competent woodworker from a great one.
Sandpaper works by abrading wood fibers with abrasive grit, a process that leaves microscopic scratch patterns on the surface. Even fine-grit paper leaves these marks, which can become visible under certain finishes, especially glossy topcoats. Power sanders compound the problem further, introducing swirl marks that are notoriously difficult to remove.
There’s also the dust. Sanding generates enormous quantities of fine particulate matter, which settles into crevices, contaminates finishes, and poses genuine health risks. Alternatives like card scrapers and steel wool produce far less airborne debris, making them a smarter choice when working indoors or on delicate pieces.
Flat sheets of sandpaper are poorly suited to three-dimensional surfaces. Carved details, routed edges, turned profiles, and tight inside corners all present challenges that sandpaper struggles to address without rounding over detail or leaving uneven scratches.
This is where purpose-built alternatives and some surprisingly humble household options come into their own. The right tool used with patience and proper technique can get a surface smoother in less time than sandpaper, with better control and fewer risks.
These practical methods allow you to smooth and finish wooden surfaces efficiently without relying on standard abrasive paper.
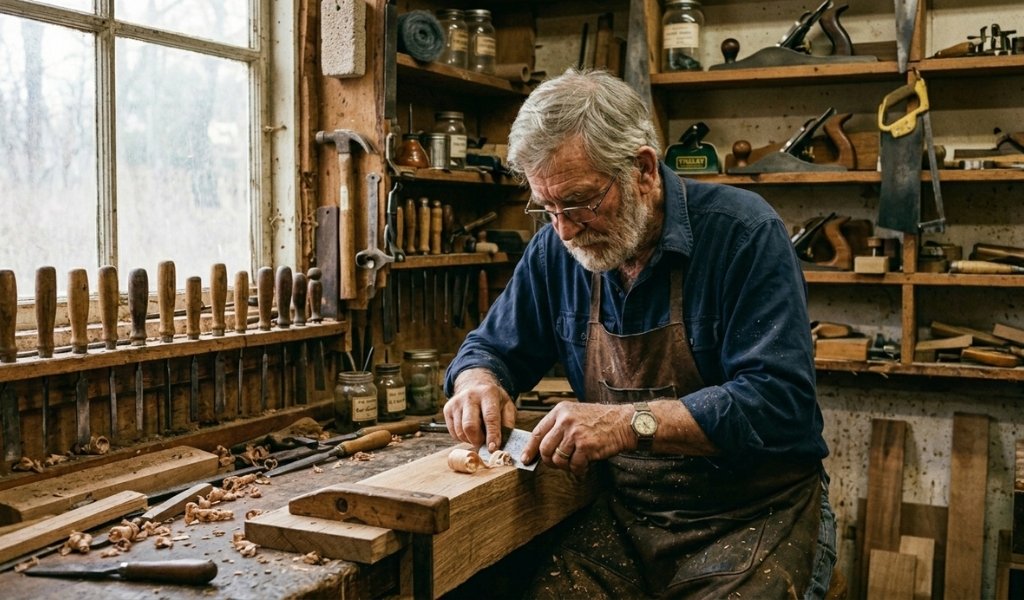
Ask any fine furniture maker which tool they reach for before final finishing, and the answer is almost always the card scraper. This simple, thin piece of hardened steel has a burnished edge that literally shaves wood fibers from the surface rather than scratching through them.
The result is remarkable. A well-tuned card scraper leaves surfaces that are glassy smooth genuinely superior to what most sandpaper achieves without scratch patterns, dust clouds, or torn grain. Used carefully on figured hardwoods like curly maple or quilted mahogany, a card scraper prevents the tearout that even sharp sandpaper can cause.
How to use it: Hold the scraper at roughly 75 degrees to the surface, flex it slightly with your thumbs to create a gentle bow, and push or pull it across the wood with steady, consistent pressure. Work with the grain where possible, using overlapping passes. The tool works through scraping action thin, translucent shavings are the goal, not dust.
Tuning the edge takes practice. A burnished hook, created with a screwdriver handle or dedicated burnisher, is what gives the scraper its shaving ability. Once you’ve mastered the setup, this tool will become indispensable.
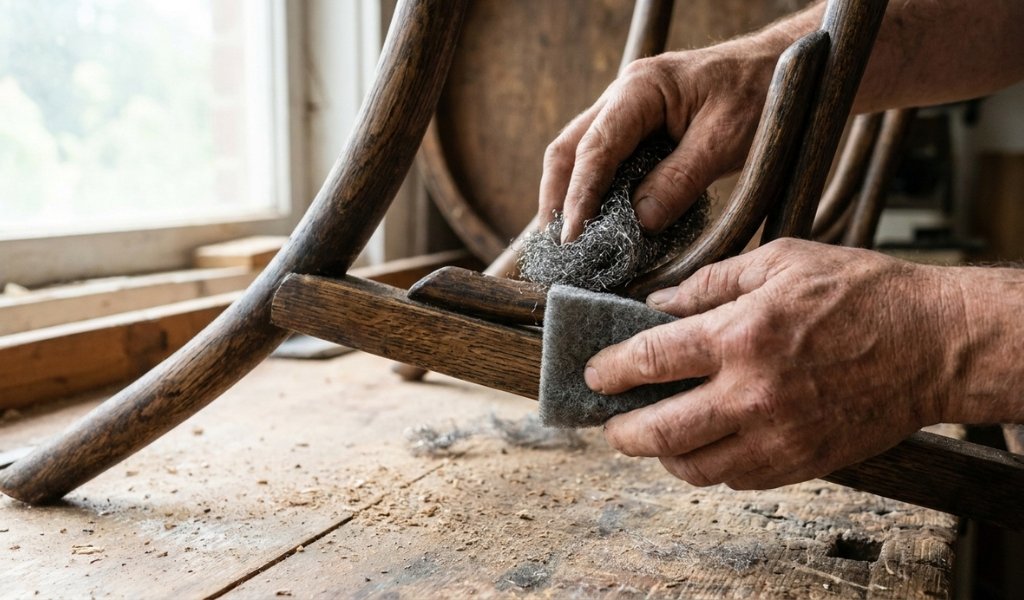
Steel wool is one of the most versatile abrasive materials available, and it’s genuinely excellent on curved profiles and contoured surfaces that sandpaper can’t conform to. The interlocking steel fibers flex around shapes, delivering even abrasion across complex geometry.
It comes in grades from coarse (#3) to ultra-fine (#0000). For finishing wood, #0000 grade is the standard choice used to buff between coats of varnish, lacquer, or wax to remove raised grain and achieve a smooth, even sheen.
Important note: Keep steel wool away from water-based finishes. The fine metal particles can rust and contaminate the surface, leaving unsightly stains. For water-based topcoats, synthetic abrasive pads (Scotch-Brite grey or white) are a better option, offering similar abrasive action without the contamination risk.
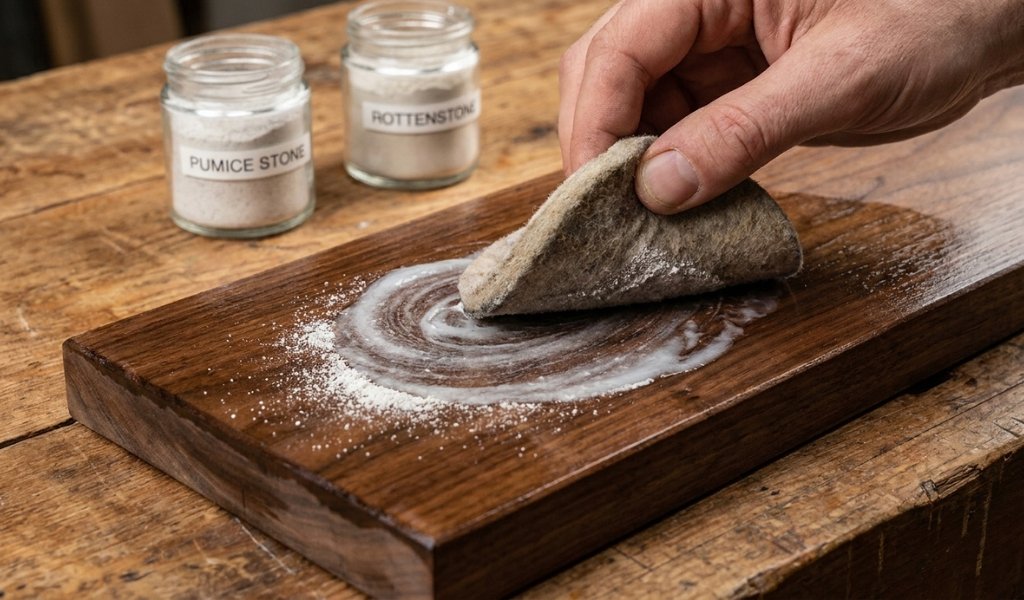
Long before modern finishing products appeared on the shelves, furniture restorers relied on pumice and rottenstone to achieve fine, polished results on hard woods. These powdered abrasive compounds were the finishing secret of 18th- and 19th-century craftsmen and they still hold their own today.
Pumice is a volcanic stone ground to various grades (F, FF, FFF, FFFF). Used with a lubricant like water, mineral oil, or linseed oil on a felt pad, it cuts cured finishes quickly and evenly. It’s the first stage in a two-step polishing process.
Rottenstone (also called tripoli) is a finer abrasive derived from decomposed limestone. After pumice smoothing, rottenstone brings the surface to a high-gloss polish. Together, these two compounds can take a dull, orange-peel finish to a mirror-like result with no power tools required.
Apply either compound to a damp cloth or felt pad, work in circular or linear strokes, then wipe clean and assess the result. This process demands patience, but the outcome on fine furniture is exceptional.
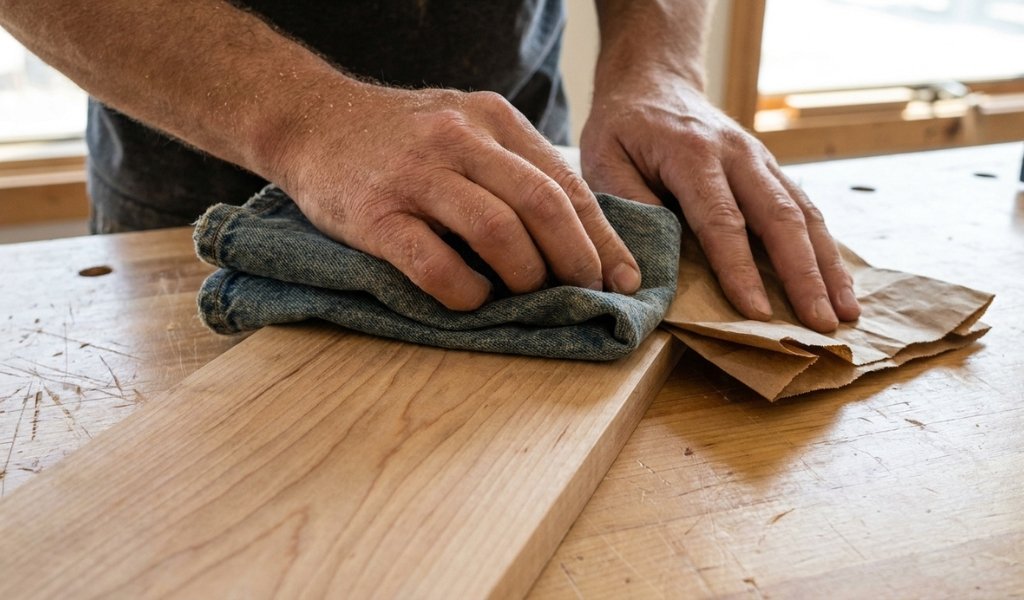
Sometimes the best sandpaper alternative is already in your kitchen or craft drawer. These are genuinely useful options for light smoothing, especially in an emergency or when working on delicate pieces.
None of these options replace purpose-built tools for serious woodworking, but as emergency substitutes or for a quick light touch-up work, they’re genuinely practical.
Sandpaper as we know it as abrasive grit bonded to a paper backing only became widely available in the early 19th century. Before that, craftsmen relied on a range of natural abrasive materials refined through centuries of trial and error.
Horsetail plants (Equisetum hyemale, also called scouring rush) were the sandpaper of the pre-industrial workshop. These plants naturally accumulate silica in their stems, creating an abrasive surface effective enough to smooth wood and even polish metal. Japanese craftsmen used dried horsetail bundles for centuries, particularly in lacquerwork finishing, and some traditional woodworkers still seek them out today.
Sand and sandstone were also used, sometimes simply rubbed directly onto wood surfaces, other times packed onto a piece of leather or a wooden block to create a more manageable abrasive tool.
Leather stropping, more commonly associated with sharpening edged tools, was also used to burnish and polish fine wood surfaces. A piece of leather loaded with a mild abrasive compound chalk, charcoal, or fine stone dust could close wood fibers and create a smooth, even patina.
These techniques weren’t just primitive workarounds. Many produced surfaces of extraordinary quality that modern abrasives struggle to replicate, particularly on highly figured or exotic hardwoods.
The single most common mistake beginners make when smoothing wood by hand whether using a scraper, steel wool, or any abrasive cloth is applying too much pressure. More pressure doesn’t mean better results. It means deeper scratches, compressed wood fibers, and surface irregularities that become visible under finish.
The grain direction matters equally. Working against or across the grain tears wood fibers rather than shearing them cleanly, leaving a rougher surface than when you started. Always work with the grain for primary passes, and use circular motion only for final buffing stages with very fine abrasives.
Before applying any smoothing method, clean the surface thoroughly. Dirt, grease, and old finish residues will load up abrasive tools quickly and can cause uneven results. A wipe-down with a clean cloth and mineral spirits is usually sufficient for bare wood; a degreasing cleaner works better on previously finished surfaces.
Always test your chosen approach on a hidden area: the underside of a board, the inside of a drawer, or a scrap of the same material. Assess the result carefully before committing to the full surface. Different wood species respond very differently to scraping, buffing, and abrasive compounds.
Physical smoothing solutions like scrapers, abrasive pads, pumice, and wool preserve the integrity of the wood surface. They remove material mechanically, leaving the underlying fiber structure intact. Chemical stripping works differently: it dissolves or lifts existing finishes, but can raise grain dramatically, leave residues that interfere with new topcoats, and sometimes darken or stain the wood when you try to refinish a piece.
For fine furniture restoration, intricate carved pieces, or any project where you want to retain as much original material as possible, physical approaches are almost always preferable. If you’re weighing up both approaches in detail, the comparison is explored thoroughly in our dedicated guide at sanding-vs-stripping-wood , which walks through the trade-offs for different wood types, finish conditions, and restoration goals.
Physical smoothing also gives you more control. You can stop the moment you achieve the result you need. Chemical stripping is harder to pause once a stripper is active, it continues working until neutralized.
There are situations where hand tools and traditional abrasives simply can’t replace the efficiency of power tools particularly when dealing with rough-sawn lumber, heavily damaged surfaces, or large flat panels that need significant material removal.
Knowing when to transition back is a sign of experience, not defeat. Random-orbit sanders, belt sanders, and drum sanders each have specific use cases, and understanding how to deploy them correctly makes every subsequent finishing step more effective. Our complete breakdown of wood sanding tools at covers each tool type in detail, including when to use them, how to choose the right model, and how to avoid common power sanding mistakes.
The most effective approach is often a hybrid one: power tools for heavy material removal, followed by hand scraping and fine abrasive work to achieve the final surface quality.
Sandpaper is a tool, not a requirement. The best finish wood can achieve often comes from understanding the alternatives knowing when a card scraper will outperform 220-grit paper, when pumice and rottenstone will deliver a polish no sanding block can match, and when a fold of denim or a brown paper bag is all you actually need.
The techniques in this post represent centuries of accumulated woodworking knowledge. Some are as old as furniture making itself. Used with patience and care, they produce results that are genuinely competitive with modern abrasives and in some cases, definitively better.
Start by adding a card scraper to your workflow. Tune the edge carefully, practice on scrap material, and pay attention to how the wood responds. From there, build outward: experiment with steel wool between finish coats, try pumice on a cured varnish surface, test a piece of leather on bare walnut. Each practice teaches you something different about how wood behaves and that knowledge makes you a better craftsman, regardless of what tools you’re reaching for.
Before sandpaper existed, woodworkers used natural abrasives including dried horsetail plants (scouring rush), sandstone, fine sand on leather, and burnished tools. Horsetail plants were particularly effective due to their high silica content, and were widely used in European and Japanese woodworking traditions for both wood smoothing and final polishing.
Brown paper bags, denim fabric, and emery boards (nail files) are the most practical household substitutes. Brown paper bags work well for light grain-raising and burnishing bare wood before oiling or waxing. Denim can smooth soft woods, and emery boards are effective for fine detail work in tight corners or small carvings.
Between coats of varnish or lacquer, #0000 steel wool or a fine synthetic abrasive pad (grey or white Scotch-Brite) is the most effective techniques. Both flatten raised grain and remove minor surface imperfections without slicing through the finish. For water-based topcoats, always use synthetic pads rather than steel wool to avoid rust staining.
For genuinely rough lumber, hand smoothing alone is rarely sufficient. A hand plane or card scraper can remove significant material, but they require a sharp, well-set edge and considerable skill. On very rough stock, power tools are more practical for initial flattening, with hand methods reserved for final surface preparation.
To use a card scraper efficiently, ensure the edge is properly burnished to form a clean hook this is what actually cuts the wood. Hold the scraper at 75 degrees, flex it slightly with your thumbs, and use consistent push or pull strokes with the grain. Overlapping passes and light pressure produce the best results. A well-tuned scraper on a flat surface can remove material and leave a finish-ready surface faster than hand-sanding through multiple grits.