Physical Address
304 North Cardinal St.
Dorchester Center, MA 02124
Physical Address
304 North Cardinal St.
Dorchester Center, MA 02124


If you have ever pulled a bowl off the lathe and run your hand across the surface only to feel a ring of scratches that just won’t go away, you already know that wood lathe sanding is not as simple as it looks. Turning the shape is often the fun part. Getting a smooth, glassy finish that shows off the grain is where a lot of beginners get stuck. The good news is that wood lathe sanding follows a logical process, and once you understand the order of grits, the tools involved, and a few basic techniques, you can get consistent results every time you sit down at the lathe.
This guide is meant to work as the complete guide to sanding wood on a lathe, whether you are working on a spindle project, a bowl, or anything in between. We will walk through grit selection, sanding tools, lathe speed, common mistakes, and everything a beginner woodturner needs to know to get a professional finish without wasting time or sandpaper.
Sanding on the lathe is different from sanding flat boards on a bench. When the piece is spinning, the sandpaper is removing wood in a circular motion, which means direction, pressure, and lathe speed all play a role in how the surface turns out. A turner who understands this has a real advantage over someone who just grabs a piece of sandpaper and starts rubbing.
The goal of sanding is to remove tool marks left by the gouge or skew, then progressively smooth the surface using finer and finer grits until the wood feels silky to the touch. Every pass with a grit removes the scratch pattern from the previous grit and replaces it with a finer one. Skip this progression and you end up chasing deep scratches all the way through the finish sanding stage, which wastes time and abrasive.
Good turners also know that sanding is not just about the final look. It affects how well a finish is applied later. Raised grain, burn marks, or leftover tool marks will show through stain or oil no matter how many coats you apply. That is why sanding deserves as much attention as the actual turning process.
Picking the right starting grit is one of the most common questions from anyone new to woodturning. The honest answer is that it depends on how clean your tool work is before you start sanding. A turner with a sharp bowl gouge and good technique might start at a higher grit than someone whose tool marks are deep and uneven.
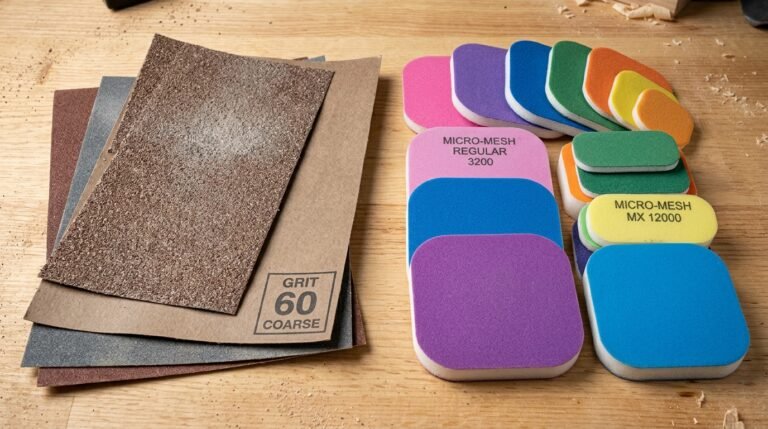
If your turning tool left visible ridges, tear-out, or torn end grain, start at 80 or 100 grit. This coarser sandpaper removes material fast and knocks down the high points left by the gouge. Spindle work with clean cuts might only need 120 grit as a starting point, while a bowl with a lot of end grain tear-out often needs the full strength of 80 grit to catch up.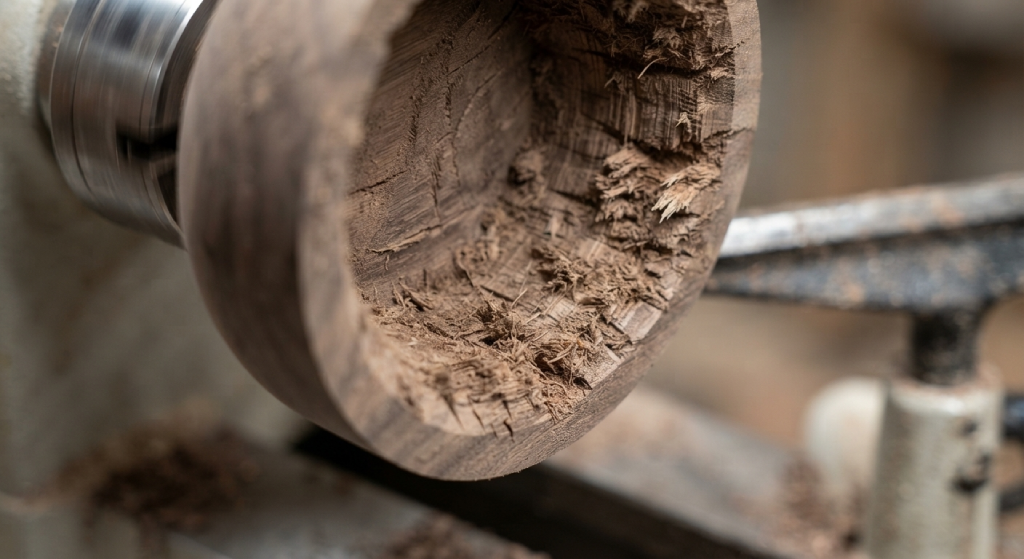
Do not be afraid of starting too coarse. A common mistake beginners make is starting too fine and spending twenty minutes trying to sand out marks that a lower grit would have removed in two minutes. The trick is knowing when to stop with the coarse grit and move on, which we will cover shortly.
Once the rough marks are gone, move into the 150 to 220 grit range. This stage is where the surface starts to feel noticeably smoother under your fingers. You are no longer removing shape or fixing tool marks, you are refining the surface and removing the scratches left by the previous grit.
Many woodturners treat 220 grit as a checkpoint. If you run your hand over the piece with the lathe stopped and it feels smooth with no visible scratch lines, you are ready to move into the finer grits. If you still see marks from the previous sandpaper, stay at this stage a little longer before moving on.
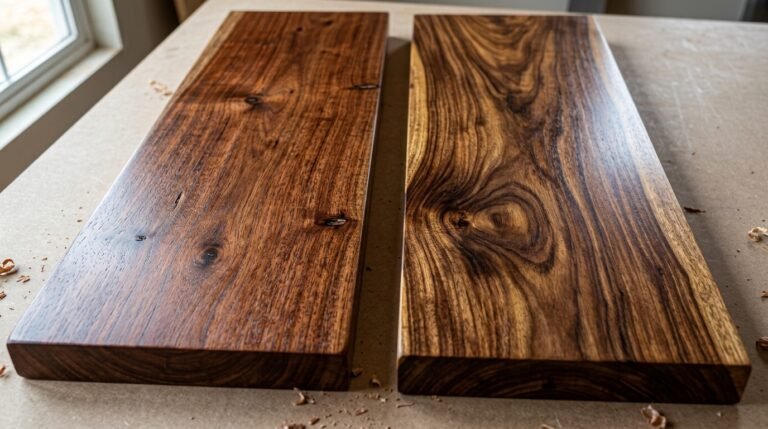
This is where the final finish really starts to shine. Fine grits between 240 and 400 or higher are used to burnish the wood surface and prepare it for oil, wax, or lacquer. On open grain woods, some turners stop around 320 grit, while dense or exotic species might benefit from going all the way to 600 grit for an extra smooth, almost polished feel.
At this stage the amount of wood being removed is minimal. You are essentially polishing the surface. Many experienced turners will tell you that going beyond 400 or 600 grit on most utility pieces provides diminishing returns, but for a fine bowl meant to be handled and admired, the extra time is worth it.
The rule that every woodturner learns early on is simple: never skip too far ahead, and never go backward unless you have to. Working through the grits in order, for example 80, 120, 150, 220, 320, is what gives you a clean, even surface without visible scratch patterns.
Each grit should completely remove the marks from the one before it. If you rush and jump from 100 straight to 320, the deeper scratches from the 100 grit paper will still be visible under the finish, especially once oil or stain highlights every imperfection in the wood. This is one of the most frustrating outcomes for a beginner because it means going all the way back to a coarser grit and starting the sequence over.
A helpful habit is to sand each grit until the surface looks uniformly dull, with no shiny spots and no visible lines from the last grit. Stopping the lathe periodically to check your progress in good lighting will save you a lot of guesswork. Some turners keep a small flashlight nearby and shine it at a low angle across the surface, since this makes even faint scratches easy to spot.
This is a question that comes up constantly among both new and experienced turners. The short answer is that skipping is possible, but only within reason. Jumping from 120 to 150 is a small enough step that most woodworkers will not notice a difference in sanding time. Jumping from 120 straight to 320, however, is asking for trouble.
A widely used guideline in woodturning is that each grit should not be more than roughly double the previous one. Going from 150 to 220 is fine. Going from 220 to 320 is also reasonable. But attempting a large leap risks leaving faint scratch marks that only become visible once a finish is applied, which is far too late to fix easily.
There is also a difference between skipping grits with hand sanding versus power sanding. A power sander with a sanding pad can sometimes handle a wider gap between grits because the mechanical action is more consistent than a hand holding sandpaper. Even so, most experienced turners still prefer to stick close to the standard progression rather than risk redoing work.
Not all wood behaves the same way under sandpaper, and the species you are working with should influence your approach. Softer woods like pine or basswood sand quickly and can clog abrasive discs faster, especially with resinous species. Cleaning or replacing sanding discs more often prevents the buildup from scratching the surface instead of smoothing it.
Harder and denser woods, such as maple or exotic hardwoods, take longer at each grit but tend to hold a finer finish once you get there. These woods often reward the extra time spent at 400 grit and beyond because the tight grain structure shows off a glassy shine that softer woods simply cannot achieve.
Open grain woods like oak or ash present their own challenge. Sanding alone will not fill the open pores, so many turners use a grain filler or apply multiple coats of finish, sanding lightly between coats, to achieve a smooth result. Knowing your wood species before you start sanding helps you set realistic expectations and choose the right sandpaper for the job.
If you are working with a piece intended for the kitchen, such as a bowl or utensil, always confirm you are using food safe wood and food safe finishes once sanding is complete, since not every species or product is appropriate for items that will contact food.
New woodturners often ask how long they should sand at each stage. There is no fixed number of minutes because it depends on the wood, the grit, and how clean your tool work was to begin with. Instead of timing yourself, learn to read the surface.
Stop the lathe and run your fingers lightly over the wood. If you can feel or see any ridges, tear-out, or lines from the previous grit, you are not ready to move on. Changing your lighting angle helps a lot here, since raking light across the surface reveals scratches that are invisible under direct overhead light.
Another trick many turners use is switching directions between grits. If you sanded with the lathe spinning for one grit, try a few passes by hand sanding with the grain while the lathe is stopped for the next grit. This cross pattern makes it easier to spot leftover scratches, since marks running in a different direction stand out clearly against the new sanding pattern.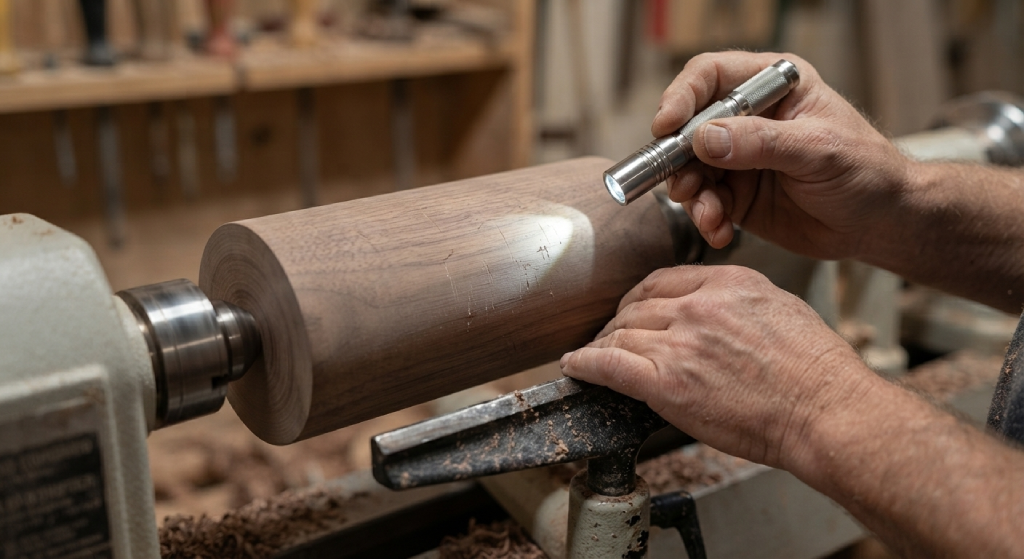
Patience at this stage pays off. Rushing through a grit because you are eager to see the final finish is exactly how scratches get sanded over instead of sanded away, only to reappear once oil or wax is applied.
Even experienced woodworkers fall into a few predictable traps when it comes to sanding. Recognizing these mistakes early can save hours of rework.
Starting too fine. Beginners often want to skip the coarse grits because they feel like they are damaging the piece. In reality, skipping ahead just means the coarse tool marks stay embedded under a smooth looking surface, only to show up once a finish is applied.
Skipping too many grits at once. As mentioned earlier, big jumps in grit leave visible scratch patterns. It feels faster in the moment but usually costs more time later when you have to backtrack.
Excessive sanding at one grit. More sanding is not always better. Once the previous grit’s marks are gone, continuing to sand at that same grit does not improve the surface, it just wears down your sandpaper and wastes time. Move on once the surface looks even.
Ignoring lathe speed. Sanding at a lathe speed that is too high generates excess heat, which can cause burn marks, especially on lighter colored woods. Slowing the lathe down during sanding, particularly on the finer grits, reduces friction and gives you more control.
Not clearing dust between grits. Leftover dust or grit particles on the surface can get trapped under the next sandpaper and create random deep scratches. A quick wipe with a cloth or a blast of compressed air between grit changes keeps the surface clean and prevents cross contamination between grits.
Sanding against the grain unnecessarily. While the spinning motion of the lathe makes true cross grain sanding somewhat unavoidable, especially on end grain areas of a bowl, finishing passes should always favor sanding with the grain where possible for the smoothest results.
Forgetting safety gear. Wood dust, especially fine dust from higher grits, is not something to breathe in regularly. A respirator and eye protection should be standard equipment any time you are sanding on the lathe, and loose sleeves or jewelry should be avoided near a spinning piece.
While hand sanding with a folded piece of sandpaper still works, most woodturners eventually invest in dedicated sanding tools to save time and get more consistent results. A power sander designed for lathe work, often called a bowl sander, typically uses a small disc mounted on a mandrel that chucks into a power drill. This setup allows the sanding disc to spin independently of the lathe, which helps avoid the ring pattern that can form from sanding only in the direction the lathe is turning.
Hook and loop sanding systems, sometimes described using the brand name velcro, have largely replaced adhesive backed discs because they allow quick changes between grits without wasting sandpaper. A sanding mandrel holds interchangeable discs, usually in 2 inch or 3 inch sizes, and attaches to a power drill or a dedicated sander for hands free operation.
Brands like Mirka are popular among woodturners for their sanding discs, which come in a wide range of grits and hold up well to repeated use. A quality sanding pad on the end of your mandrel also matters, since a worn or hard pad can create pressure points that leave uneven marks across the surface, especially on curved areas like the inside of a bowl.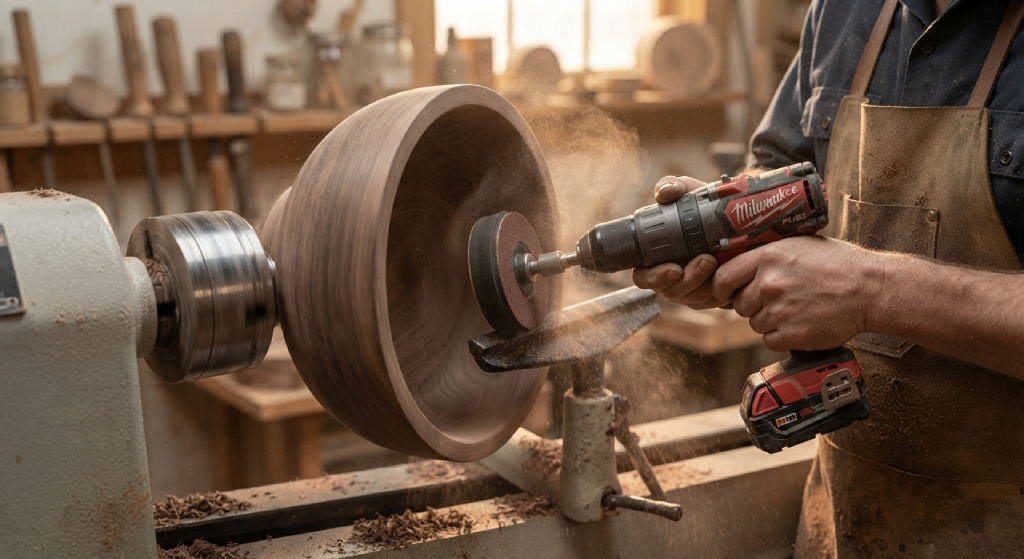
For spindle work, an orbital sander is sometimes used off the lathe for flat sections, though most spindle sanding still happens with the lathe spinning at a slower speed and the sandpaper held by hand. A steady rest can also help stabilize longer spindle pieces during sanding, especially for thin or delicate sections that might flex under pressure.
Whatever tools you choose, keep a variety of grits on hand and keep the sandpaper organized so you are not hunting for the right disc mid-project. Many turners keep their discs sorted in labeled containers by grit, which speeds up the entire sanding process significantly.
A few small habits separate a good finish from a great one. Many experienced turners recommend stopping the lathe periodically during hand sanding on flat areas, since sanding with the lathe stopped and moving the sandpaper along the grain removes any remaining circular scratch pattern left by power sanding.
Keeping your fingers protected is also worth mentioning. Friction from sanding, especially at higher lathe speeds, can genuinely burn your fingers if you are not careful, so many turners wear a thin glove on one hand or take short breaks to let the wood cool between grits.
Finally, do not rush the transition from sanding to finish. Once you reach your final grit, lightly wipe the piece down and inspect it one more time under bright light before applying any oil, wax, or lacquer. This last check catches any missed spots and ensures the finish is applied over a truly ready surface.
Wood lathe sanding is a skill that improves with practice, patience, and a willingness to slow down between grits. Starting with the right coarse grit for your tool marks, progressing steadily through the sequence, and using proper sanding tools like a bowl sander or sanding mandrel will save you time and produce a far better final finish. Pay attention to lathe speed, wood species, and the condition of your sandpaper, and you will notice a real difference in the quality of your turned pieces. The next time you sit down at the lathe, treat sanding as an extension of your turning process rather than an afterthought, and your results will show it.
If you are just starting out, keep a basic set of grits on hand, from 80 up through 400, and build your technique one project at a time. Every turner develops their own rhythm eventually, but the fundamentals covered in this guide will get you there faster and with far less frustration.
What grit should I start sanding a bowl with on the lathe?
Most bowls with visible tool marks or tear-out benefit from starting around 80 to 100 grit. If your gouge work left a clean surface, you might be able to start as high as 120 grit and save some time.
How do I stop sanding scratches from showing up under the finish?
Work through your grits in order without skipping too far ahead, and check the surface under angled light between each grit change. Scratches that are invisible in normal light often show up clearly once a finish is applied, so thorough checking during the sanding process is essential.
Is power sanding better than hand sanding on a lathe?
Power sanding with a bowl sander or sanding mandrel is generally faster and produces a more even surface, especially on curved bowl interiors. Hand sanding still has its place for spindle work and for final passes with the grain to remove any remaining circular marks from power sanding.
What lathe speed is best for sanding?
A slower lathe speed than what you use for turning is generally recommended for sanding. High speeds generate more friction and heat, which can cause burn marks and make it harder to control the sandpaper, especially with finer grits.
How many grits should I use when sanding a turned piece?
Most projects work through five to seven grits, typically something like 80, 120, 150, 220, 320, and sometimes up to 400 or 600 for a fine finish. The exact number depends on the wood species and how smooth you want the final surface to be.
Can I use the same sandpaper for wet and dry sanding?
No, standard sandpaper used for dry sanding is not designed for wet use. If you plan to wet sand, look for sandpaper specifically labeled for wet or dry use, which holds up better with water or oil as a lubricant during the final finishing stages.
Why does my sanded piece still feel rough after finishing?
This is often caused by raised grain, which happens when moisture from a water based finish lifts the wood fibers. Lightly sanding with a fine grit between coats of finish usually solves this issue and results in a smoother final surface.