Physical Address
304 North Cardinal St.
Dorchester Center, MA 02124
Physical Address
304 North Cardinal St.
Dorchester Center, MA 02124

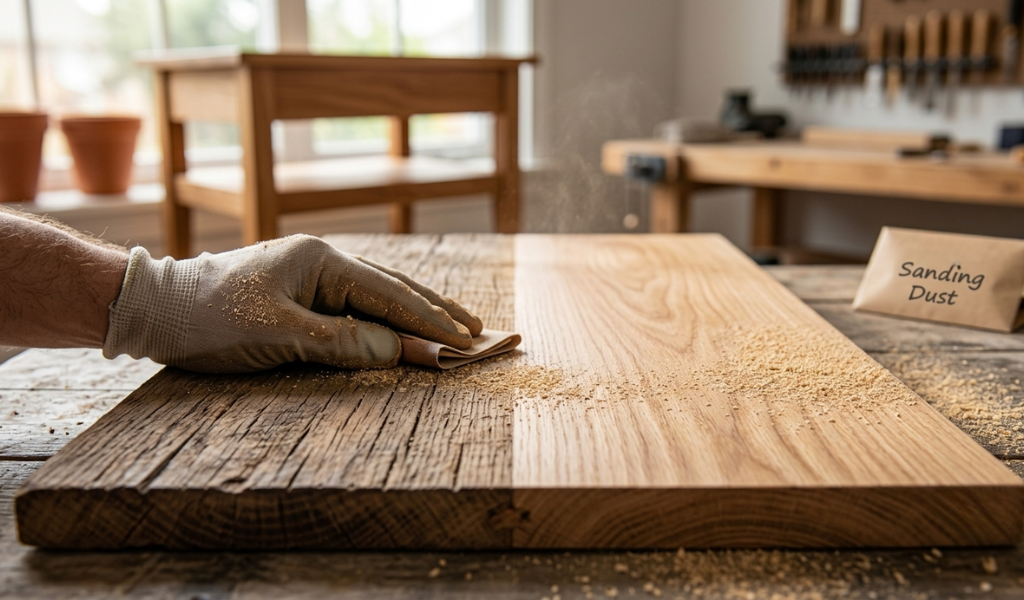
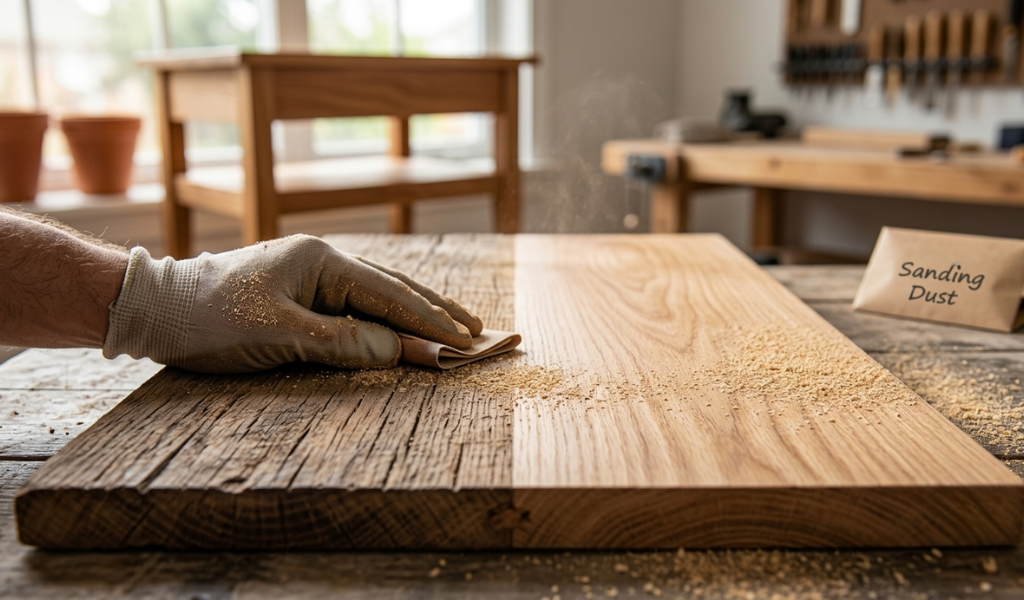
If you’ve ever run your hand across a beautifully finished piece of wood and wondered how it got so smooth, the answer almost always comes down to sanding. Good wood sanding techniques are the difference between a project that looks homemade and one that looks professionally crafted. Whether you’re refinishing an old dresser, building furniture from scratch, or just touching up a worn surface, knowing how to sand wood properly will transform your results.
This guide covers everything from the types of sandpaper and grit levels to the best sanding tools and techniques for every situation. Think of it as our ultimate guide to woodworking sanding techniques, written for anyone who wants cleaner finishes, better stain absorption, and fewer headaches on the job.
By the end, you’ll know exactly how to approach any sanding project with confidence.
Sanding is not just a step you rush through before applying a finish. It’s the foundation of every great wood project. When you sand wood correctly, you remove mill marks, smooth rough fibers, open the grain for better stain absorption, and create a surface that holds paint or varnish evenly.
Skip this step or do it carelessly and every coat of finish you apply will highlight the flaws underneath. Scratches become more visible. Stain absorbs unevenly. Paint peels faster. In woodworking, surface preparation is everything, and sanding is at the heart of it.
Beyond aesthetics, sanding also improves safety. Rough edges and splinters are hazards, especially on furniture that gets handled daily. A properly sanded wood surface feels smooth to the touch and looks professional from every angle.
Not all sandpaper is the same. The abrasive material used to coat the paper affects how it cuts, how long it lasts, and what surfaces it works best on. Here are the three most common types every woodworker should know.
Aluminum oxide sandpaper is the most widely used abrasive in woodworking. It’s durable, cuts efficiently, and works well on both softwoods and hardwoods. One of its best qualities is that it fractures as it wears, constantly exposing fresh cutting edges. This makes it last longer than many alternatives. You’ll find aluminum oxide sandpaper used in most power sanding applications, including random orbital sanders and belt sanders.
Silicon carbide is harder and sharper than aluminum oxide, which makes it ideal for very fine sanding and wet sanding applications. It cuts fast and leaves a finer scratch pattern. Woodworkers commonly use silicon carbide sandpaper when sanding between coats of finish, smoothing surfaces before painting, or working on harder materials like metal or plastic. It tends to wear out more quickly on rough wood surfaces but excels at finishing sanding.
Garnet sandpaper is a natural abrasive that cuts more slowly than aluminum oxide but leaves a finer scratch pattern. It’s a popular choice among traditional woodworkers and cabinet makers for hand sanding. Because garnet doesn’t last as long as synthetic abrasives, it’s usually reserved for fine finish work rather than heavy material removal. If you want a smooth surface before applying a stain or varnish, garnet sandpaper is worth considering.
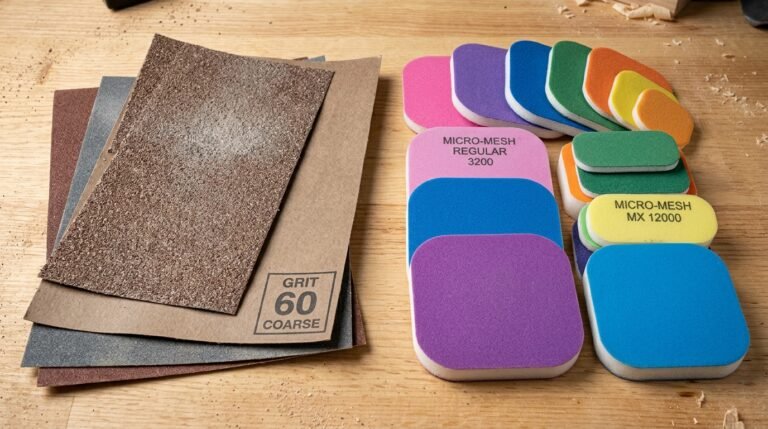
Sandpaper grit refers to the size of the abrasive particles on the surface. Lower grit numbers mean coarser, larger particles that remove material quickly. Higher grit numbers mean finer particles that smooth the surface without removing much material. Choosing the right grit sandpaper for each stage of your project is one of the most important sanding techniques you can master.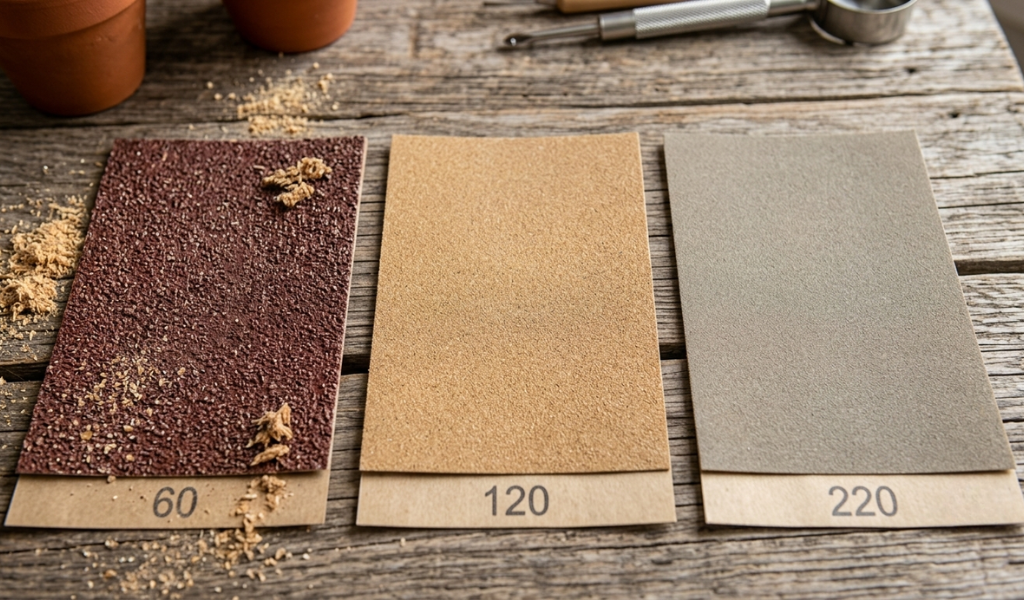
Coarse grit sandpaper is used for heavy material removal. Think stripping old paint, leveling uneven surfaces, or shaping raw wood. A 40 grit or 60 grit sandpaper cuts aggressively and leaves deep scratches that need to be worked out with finer grits later. Use coarse grit sparingly and only when you genuinely need to remove a lot of material.
This is the workhorse range for most woodworking projects. An 80 grit sandpaper is great for removing the scratches left by coarse grits, while 120 grit sandpaper and 150 grit move you closer to a smooth surface. Most sanding projects start here unless the wood is particularly rough or uneven.
Fine grit sandpaper is used for finishing sanding. Once your wood surface is smooth from medium grits, you move into this range to refine it further. Sanding with 220 grit sandpaper is a common final step before applying stain or a first coat of finish. This grit level removes the finer scratches left by medium grits and prepares the surface to absorb stain wood evenly.
Extra fine grits are mainly used for sanding between coats of varnish, lacquer, or paint. After each coat dries, a light hand sanding with 400 grit or higher knocks down any raised grain or dust nibs, creating a glass-smooth finish. Wet sanding with silicon carbide in this range can produce an almost mirror-like result on finished surfaces.
Having the right sanding tool for the job makes the whole process faster, easier, and more consistent.
A sanding block is the most basic manual tool, and it’s still one of the best for flat surfaces. Wrapping sandpaper around a block of wood or foam gives you even pressure across the surface, preventing dips and hollows. Hand sanding with a block is slower than using a power sander, but it gives you more control especially around edges and detailed areas.
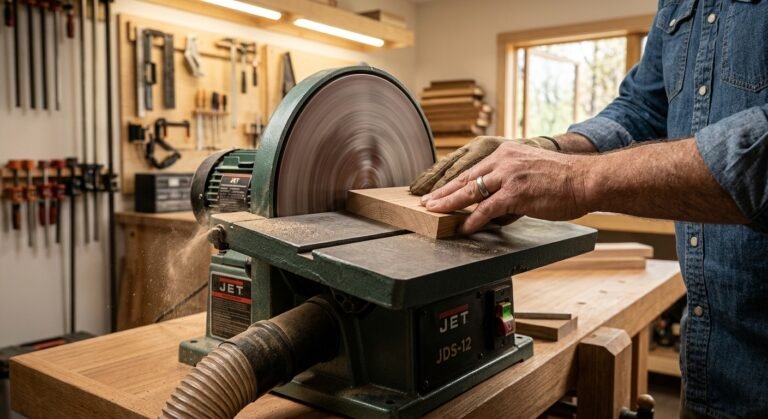
Power sanders dramatically reduce the time it takes to sand wood, especially on larger projects.
Orbital Palm Sander :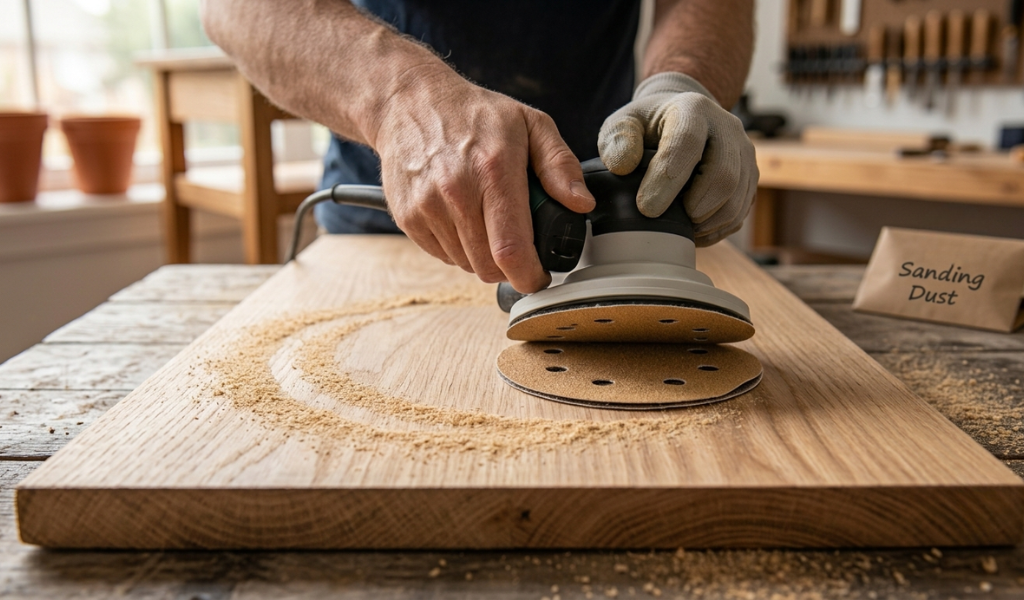 Also called a random orbital sander or random orbit sander, this is the most versatile power sanding tool in most woodworkers’ arsenals. It uses sanding discs that spin and orbit simultaneously, which prevents swirl marks and leaves a smooth surface. A random orbital sander works on flat surfaces, edges, and even contoured areas. It’s the go-to choice for both beginners and experienced woodworkers.
Belt Sander :A belt sander uses continuous sanding belts and removes material very aggressively. Use a belt sander for rough work: flattening glued panels, leveling high spots, or quickly stripping a surface. Because it cuts so fast, it requires a steady hand. Move the sander with the grain of the wood at all times and avoid holding it in one spot.
Corner Sander : Also called a detail sander, a corner sander has a triangular pad that fits into tight spaces, corners, and edges where a palm sander can’t reach. It’s a specialized sanding tool but extremely useful for cabinetry and furniture work.
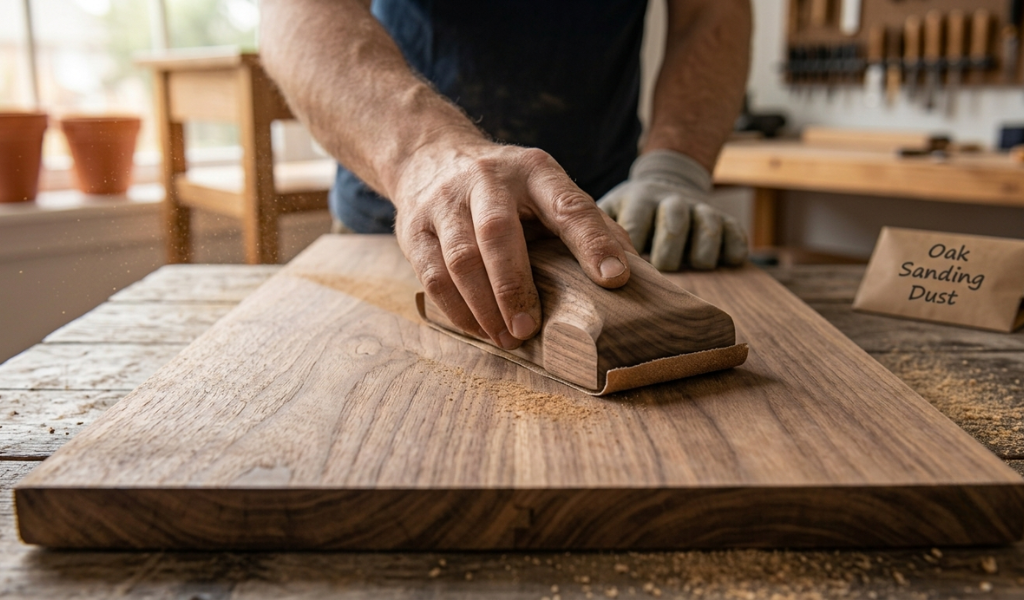
Hand sanding is slower, but it gives you more control. Always sand in the direction of the wood grain this is called sanding with the grain, and it’s one of the most fundamental rules in woodworking. Moving sandpaper across the grain creates cross-grain scratches that become very visible once you apply stain wood or a clear finish.
Use consistent, overlapping strokes and apply even pressure. Avoid pressing harder in some spots than others, as this creates an uneven wood surface.
When using a power sander, let the sander do the work. Many beginners press down hard thinking it will sand faster, but this actually reduces the effectiveness of the abrasive and can leave swirl marks or gouges. Keep the sander moving at a steady pace don’t hold it still over one area.
With a random orbital sander, move across the wood surface in slow, overlapping passes. The random orbit motion handles most of the directional scratches, but a final hand sanding with fine grit sandpaper in the direction of the grain will clean up any remaining marks.
Wet sanding involves using water or a lubricant along with very fine grit sandpaper to smooth a finished surface. It’s most commonly used after the final coat of varnish, lacquer, or paint has dried. The liquid reduces heat buildup, prevents the sandpaper from clogging, and produces an exceptionally smooth result. Silicon carbide sandpaper is the best choice for wet sanding because it handles moisture well without breaking down.
Raw wood straight from a mill or lumberyard is rarely smooth. It carries saw marks, surface irregularities, and raised wood fibers that will absorb finish unevenly if left alone. Sanding flattens those fibers, removes imperfections, and creates a consistent surface that takes stain and finish evenly.
Even wood that has been previously finished benefits from sanding. Over time, surfaces get scratched, dulled, and worn. Sanding strips away the damaged layer and prepares the wood beneath for a fresh coat.
Another reason to sand: adhesion. Paint and varnish bond better to a sanded surface than to a glossy or smooth one. A light sanding between coats even with 220 grit sandpaper dramatically improves how well each layer sticks.
There are situations where sanding is unnecessary or even counterproductive. If you’re working with pre-finished wood or factory-sanded panels, additional sanding may remove the smooth factory surface and create more work. Certain wood finishes like some oil finishes bond well to unsanded wood and don’t require surface preparation beyond cleaning.
If you’re applying a product specifically designed for no-prep application, follow the manufacturer’s instructions rather than adding an extra sanding step. Over-sanding can also close the grain on some woods, making it harder for stains to penetrate evenly. Know when to start sanding and when to leave the surface alone.
Even experienced woodworkers make these errors. Avoiding them will immediately improve the quality of your finish.
More pressure does not mean faster sanding. It means uneven surfaces, burnt wood, and worn-out sandpaper. Let the abrasive do the cutting. A consistent, light touch produces better results than aggressive force.
Sanding against the grain or at an angle to it creates scratches that run across the wood fibers. These cross-grain scratches become painfully visible after staining or finishing. Always sand in the direction as the wood grain, moving the sander or sandpaper along the length of the wood.
Jumping from 80 grit straight to 220 grit sandpaper to save time is one of the most common sanding mistakes. Each grit level removes the scratches left by the previous one. Skip a step, and you leave scratches behind that a finer grit can’t fully remove. Work through the grits progressively 80, 120, 150, 180, 220 for a truly smooth surface.
Tilting a random orbital sander or palm sander so only part of the sanding disc makes contact creates uneven pressure and leaves marks on the surface. Keep the sander flat against the wood at all times so the entire sanding disc contacts the surface evenly.
Mastering wood sanding techniques takes practice, but the principles are straightforward. Use the right type of sandpaper, work through the grits in order, sand with the grain, and choose the right tool for each task. Follow those basics and your wood projects will consistently come out cleaner, smoother, and more professional-looking.
Whether you’re doing a quick hand sanding before applying a stain or running a random orbital sander across a large flat surface, each step matters. Don’t rush it. The time you invest in sanding properly pays off every time you apply that final coat and see a flawless finish looking back at you.
Ready to put these techniques to work? Start with a small project, work through the grits, and see the difference that proper sanding makes.
Always sand with the grain of the wood, not against it. Sanding across or against the grain creates scratches that become visible once you apply stain or finish. Moving in the direction of the wood grain produces a smooth, consistent surface.
It depends on the stage of your project. Dry sanding is standard for raw wood and during the main sanding process. Wet sanding is best used after applying a finish coat it smooths out imperfections between coats and produces an exceptionally refined surface when using fine grit sandpaper like 400 grit or higher.
The pencil trick involves drawing light pencil lines across the wood surface before sanding. As you sand, the pencil marks gradually disappear. Once all the marks are gone, you know the entire surface has been sanded evenly no high or low spots have been missed.
Always sand with the grain. Sanding against the grain tears the wood fibers and leaves scratches that are difficult to remove. These scratches become especially obvious after staining, so sanding in the direction of the grain is a non-negotiable rule in good woodworking practice.
The most common sanding mistakes include applying too much pressure, sanding against the grain, skipping grit levels, and tilting the sander. Each of these errors leaves marks on the wood surface that are hard to correct later. Working through the grits progressively and keeping the sander flat against the surface will help you avoid most of these problems.
For final sanding before applying stain or a first coat of finish, 220 grit sandpaper is the most commonly recommended choice. It removes fine scratches from previous grits without closing the grain too much. For sanding between finish coats, move up to 320–400 grit for the smoothest results.
A random orbital sander is the best all-round tool for flat surfaces. Its dual-motion sanding action prevents swirl marks and covers ground quickly. For very large surfaces, a belt sander with a low grit sandpaper can remove material faster, but always follow up with a random orbital sander and a final light hand sanding to achieve a smooth, even finish.