Physical Address
304 North Cardinal St.
Dorchester Center, MA 02124
Physical Address
304 North Cardinal St.
Dorchester Center, MA 02124
Drilling is one of those skills that shows up everywhere — from a homeowner hanging a shelf on a Saturday morning to an oil crew boring thousands of feet into the earth. Yet most people never stop to ask: what is drilling, exactly? How does it work? And why does the same word describe both a handheld power tool in your garage and a massive industrial rig on a construction site?
If you’ve landed here wondering about the drilling process, the types of drilling available, or how to drill into specific surfaces like concrete, brick, or plasterboard, you’re in the right place. This guide covers everything — from the basic definition of drilling to the methods used across industries, plus practical tips for common home projects. By the end, you’ll have a clear, confident understanding of drilling and how to approach any job with the right tools and technique.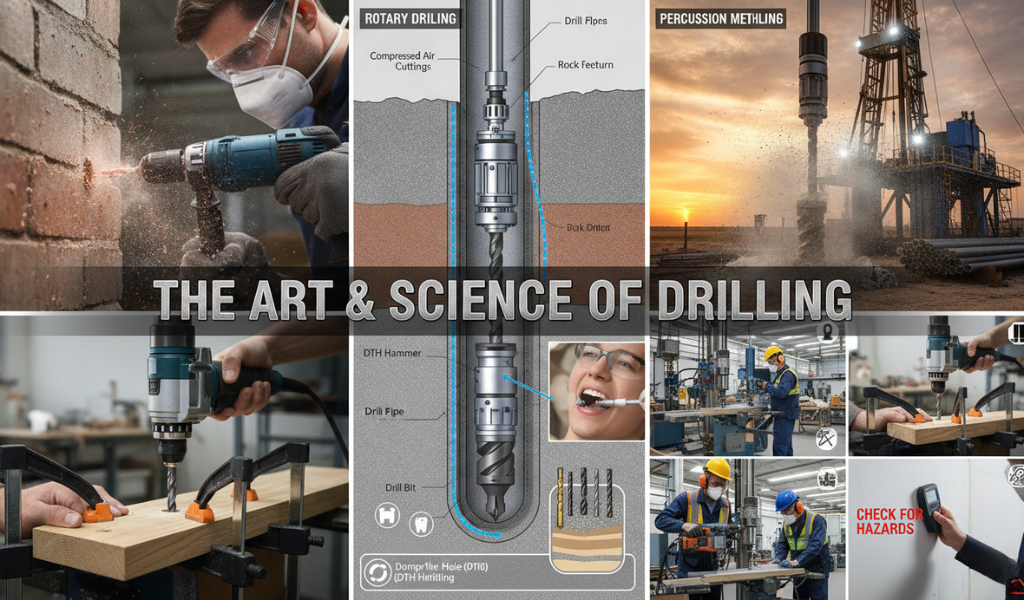
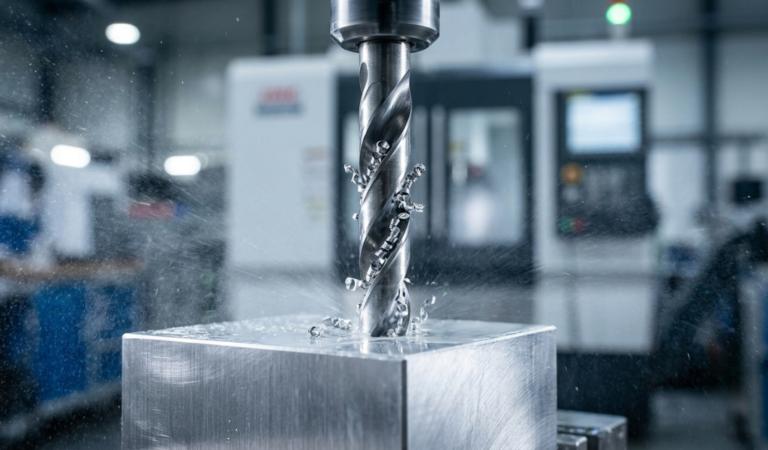
Drilling is the process of creating a round hole in a solid material using a rotating cutting tool called a drill bit. The bit spins at high speed while being pressed into the surface, and its sharp cutting edges scrape away material in small fragments called chips. Those chips are then cleared from the hole so the bit can continue deeper.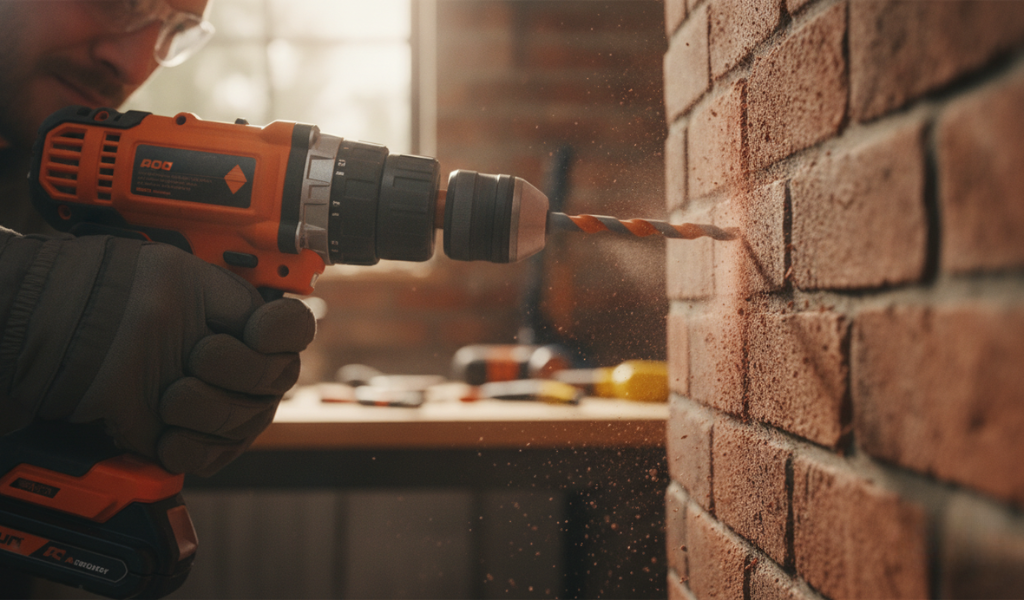
That’s the core idea — but the range of applications is enormous. A dentist uses a drill. A water well crew uses a drill. An aerospace engineer uses a drill to bore precise holes in jet engine components. The basic principle stays the same across all of these: a rotating tool cuts through material to create a controlled opening.
The drilling process dates back further than most people realize. Early humans used primitive bow drills made from sticks and strings to bore holes in wood and stone. The Industrial Revolution brought mechanical drilling to manufacturing. By 1776, engineer John Wilkinson had built one of the first boring machines to produce precision cylinders. Today, computer-controlled drilling machines can cut holes accurately to fractions of a millimeter.
Whether you’re a DIYer, a tradesperson, or simply curious, understanding what drilling is — and how it works — is the first step to doing it well.
The drilling process follows a consistent sequence, regardless of the material or machine involved.
First, the drill bit is secured in a chuck — the clamping mechanism that grips the bit and connects it to the machine’s spindle. The spindle rotates, transferring power from the motor to the bit. As the bit turns and presses into the workpiece, its cutting edges shear away material.
For soft materials like wood or plastic, a standard twisting motion does the job. For harder materials like concrete, rock, or masonry, many drills add a hammering action — rapid, short impacts that break up the surface while the bit rotates. This combination of rotation and percussion is what separates a standard drill from a hammer drill or rotary hammer.
Throughout the process, chips and debris must be cleared from the hole. In handheld drilling, this happens naturally as the bit’s spiral flutes carry material upward and out. In industrial and deep drilling, operators may pump in compressed air or drilling fluid to flush debris away and keep the bit cool.
The result is a clean, accurately sized hole — ready for a screw, anchor, bolt, cable, pipe, or whatever the job demands.
There isn’t one single drilling method that works for everything. Different materials, depths, and project goals require different approaches. Here’s a breakdown of the most widely used types of drilling.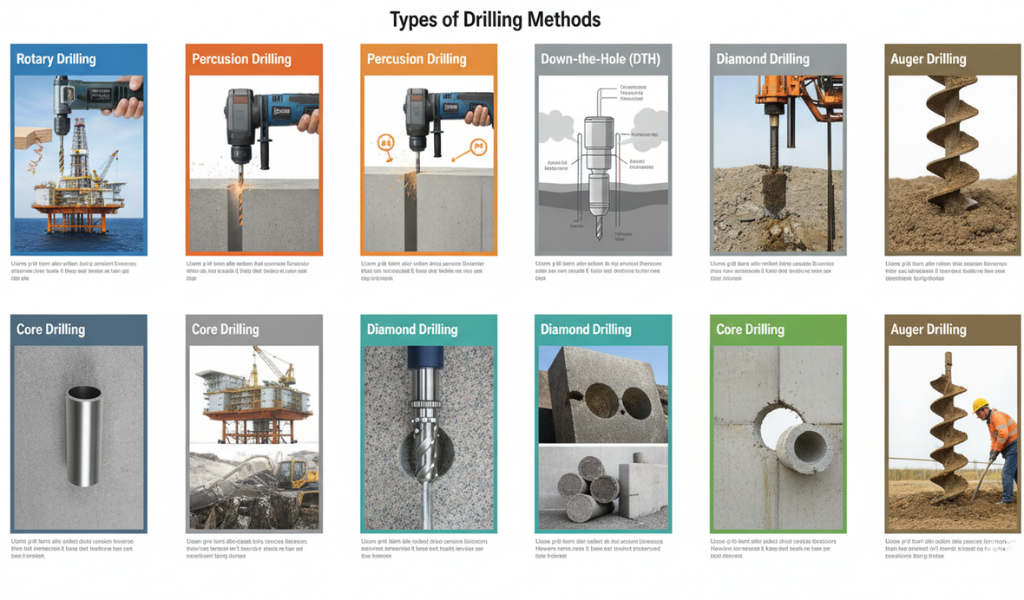
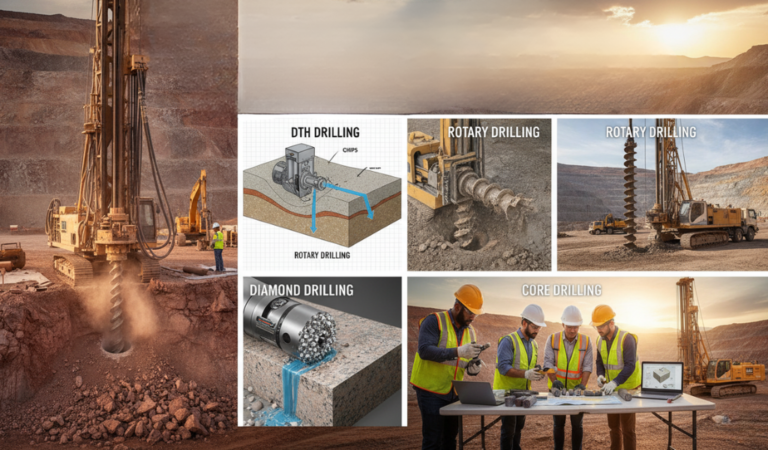
Rotary drilling is the most familiar method. A spinning bit is pressed into the material under steady downward pressure, shearing or grinding away the surface as it turns. This is the method used by most handheld drills, drill presses, and oil well rigs.
Rotary drilling is incredibly versatile. With the right bit and speed settings, it handles wood, metal, plastic, soil, and even soft rock. It’s fast, controllable, and widely available, which is why it dominates across so many industries — from home improvement to petroleum exploration.
Percussion drilling adds a hammering action to the rotary motion. The bit strikes the surface repeatedly while spinning, breaking up hard, brittle material that would resist plain cutting. This method is standard for construction work involving concrete, brick, and stone.
Hammer drills and rotary hammers use percussion drilling. So do large construction rigs boring blast holes in mining operations. The key advantage is speed through hard material — percussion drilling cuts through solid rock far faster than rotary drilling alone.
DTH drilling places a pneumatic hammer directly behind the drill bit, inside the borehole. Compressed air drives the hammer, which strikes the bit with great force while it rotates. The same air pushes debris up and out of the hole.
Because the hammer sits right at the cutting face, very little energy is lost between the machine and the bit. This makes DTH drilling exceptionally fast in hard rock and excellent for producing straight, accurate boreholes. Mining, quarrying, and deep foundation work all rely on this method.
Diamond drilling uses bits embedded with industrial-grade diamonds — one of the hardest materials on earth. As the bit rotates, the diamond surface grinds through extremely hard or abrasive material with precision.
A coolant flows through the bit during drilling to manage heat and flush away debris. The result is clean, smooth holes with tight tolerances, even in reinforced concrete, granite, and ceramic tile. Construction, geology, and semiconductor manufacturing all use diamond drilling where accuracy matters most.
Core drilling uses a hollow bit to cut around the perimeter of a circle, leaving a solid cylinder — called a core — in the center. Rather than grinding away all the material, the bit removes an intact sample.
Geologists depend on core drilling to extract samples of rock and soil from deep underground. The construction industry uses it to create large openings for pipes and conduits in concrete walls and slabs. When you need both the hole and the material inside it, core drilling is the method to reach for.
Auger drilling uses a helical screw blade — think of a giant corkscrew — to bore into soft ground. As the auger spins, its spiral flights lift loose soil and sediment up and out of the hole without needing additional flushing.
This method is quick, affordable, and ideal for shallow to medium-depth work in soft ground. It’s commonly used for soil sampling, fence post installation, shallow well construction, and site preparation. When the ground is soft and the depth is manageable, auger drilling is hard to beat for speed and simplicity.
Sonic drilling uses high-frequency vibrations to advance the drill bit or core barrel into the ground. The vibrations reduce friction between the tool and the surrounding material, allowing the bit to move forward with minimal downward force.
This technique causes very little disturbance to surrounding soils, which makes it valuable for environmental sampling and geotechnical studies. It works across a wide range of ground conditions and delivers clean, continuous core samples. Sensitive sites and complex soil profiles are where sonic drilling earns its place.
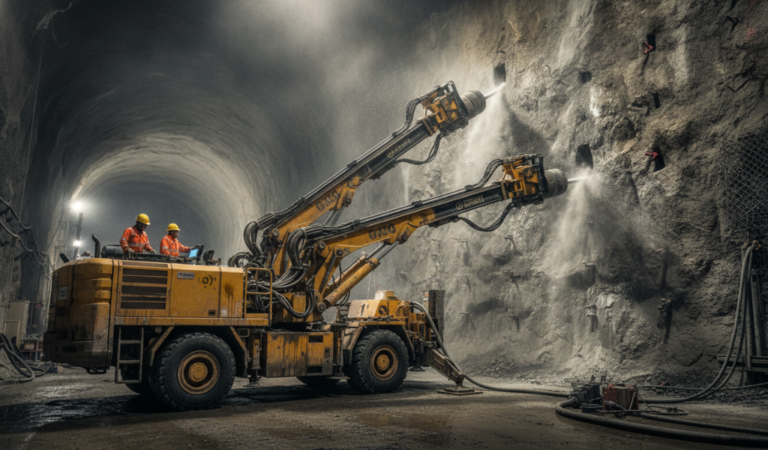
Rock drilling is a specialized branch of the drilling process focused on penetrating hard geological formations — granite, limestone, sandstone, shale, and similar materials. It comes up in mining, tunneling, quarrying, oil and gas extraction, and large-scale construction projects.
What makes rock drilling different from standard drilling is the level of force required. Rock doesn’t yield to simple rotation. It needs to be broken apart, which is why percussion and DTH drilling are the dominant methods in this field.
Rock drilling rigs vary enormously in size. A hand-held jackhammer is one end of the spectrum. A multi-story drilling rig on a mine site is the other. The right equipment depends on the hardness of the rock, the depth of the hole, and the precision required.
For anyone working in construction or civil engineering who needs to understand what rock drilling involves, the short answer is this: it’s high-impact, high-force work that demands the right tools, the right technique, and serious attention to safety.
The drilling machine — or drill press — is the stationary workhorse behind many precision drilling tasks. Unlike handheld drills, drilling machines hold the workpiece in place on an adjustable table while the bit moves in a perfectly vertical line.
Here are the main types:
Upright (Pillar) Drilling Machine — The most common type for workshops and home garages. A fixed spindle and adjustable worktable handle drilling, countersinking, and reaming with ease. Affordable and reliable, it suits most DIY and small-trade tasks.
Radial Drilling Machine — Built for large, heavy workpieces. A radial arm swings around the column, allowing the drill head to be repositioned without moving the workpiece. Used in shipbuilding, heavy equipment manufacture, and structural fabrication.
CNC Drilling Machine — Computer-controlled and automated. Once programmed, the machine drills complex hole patterns with perfect repeatability and minimal human input. Essential for mass production in automotive and aerospace manufacturing.
Gang Drilling Machine — Multiple drill heads lined up on one table. Each head can perform a different operation, allowing several holes to be drilled without changing tools. Common in assembly-line settings.
Sensitive Drilling Machine — A simple, hand-operated machine for light, delicate work. The operator feels the cutting action directly, making it well suited to small holes in soft materials like jewelry components and model parts.
Portable Drilling Machine — A lightweight, mobile drill for on-site work. When the workpiece can’t come to the machine, the machine goes to the workpiece. Standard equipment in construction and maintenance trades.
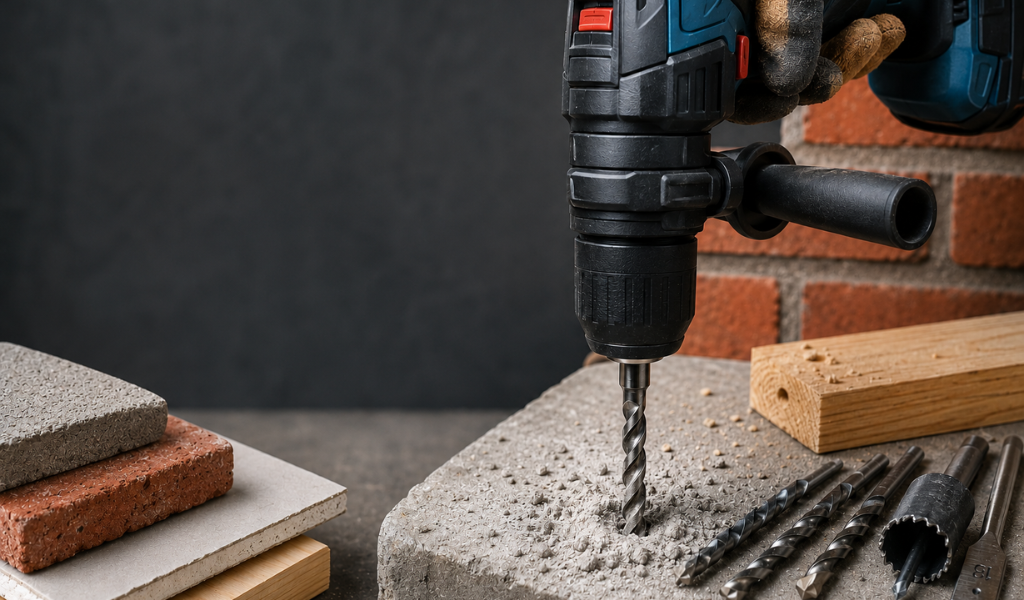
Concrete is one of the most challenging surfaces to drill into, but it’s also one of the most common in home improvement projects. Getting it right comes down to three things: the right drill, the right bit, and the right technique.
What you need: A hammer drill (for light jobs) or a rotary hammer (for thicker slabs or multiple holes). Pair it with a carbide-tipped masonry bit sized to the anchor or fastener you’re using.
Step 1: Mark your spot. Use a pencil to mark the exact drilling location. Place a small piece of masking tape over the mark — it stops the bit from slipping on the smooth surface.
Step 2: Check for hidden hazards. Run a pipe and cable detector over the area before you start. Drilling into a live wire or water pipe creates serious problems fast.
Step 3: Start with a pilot hole. For anything larger than a small hole, drill a narrow pilot hole first. This reduces stress on the concrete and keeps your main bit on target.
Step 4: Drill in short bursts. Set the drill to hammer mode and work in short, steady bursts rather than one long push. Pull the bit out every few seconds to clear debris from the hole.
Step 5: Maintain steady pressure. Let the drill do the work. Pressing too hard won’t speed things up — it just overheats the bit and stresses the surface.
Step 6: Clean the hole. Before inserting any anchor or fastener, vacuum or brush all dust out of the hole. A clean hole gives anchors something solid to grip.
Common problems to watch for: if the bit spins without making progress, check that the hammer function is active and the bit is carbide-tipped. If you hit rebar, stop drilling immediately — shift the hole position or consult a professional if the rebar can’t be avoided.
Brick presents a different challenge than concrete. It’s hard enough to resist a standard bit, but brittle enough to crack under too much force. The goal is controlled penetration — steady, moderate pressure with the right tools.
What you need: A hammer drill with a sharp masonry bit. For heavy-duty work, step up to a rotary hammer (SDS drill).
Step 1: Choose your location carefully. Whenever possible, drill into the brick face itself rather than the mortar joints. Mortar is softer and weaker — better for lighter fixtures or temporary installations.
Step 2: Stay away from the edges. Keep at least one inch between your drilling point and the edge of the brick. This leaves enough material around the hole to absorb drilling pressure.
Step 3: Mark and check. Pencil-mark your spot, use a level to confirm alignment, and scan for hidden wires or pipes.
Step 4: Drill slowly and steadily. Start at low speed, apply moderate pressure, and keep the drill perpendicular to the wall. If the bit heats up, dip it in water to cool it down.
Step 5: Clear dust regularly. Stop every 10 to 15 seconds to vacuum debris from the hole. Built-up dust clogs the bit and slows progress.
Step 6: Insert the right anchor. For light items, plastic expansion anchors work well. For heavy-duty fixtures, use metal sleeve anchors or wedge anchors rated for masonry.
The most common cause of cracked bricks? Wrong technique, not weak brick. Excessive force, dull bits, and drilling too close to the edge are the culprits in almost every case. Respect the material and it won’t give you trouble.
Plasterboard — also called drywall — is the softest surface covered in this guide, but it still requires the right approach. Drill into it wrong, and you risk a crumbling hole that can’t hold a screw.
What you need: A standard cordless drill works perfectly. No hammer function needed — plasterboard is too fragile for it. Use a sharp twist bit or a specialized plasterboard bit.
Step 1: Find the studs. Use a stud finder to locate the timber or metal studs behind the plasterboard. For anything heavier than a picture frame, you want the screw to go into a stud, not just the plasterboard.
Step 2: Mark and measure. Pencil-mark your hole position and use a level to confirm it’s straight.
Step 3: Drill at slow speed. Keep the drill speed low and apply light, even pressure. Plasterboard tears easily at high speeds.
Step 4: Choose the right fixing. For holes that land on a stud, a wood screw driven straight in is enough. For hollow sections between studs, use a cavity wall anchor — such as a spring toggle or hollow wall anchor — to spread the load across a wider area.
Step 5: Don’t overtighten. When driving screws into plasterboard, stop before the head buries itself in the surface. Sinking it too deep crushes the material and weakens the hold.
One tip that many DIYers skip: always check both sides of a plasterboard wall before drilling. Pipes and cables often run through the cavity, and a detector takes 30 seconds to use.
The drill gets you started, but the bit does the actual cutting. Using the wrong bit for your material is one of the most common drilling mistakes — and one of the easiest to avoid.
Here’s a quick reference guide:
A general rule: always match the bit to the material. The wrong bit wastes time, damages the surface, and wears out the tool far faster than it should.
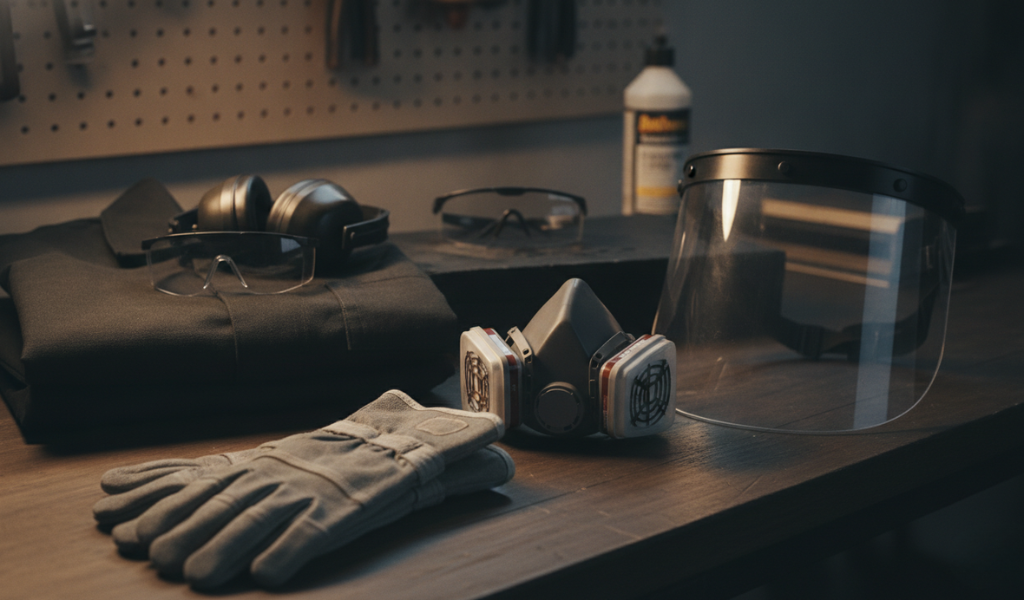
Drilling is straightforward, but it does carry real risks if safety isn’t taken seriously. Keep these habits in place on every job:
Wear eye protection. Drilling throws off chips, dust, and fragments at high speed. Safety glasses are non-negotiable, regardless of the material.
Use ear protection for prolonged drilling. Hammer drills and rotary hammers produce significant noise over time. Earplugs or ear defenders protect against long-term hearing damage.
Wear a dust mask when drilling masonry. Concrete and brick dust contain silica particles that are harmful when inhaled. A proper dust mask (rated P2 or higher) keeps that risk in check.
Clamp your workpiece. Never hold a workpiece by hand while drilling. If the bit catches, the workpiece can spin violently. Clamps keep everything secure.
Check for hidden hazards before drilling into walls or floors. A pipe or cable detector is a small investment that prevents major injuries. Use one every time.
Remove the chuck key before switching on the drill. A key left in the chuck becomes a projectile when the drill starts. Make it a habit to remove it immediately.
Keep the drill cord clear of the bit. When using a corded drill, be aware of where the cord lies at all times. A bit that catches the cord can yank the drill or cause a serious fall.
Drilling is one of the most fundamental skills in construction, manufacturing, and home improvement — and understanding it properly changes how you approach every project.
Get the method right and you get clean holes, intact surfaces, and hardware that holds. Get it wrong and you’re dealing with cracked bricks, stripped anchors, burned-out bits, and do-overs that cost time and money.
The core takeaways from this guide: drilling is a process, not just an action. The drilling process involves choosing the right machine, the right bit, and the right technique for your specific material — whether that’s soft plasterboard, tough masonry, or solid rock. The types of drilling span everything from a hammer drill in a home garage to a diamond-tipped core drill in a mining operation, and each one exists because it solves a specific problem.
Start with the right tools, take your time with prep work, and let the drill do what it was built to do. That’s the simplest version of good drilling practice — and it applies whether you’re mounting a TV bracket or boring through a concrete slab.
What is drilling in simple terms?
Drilling is the process of making a round hole in a solid material using a rotating cutting tool called a drill bit. The bit spins and presses into the surface, removing small pieces of material until the hole reaches the required size and depth.
What are the main types of drilling?
The most common types of drilling include rotary drilling, percussion drilling, DTH (down-the-hole) drilling, diamond drilling, core drilling, and auger drilling. Each method suits different materials, depths, and project goals.
What is rock drilling used for?
Rock drilling is used in mining, quarrying, tunneling, and large-scale construction to bore holes through hard geological formations. Percussion and DTH drilling are the most common methods because they combine rotation with impact force to break through solid rock efficiently.
How do I drill into concrete without cracking it?
Use a hammer drill with a carbide-tipped masonry bit. Start with a pilot hole, drill in short bursts with steady moderate pressure, and clear debris from the hole regularly. Avoid forcing the bit — gradual, consistent drilling produces cleaner results than aggressive pushing.
How do I drill into brick without causing damage?
Use a hammer drill and a sharp masonry bit. Keep your drilling point at least one inch from the edge of the brick, apply steady pressure without forcing the drill, and cool the bit with water if it gets hot. Starting with a small pilot hole also reduces the risk of cracking.