Physical Address
304 North Cardinal St.
Dorchester Center, MA 02124
Physical Address
304 North Cardinal St.
Dorchester Center, MA 02124

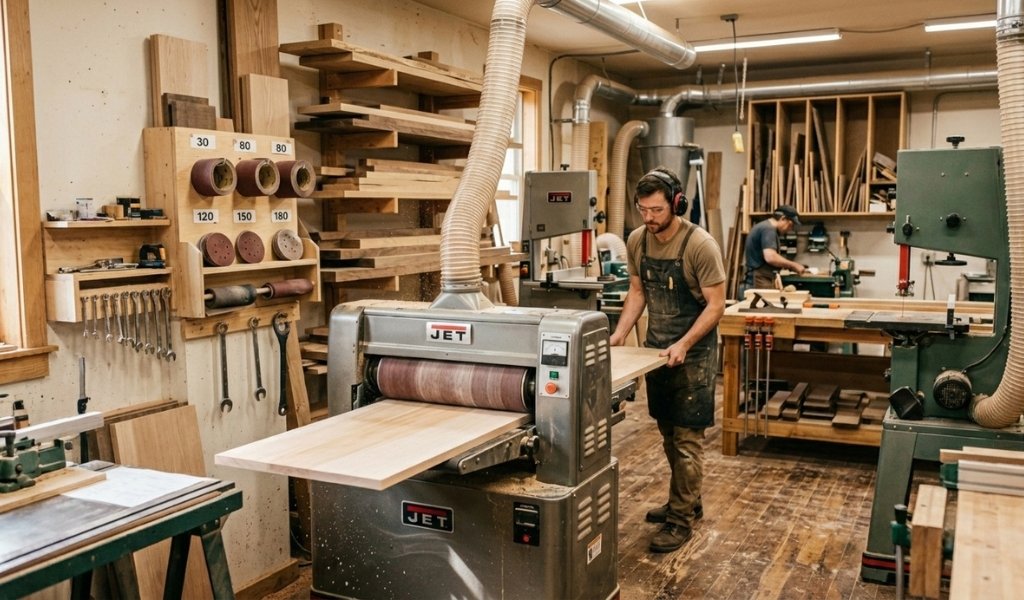
Few machines transform a woodworking shop the way a drum sander does. If you’ve ever tried to flatten a glued-up panel wider than your planer’s capacity, or struggled to get a consistent thickness on thin stock without tearout, you already understand the problem this machine solves. A drum sander fills a very specific and very important gap in the workshop toolkit, one that neither a thickness planer nor a random orbit sander can adequately cover.
Understanding how to use one correctly, however, takes more than just feeding wood through it. Feed rate, grit selection, conveyor belt tension, and stock removal per pass all determine whether you walk away with a flawless surface or a board covered in ridges and burn marks. This guide covers everything you need to know: how drum sanders work, how they compare to other tools, how to set them up correctly, and which models suit different shop environments.
Before diving in, it’s worth noting that the drum sander is just one part of a broader sanding workflow. Understanding how abrasive tools fit together from hand sanding to wide-belt production machines gives you a clearer picture of where the drum sander earns its place.
A drum sander is a stationary woodworking machine that uses a rotating cylindrical drum wrapped in abrasive sandpaper to smooth and size wood as it passes through on a motorized conveyor feed belt. The workpiece sits on the feed belt, which moves it at a controlled rate beneath the spinning drum. As the drum contacts the surface of the wood, it removes material uniformly across the full width of the board.
The drum itself is the heart of the machine. Most models use a single sanding drum positioned above the conveyor, though heavy-duty industrial versions use two drums in sequence. The drum height is adjustable typically via a lever or handwheel allowing the operator to set the gap between the drum and the feed belt, which directly controls how much material gets removed per pass, also called stock removal depth.
The motor drives the drum at high RPM, while the conveyor belt moves the workpiece through at a slower, controlled feed rate. Most benchtop units draw between 1.5 HP and 3 HP, with industrial double drum sanders running significantly higher. The combination of drum speed and conveyor feed rate determines surface finish quality: too fast a feed rate produces chatter marks; too slow can cause burn marks, particularly on hardwood like maple.
The drum sander’s primary function is dimensional consistency. It excels at three specific tasks that other shop machines handle poorly or not at all.
Sizing stock to precise thickness: A drum sander can bring a board to a very precise final thickness, particularly useful for thin stock that a planer would either snipe or reject entirely. Pieces as thin as 1/8 inch can pass through a drum sander safely, a capability no thickness planer can match without risk of destruction.
Flattening wide panels: Glued-up tabletops, cabinet door panels, and wide cutting boards often exceed the infeed width of most shop planers. An open-end drum sander, particularly a 25-50 model handles panels up to 50 inches wide by passing the workpiece through twice, once from each side.
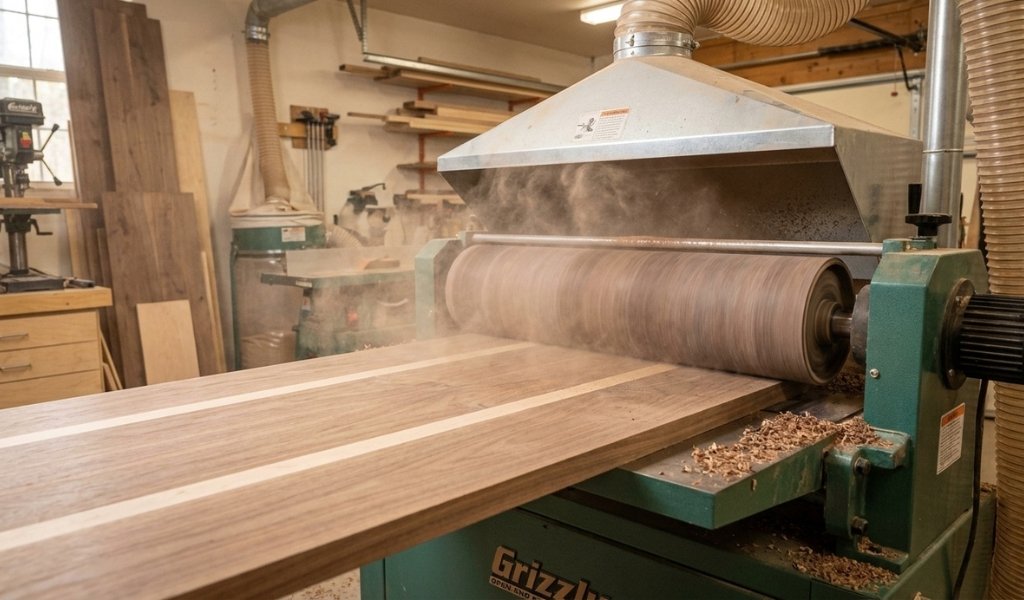
This cantilever design is one of the drum sander’s defining advantages.
Achieving uniform surface finishes: After sizing, the drum sander leaves a surface that’s far smoother and more consistent than a planer’s knives can produce, especially on figured wood or pieces with irregular grain. It doesn’t replace finish sanding, but it dramatically reduces the work needed afterward.
This distinction matters more than many woodworkers, especially hobbyists setting up a new shop initially realize. A drum sander is not a thickness planer, and treating it as one leads to frustration, wasted abrasive, and slow going.
A thickness planer uses sharp rotating knives to slice material from the surface of a workpiece. It removes wood aggressively and quickly, often 1/8 inch or more per pass. A drum sander removes material through abrasion, which is inherently slower. Attempting to remove large amounts of stock in a single pass on a drum sander overloads the motor, glazes the abrasive, and can even stall the machine.
The tradeoff is surface quality. Planers leave knife marks, snipe at the ends of boards, and can produce tearout on figured or reversing grain. A drum sander, by contrast, leaves a uniformly abraded surface that’s ready for finish sanding with minimal additional work. On highly figured maple, walnut crotch pieces, or quilted stock, this distinction is significant.
The drum sander also reaches where a planer cannot: wide panels, thin stock, end grain cutting boards, and glued assemblies that are too large or too fragile for a planer’s infeed rollers.
A random orbit sander is a handheld finishing tool. It’s excellent for final surface preparation, curved surfaces, and detail work but it has no dimensional control whatsoever. Using a random orbit sander to flatten a panel or bring a board to consistent thickness isn’t practical; it’s entirely dependent on hand pressure and operator consistency.
The drum sander operates from a fixed, mechanically controlled height, producing repeatable results across every piece that passes through. Where a random orbit sander might take 20 minutes of careful work to level a small glued-up panel, a drum sander accomplishes the same result in two or three passes measured in seconds each.
Use a drum sander for sizing, flattening, and initial surface preparation. Switch to a random orbit sander for contour sanding, detail work, and final finish passes where the orbital motion’s swirl-minimizing pattern is an advantage. The two tools are complementary, not competitive.
Getting the most from a drum sander starts with understanding the relationship between feed rate and stock removal. The conveyor belt speed usually adjustable via a dial or lever on most machines controls how quickly the workpiece moves beneath the drum. Slower feed rates mean more abrasive contact time per inch of wood surface, which produces a finer finish but increases the risk of burning, especially on dense hardwood. Faster feed rates remove material less aggressively and reduce heat buildup, but can leave a rougher surface if the grit is too coarse.
A practical rule: never remove more than 1/32 inch per pass, and stay closer to 1/64 inch when working with finer grits or sensitive species. Sneak up on final thickness across multiple light passes rather than trying to reach it in one aggressive cut. Each pass, lower the drum slightly, feed the board through, and check. This disciplined approach protects both the workpiece and the abrasive.
Conveyor belt tension deserves attention as well. A loose feed belt allows the workpiece to shift or track unevenly, producing a surface that’s thicker on one edge than the other. Check belt tension regularly and keep the belt clean sawdust and glue residue accumulate on the belt surface and affect how the workpiece feeds through.
Grit selection for a drum sander follows the same progressive logic as any other form of sanding, but the stakes are higher because the machine removes material much faster than a handheld tool.
36 grit is extremely aggressive, reserved for initial flattening of badly cupped panels, heavily glued surfaces, or stock that’s well above final thickness. At 36 grit, the drum removes material quickly and leaves deep scratches that require multiple subsequent grits to eliminate. Use it only when the situation genuinely demands it.
60 to 80 grit handles most initial passes on rough-sawn or already-planed stock. This range is the workhorse zone for a drum sander: aggressive enough to make real progress, fine enough that the resulting surface isn’t impossibly scratched.
100 to 120 grit transitions the surface from dimensioned to refined. At 120 grit, you’re removing the marks left by coarser grit paper and beginning to produce a surface that’s legitimately smooth. This is also where final thickness is typically locked in.
150 to 220 grit is finished territory on a drum sander. At these finer grits, the machine is doing very little stock removal and a great deal of surface refinement. A final pass at 150 or 180 grit leaves a surface that requires only light hand sanding or a few passes with a random orbit sander to be ready for finish.
Never skip more than one grit stage. Jumping from 60 grit to 120 grit leaves scratch patterns that the finer paper has to work much harder to remove, often unsuccessfully, with the marks surfacing under stain.
When changing grits, always blow the dust off the conveyor belt and drum, and inspect the paper on the drum for glazing or loading before continuing.
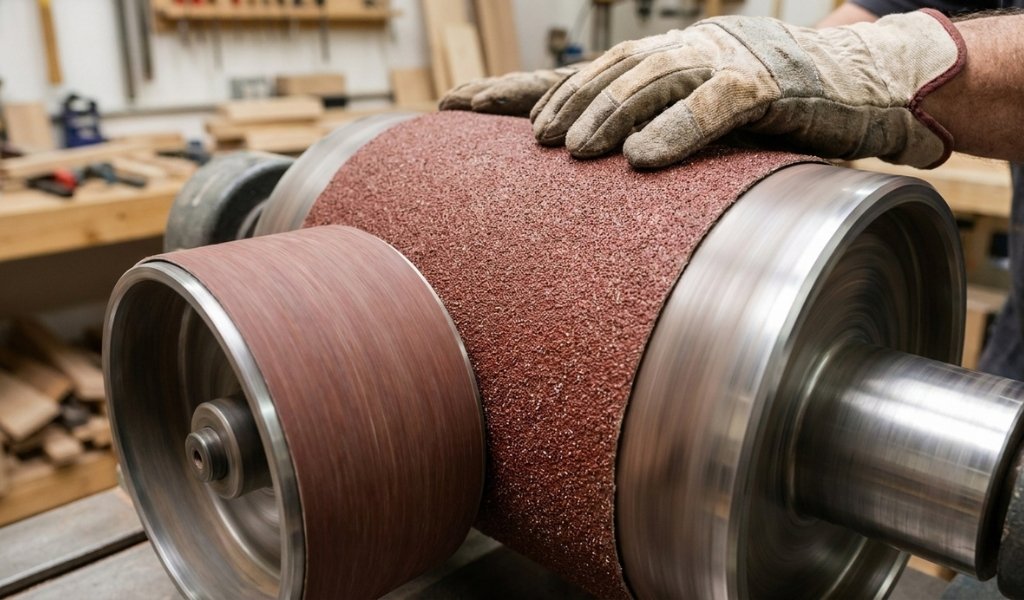
Loaded sandpaper doesn’t cut it burns.
End grain cutting boards are one of the drum sander’s most practical specialized applications. Because end grain is essentially a cross-section of the wood’s fibers, it’s both harder to sand evenly and more prone to showing uneven surface texture. The drum sander handles end grain efficiently and consistently, something that’s genuinely difficult to accomplish by hand or with a random orbit sander on a large board.
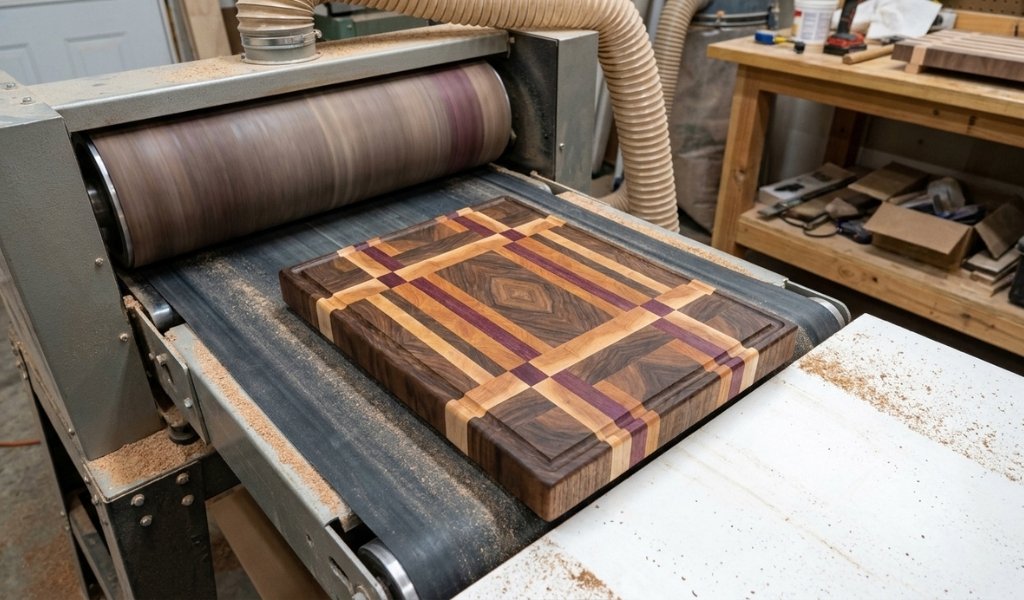
When sanding end grain cutting boards, reduce the feed rate slightly and use moderate grit 80 to 100 grit is a good starting point, finishing at 120 or 150. Keep passes light to avoid heat buildup, which can open glue joints.
Thin stock presents its own challenges. Pieces under 1/4 inch can flex, vibrate, or even get pulled into the machine if not handled carefully. Most drum sander operators use a sled, a flat, stable carrier board to support thin stock as it passes through. Double-sided tape holds the thin piece flat to the sled, and the assembly feeds through as a single unit. This technique is essential for safely processing veneer or thin drawer bottoms.
Veneer work pushes the drum sander’s precision to its limits. The margin for error is minimal, and grit selection matters enormously. Starting no coarser than 120 grit and taking extremely light passes less than 1/64 inch is non-negotiable when working with veneer panels.
The most common drum sanders found in home shops and small professional shops are open-end (also called open-ended or cantilever) designs. The drum extends to one side without a supporting column on the outfeed edge, which allows wide panels to be passed through in two stages once with the panel oriented one way, then again with it flipped effectively doubling the usable sanding width.
16-32: The numbers indicate the single-pass width and the two-pass width. A 16-32 sander handles boards up to 16 inches in a single pass and up to 32 inches with two passes. This is an entry-level benchtop model well-suited for the hobbyist or small shop with limited floor space. Motor size is typically 1.5 to 1.75 HP sufficient for light to moderate work. Jet and SuperMax both produce well-regarded machines in this category.
19-38: A step up in capacity and motor power, the 19-38 is often the sweet spot for a serious hobbyist or a small production shop. The SuperMax 19-38, for example, is a well-regarded machine in this category; it offers a wider drum, stronger motor, and better dust collection capability than entry-level models. Single-pass capacity of 19 inches covers most glued-up panels without requiring a second pass.
25-50: This is a substantial machine often available in both benchtop and stand configurations capable of handling panels up to 25 inches in a single pass and 50 inches in two. At this size, motor requirements climb to 3 HP or higher. Laguna and SuperMax produce capable 25-50 machines that bridge the gap between hobbyist and light industrial use. Cabinet shops that regularly process wide panels, door slabs, or large tabletops will find a 25-50 model significantly more productive than smaller machines.
At the professional and production end of the spectrum, double drum sanders replace the single sanding drum with two drums in sequence. The first drum typically loaded with a coarser grit performs the bulk of the stock removal. The second drum, running a finer grit, refines the surface in a single pass through the machine.
This arrangement dramatically increases throughput. A cabinet shop processing dozens of door panels per day, or a flooring manufacturer sizing hardwood strips, gains an enormous efficiency advantage from a double drum machine. The wide-belt sander occupies a similar position but uses a continuous abrasive belt rather than a drum, which some production environments prefer for its superior surface finish characteristics.
Double drum sanders are heavy, expensive, and require dedicated electrical service often 220V or three-phase power. They’re not for the typical home woodworker, but for a professional shop processing high volumes of hardwood or panel goods, the investment pays off quickly through reduced labor and superior consistency.
CNC woodworking operations increasingly pair drum and double drum sanders with automated infeed and outfeed systems, integrating surface preparation into a continuous production workflow.
A drum sander is used primarily to flatten wide panels, size stock to consistent thickness, and produce uniform surface finishes that are difficult to achieve with a planer or handheld sander. It excels at processing glued-up panels, end grain cutting boards, thin stock, and veneer that would be damaged or rejected by a thickness planer. The open-end design found on most benchtop models allows panels up to twice the drum width to be processed in two passes.
Neither tool is universally better; they serve fundamentally different purposes. A drum sander is a stationary, dimensionally controlled machine best suited for flattening, sizing, and uniform surface preparation. A random orbit sander is a handheld finishing tool designed for final surface refinement, curved surfaces, and detail work. For a woodworker who needs to flatten wide panels or process large volumes of stock, a drum sander is indispensable. For finish sanding and detail work, the random orbit sander has no peer.
The closest alternative for flattening wide panels is a wide-belt sander, which uses a continuous abrasive belt rather than a drum and is found mainly in production environments. For smaller panels, a well-tuned hand plane followed by a card scraper can produce exceptional results, though the process is slower and more skill-dependent. A CNC router equipped with a surfacing bit can also flatten panels, though the surface quality differs. For thin stock, a router sled provides a controlled flattening method without a drum sander.
Start with your most common workpiece width that determines the minimum drum capacity you need. A 16-32 suits most hobby shops where panels rarely exceed 28 to 30 inches. A 19-38 or 25-50 model makes more sense for serious woodworkers or those processing cabinet doors and large tabletops regularly. Consider motor size (aim for at least 1.75 HP for regular hardwood use), dust collection capability, and whether the machine accepts standard sandpaper rolls for easy and inexpensive abrasive changes. Brands like Jet, SuperMax, and Laguna all offer reliable machines across these size categories.