Physical Address
304 North Cardinal St.
Dorchester Center, MA 02124
Physical Address
304 North Cardinal St.
Dorchester Center, MA 02124
Most people reach for the nearest hammer without thinking twice. But grab the wrong one, and you risk cracking a tile, denting a wood panel, or scratching a car part you spent hours aligning. That’s exactly where a rubber mallet changes everything.
A rubber mallet is one of those tools that doesn’t get nearly enough credit. It looks simple. It feels familiar. But once you start using it correctly, you’ll wonder how you managed without it. Whether you’re setting tiles in your kitchen, assembling flat-pack furniture, or doing basic automotive work in your garage, knowing how to use a rubber mallet properly can save you time, money, and a lot of frustration.
This guide covers everything you need to know — what a rubber mallet is, what it’s used for, how to choose the right one, and how to get the best results across different tasks.
A rubber mallet is a type of hammer with a head made from rubber rather than metal. The rubber head absorbs impact instead of transferring all that force directly to the surface you’re striking. This makes it perfect for jobs where you need a firm hit without leaving a mark, denting a surface, or causing a crack.
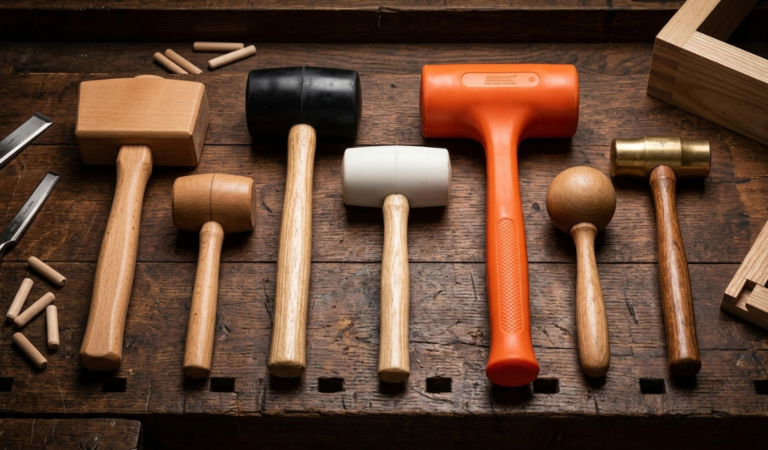
Rubber mallets typically come with handles made from hardwood, fiberglass, or steel with a rubber grip. The head can be white or black rubber, PU (polyurethane) rubber, or nylon, each suited to slightly different tasks. Unlike a standard metal hammer, a rubber mallet gives you control — you can strike with confidence without worrying about the damage that usually follows.
This is what separates a rubber mallet hammer from regular hammers. It’s not about hitting hard. It’s about hitting smart.
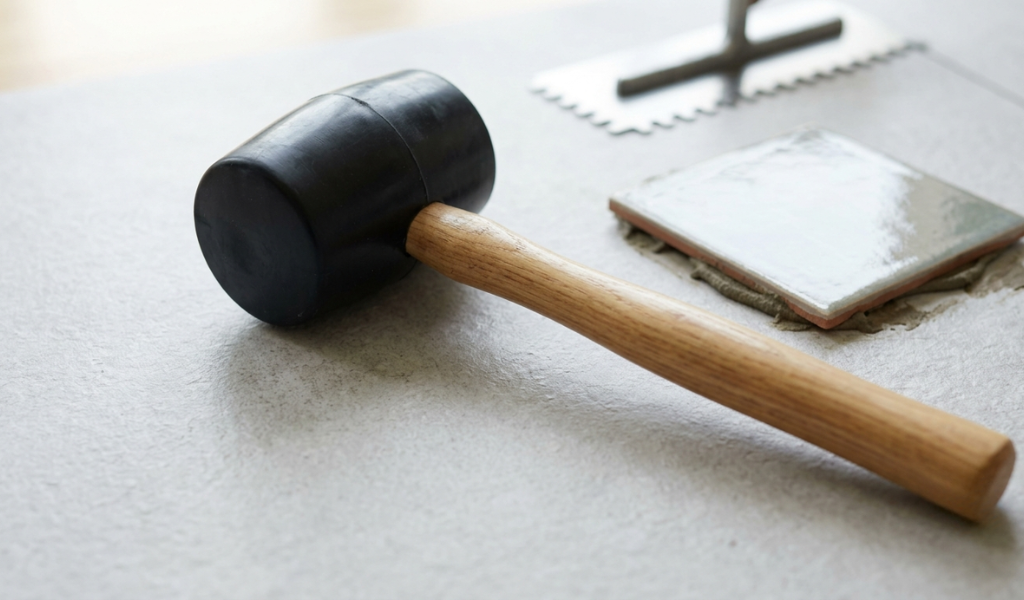
Tile installation is one of the most common reasons people pick up a rubber mallet — and for good reason. Tiles, whether ceramic, porcelain, or vinyl, are relatively fragile. A metal hammer would crack them almost instantly. Even a slightly misaligned blow can send a hairline fracture across an expensive tile.
A rubber mallet gives you a way to seat tiles firmly into adhesive mortar without putting them at risk. The soft head spreads the force across a wider area, reducing the chance of pressure points that cause cracks.
Here’s why rubber mallets are specifically built for tile work:
If you’re working with light-colored or glossy tiles, always use a white rubber mallet. Black rubber can transfer color onto the tile surface, which is difficult to clean off.
The rubber mallet is more versatile than wooden mallets ,most people realize. Here’s a breakdown of where it genuinely earns its place.

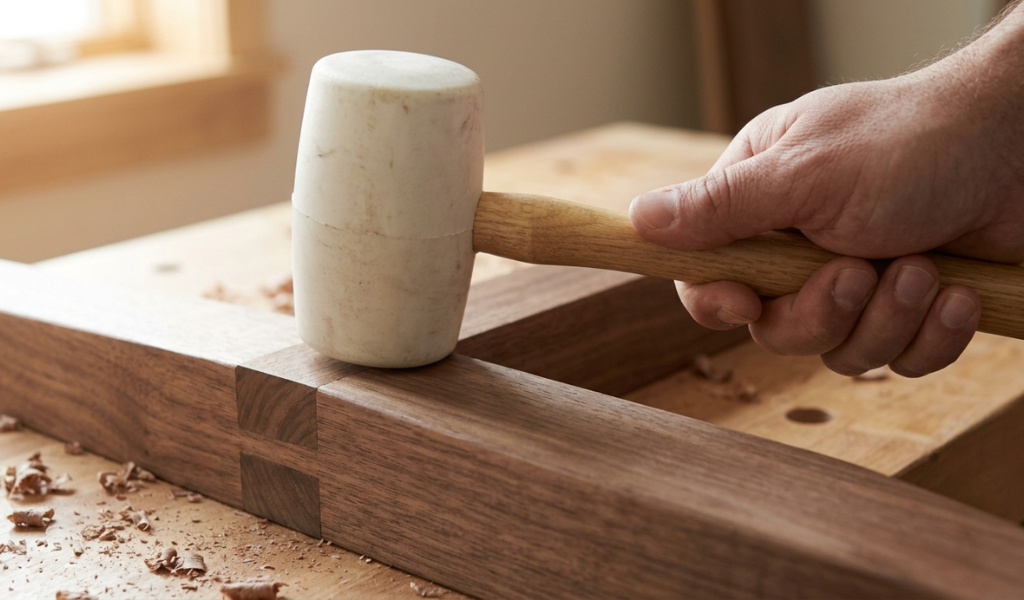
Furniture assembly, joining wooden panels, and working with mortise and tenon joints all call for a rubber mallet. When you’re tapping wooden pieces together and when anyone questions about mallet vs hammer , a metal hammer would leave dents, split edges, or crack joints under too much force.
A rubber mallet lets you drive pieces together firmly without any of that surface damage. It’s especially useful when you need a flush, clean finish — the kind where every surface needs to look polished.
Laminate flooring and hardwood flooring uses a tongue-and-groove locking system. The pieces need to click together tightly, but forcing them with a regular hammer usually damages the locking edge. A rubber mallet, combined with a tapping block, lets you apply steady force along the edge without chipping the groove.
The same principle applies to tile floors. You need firm, even pressure to seat tiles properly, and a rubber mallet delivers exactly that.
Mechanics use rubber mallets regularly for jobs that require precise force on metal parts without scratching or denting them. Fitting hubcaps, realigning body panels, removing stuck components, and working in tight engine bay spaces are all tasks where a rubber mallet protects surfaces that would otherwise get marked up.
It’s also useful for removing trim panels and dashboard components inside vehicles, where hard blows would cause cracks or snap plastic tabs.
This is a less obvious application, but rubber mallets are a staple tool in leather workshops. When shaping leather, finishing edges, or punching holes, the controlled force of a rubber mallet ensures consistency. It won’t leave visible marks on the leather surface, and for high-quality products like bags and belts, that matters a lot.
White rubber mallets are preferred here to avoid any color transfer onto the leather.
Setting up a tent, driving wooden stakes into the ground, or building garden structures — a rubber mallet handles all of these without the risk of deforming metal tent pegs or splitting wooden stakes. The controlled strike gives you accuracy without overdoing it.
Knowing the tool is one thing. Using it well is another. Here’s a step-by-step look at how to use a rubber mallet for tile installation, which covers the core technique you can adapt to other tasks.
Step 1: Prepare the surface
Make sure the floor or wall is clean, dry, and flat before you start. Any bumps or debris under the tile will cause uneven results no matter how well you use the mallet.
Step 2: Apply mortar or adhesive
Use a notched trowel to spread adhesive evenly across the surface. The notches create ridges that help the tile bond properly. Cover the back of larger tiles as well for better adhesion.
Step 3: Set the tile in place
Press the tile down gently by hand first. This removes air pockets and gives the adhesive a chance to grip before you start tapping.
Step 4: Tap with the rubber mallet
Hold the mallet comfortably with a firm grip. Strike the center of the tile first using a light, controlled tap. Then move to the edges. Keep your strikes even — the goal is uniform contact across the whole tile, not force.
Step 5: Check your level
After tapping, use a level or straightedge to confirm the tile is flush with its neighbors. If one side is slightly high, tap it down gently. If you spot a problem after the adhesive has started to set, act quickly.
Step 6: Repeat
Work across the surface systematically, using tile spacers to keep gaps consistent. Recheck your level every few tiles.
For woodworking and flooring, the principle is the same: place your material, apply controlled taps at the joint or connection point, and check alignment regularly.
Not every rubber mallet is the same, and picking the right one makes the job easier.
For most DIY tasks around the home, a 16 oz rubber mallet with a fiberglass or hardwood handle is the most practical starting point.
A few simple habits will improve your results noticeably:
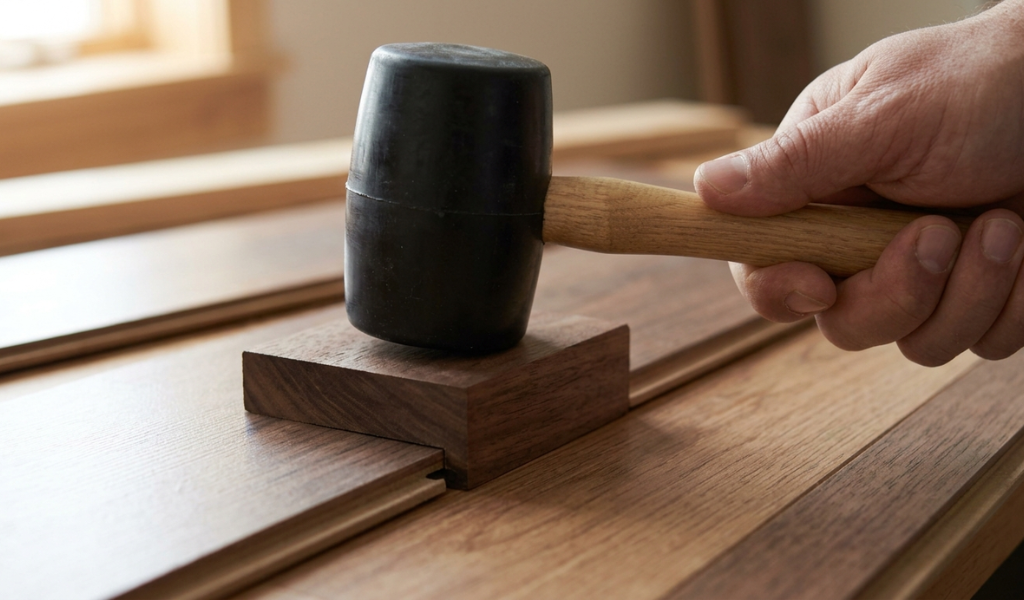 A tapping block distributes force more evenly across the edge of a plank, reducing the risk of damage to the locking joint.
Even with the right tool, poor technique creates problems. Here are the mistakes that trip people up most often:
A rubber mallet is one of the most underrated tools in any toolkit. It does a job that looks easy but actually requires the right combination of force, control, and surface protection. Get those three things right, and the results speak for themselves — clean joints, level tiles, scratch-free finishes, and work that holds up over time.
If you’re building out your tool collection, start with a mid-weight rubber mallet around 16 oz, pick a handle that suits your grip, and match the head color to the materials you work with most. From there, the applications are almost endless.
Can I use a regular hammer instead of a rubber mallet?
No. A metal hammer concentrates force at a small point, which cracks tiles, dents wood, and scratches finished surfaces. A rubber mallet distributes force across a wider, softer area, protecting your materials while still driving them into place.
Why are rubber mallets used for tile applications specifically?
Tiles are fragile. A rubber mallet lets you seat them firmly into adhesive mortar without cracking them. It also allows for small positional adjustments after placement and helps you achieve a level surface across multiple tiles.
What is the difference between a rubber mallet and a dead blow hammer?
A dead blow hammer has a hollow head filled with sand or shot, which eliminates rebound after striking. It delivers more controlled force than a rubber mallet and is better suited for heavy-duty tasks like seating stubborn components or working with thick quarry tiles. For standard DIY and tile work, a rubber mallet is usually sufficient.
How much force should I use when tapping tiles?
Light to medium taps are all you need. The goal is consistent contact between the tile and the adhesive — not raw force. If you find yourself swinging hard, something else is likely wrong, such as insufficient adhesive or an uneven substrate.
Should I use a white or black rubber mallet?
Use a white rubber mallet on light-colored surfaces, polished tiles, or leather products. Black rubber mallets are more durable and better suited for darker surfaces and industrial work. Using the wrong color can leave marks that are difficult to remove.
What size rubber mallet is best for tile installation?
A 16 oz rubber mallet is the most practical size for tile installation. It offers enough weight to seat tiles firmly without being so heavy that you risk cracking them.
Can a rubber mallet be used for laminate flooring?
Yes. A rubber mallet combined with a tapping block is the standard method for locking laminate planks together. The tapping block protects the edge of the plank while the mallet drives it into the locking joint without damaging it.